Overview
One of our customers' favorite features in AllSpice Hub is the ability to run digital, asynchronous design reviews.
Especially helpful for distributed and remote teams, AllSpice design reviews help teams:
- Be flexible and respond to market changes quickly
- Reduce the time it takes to go from a new version to a new release
- Encourage stakeholders - firmware, mechanical, systems, operations, management - to participate in reviews
- Record design intent for documentation and future troubleshooting
Design reviews in AllSpice run similar to merge or pull requests on software git platforms. If you've used Github, Gitlab, or Bitbucket before, they'll feel very familiar - and that is on purpose. We believe this format is extremely successful for a (good) reason, and work to enable hardware engineers to take advantage of it.
Steps to conduct a design review in AllSpice
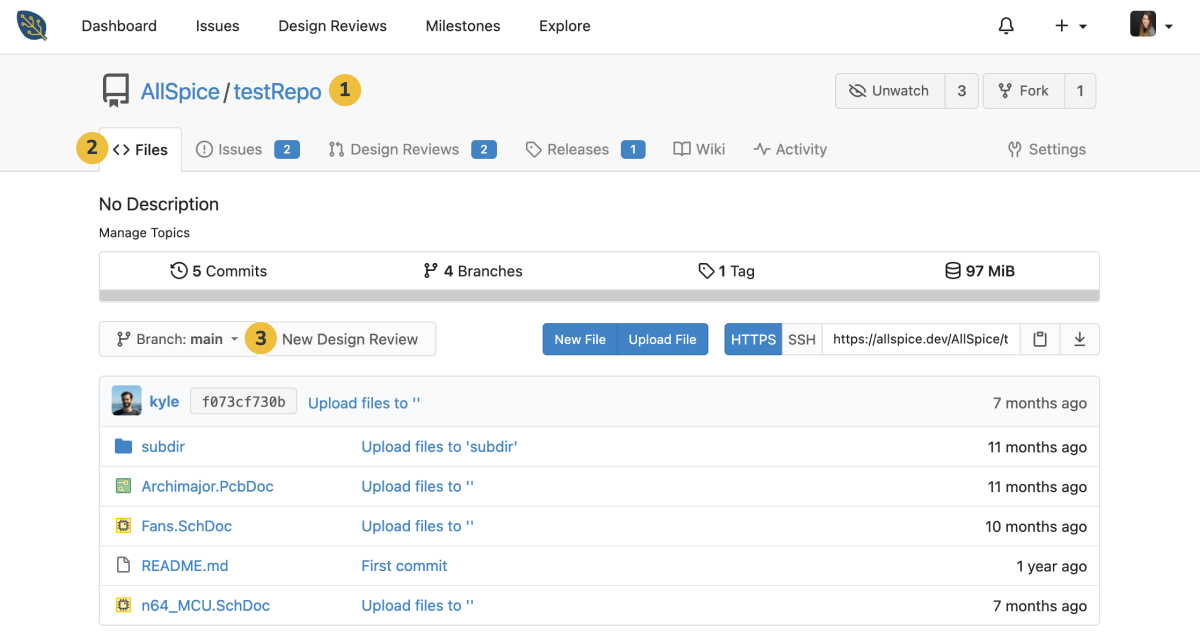
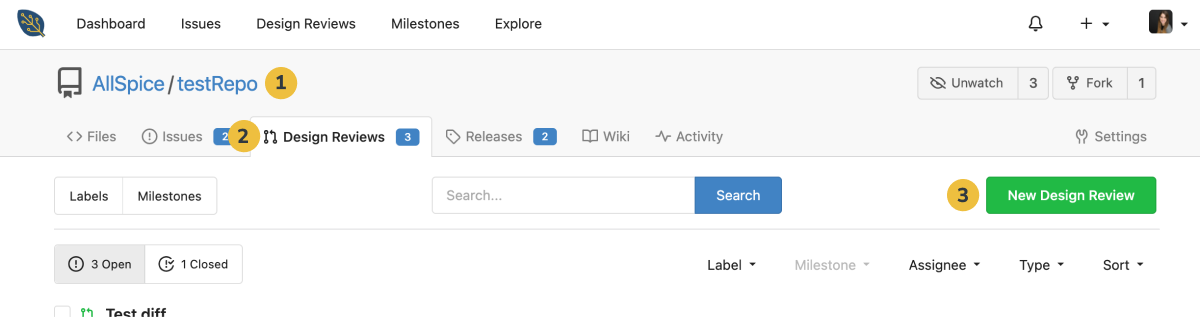
1. Navigate to the repository where you'd like to create the design review.
2-3. There are two places where you can open a new review:
I. In the Files tab, select New Design Review.
OR
II. In the Design Reviews tab, select New Design Review.
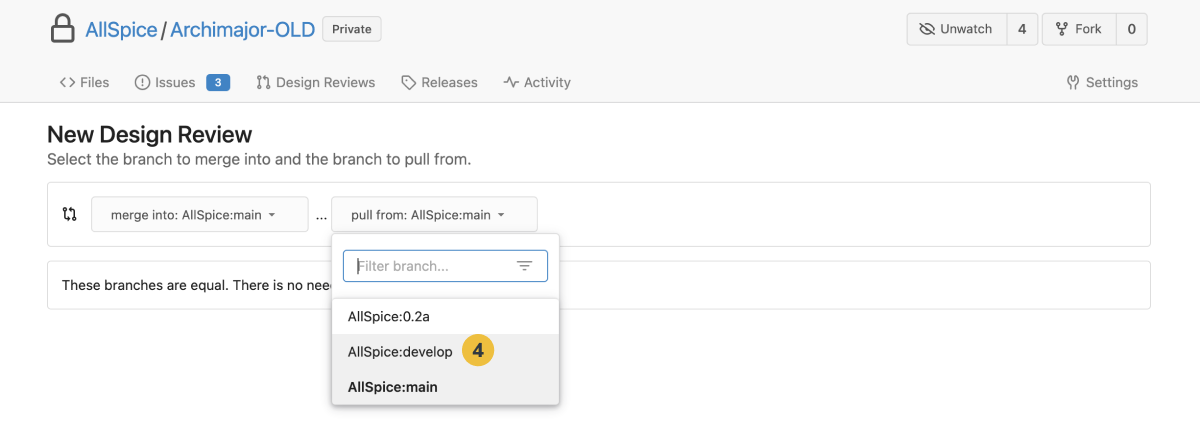
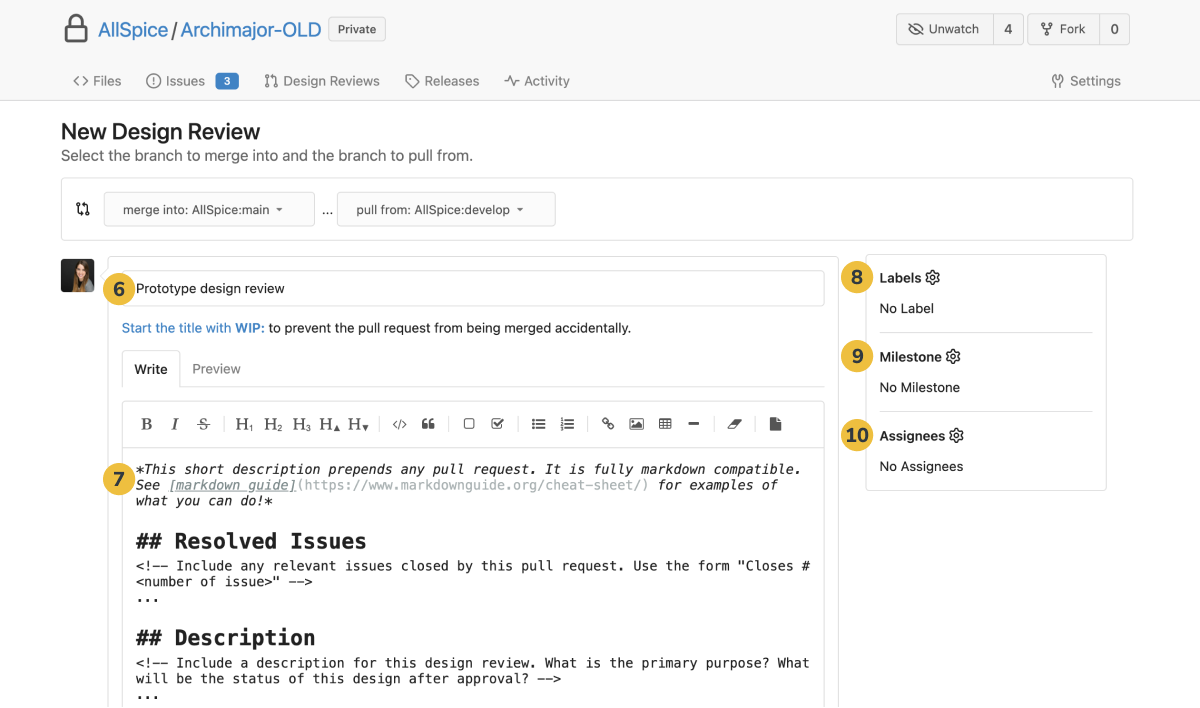
4. In the New Design Review page, select the branches you want to compare. Click on the branch with the changes you wish to review in the 'pull from' drop-down menu.
If you're following a dual branch structure, you'll merge into: [ORG-NAME]:main and pull from: [ORG-NAME]:develop.
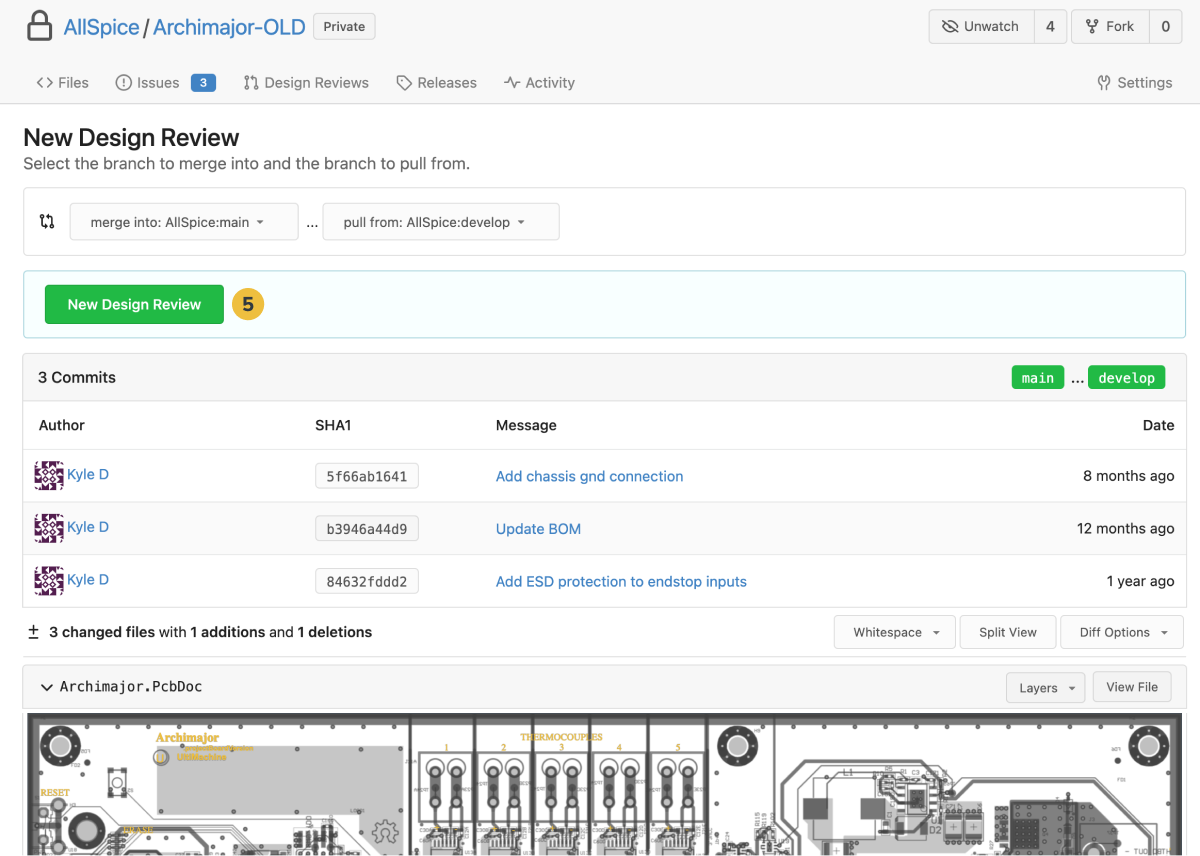
5. Redlines for review packages are automated. Every design review generates a visual comparison, or diff, between the last approved revision and the current one under review. These visual diffs highlight changes in PCBs, schematics, and BOMs.
After you review the changes, click New Design Review.
6. Enter a name or title for your review.
7. Write any description or supporting context. This section supports Markdown, so you can use that to incorporate basic formatting - titles, subtitles, bullets, checkboxes, etc. See the Markdown cheat sheet for examples of what you can do!
To pre-populate placeholders or checklists, read our guide to creating design review templates.
Steps 8-10 below are optional. If you don't wish to add these fields, skip to Step 12.
8. Add any Labels needed to identify the review. AllSpice pre-populates a set of general and hardware-specific labels.
9. Attach a Milestone if you're using those to track your projects.
10. Add Assignees if someone else is responsible for this review. Note that Assignees are 'owners', not 'reviewers.' Meaning, assignees are people conducting the review, collecting and evaluating comments, and executing the necessary changes based on feedback. There will be another section later to add 'reviewers' or those responsible for proving design feedback and/or approving the review.
11. Add any attachments needed. Some engineers choose to include here Gerbers, STEP files, and any other materials the team needs to check and review.
12. Once everything looks ready, select Create Design Review.

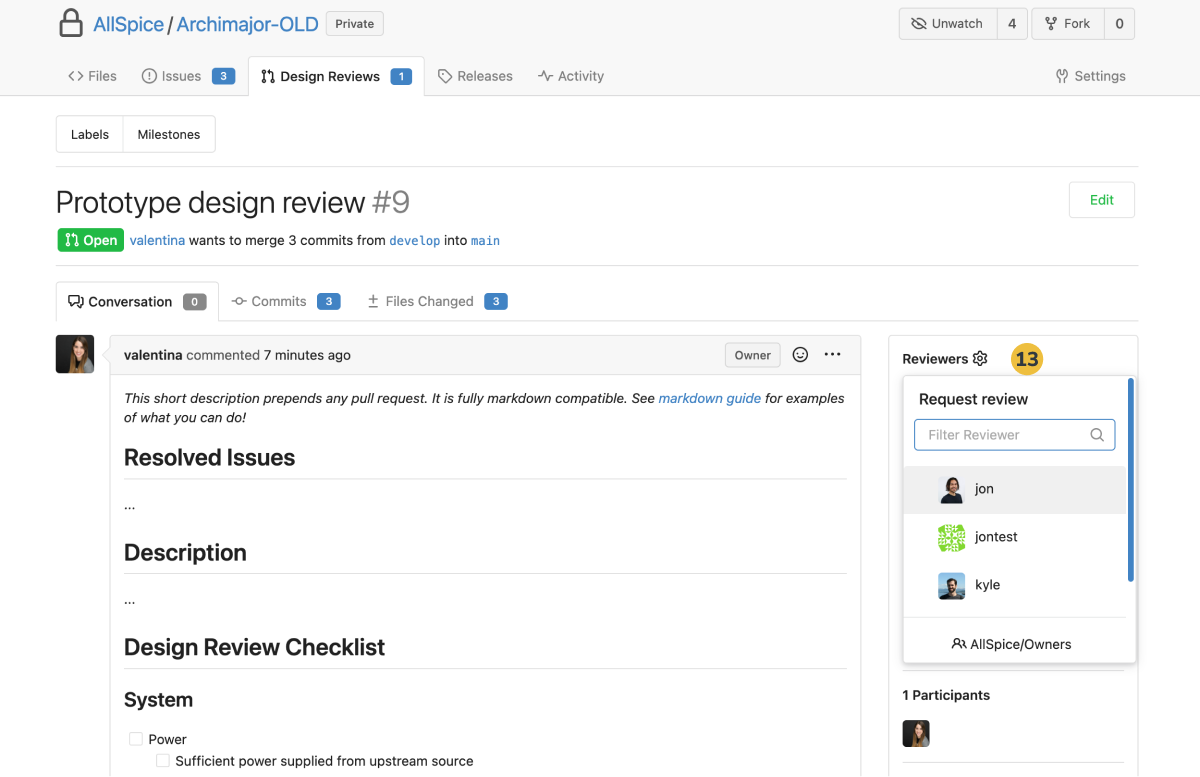
13. Add Reviewers. You can select individual users or Teams with multiple users in them.
And that's it! Your design review is now ready to go.