# Tutorial: Organizing Multiple PCBAs
A tutorial for how to use AllSpice Hub for organizing multiple PCBAs to answer the question
“How can I best manage large complex projects with multiple PCBAs?”
If you're in a hurry, we have a TLDR short video
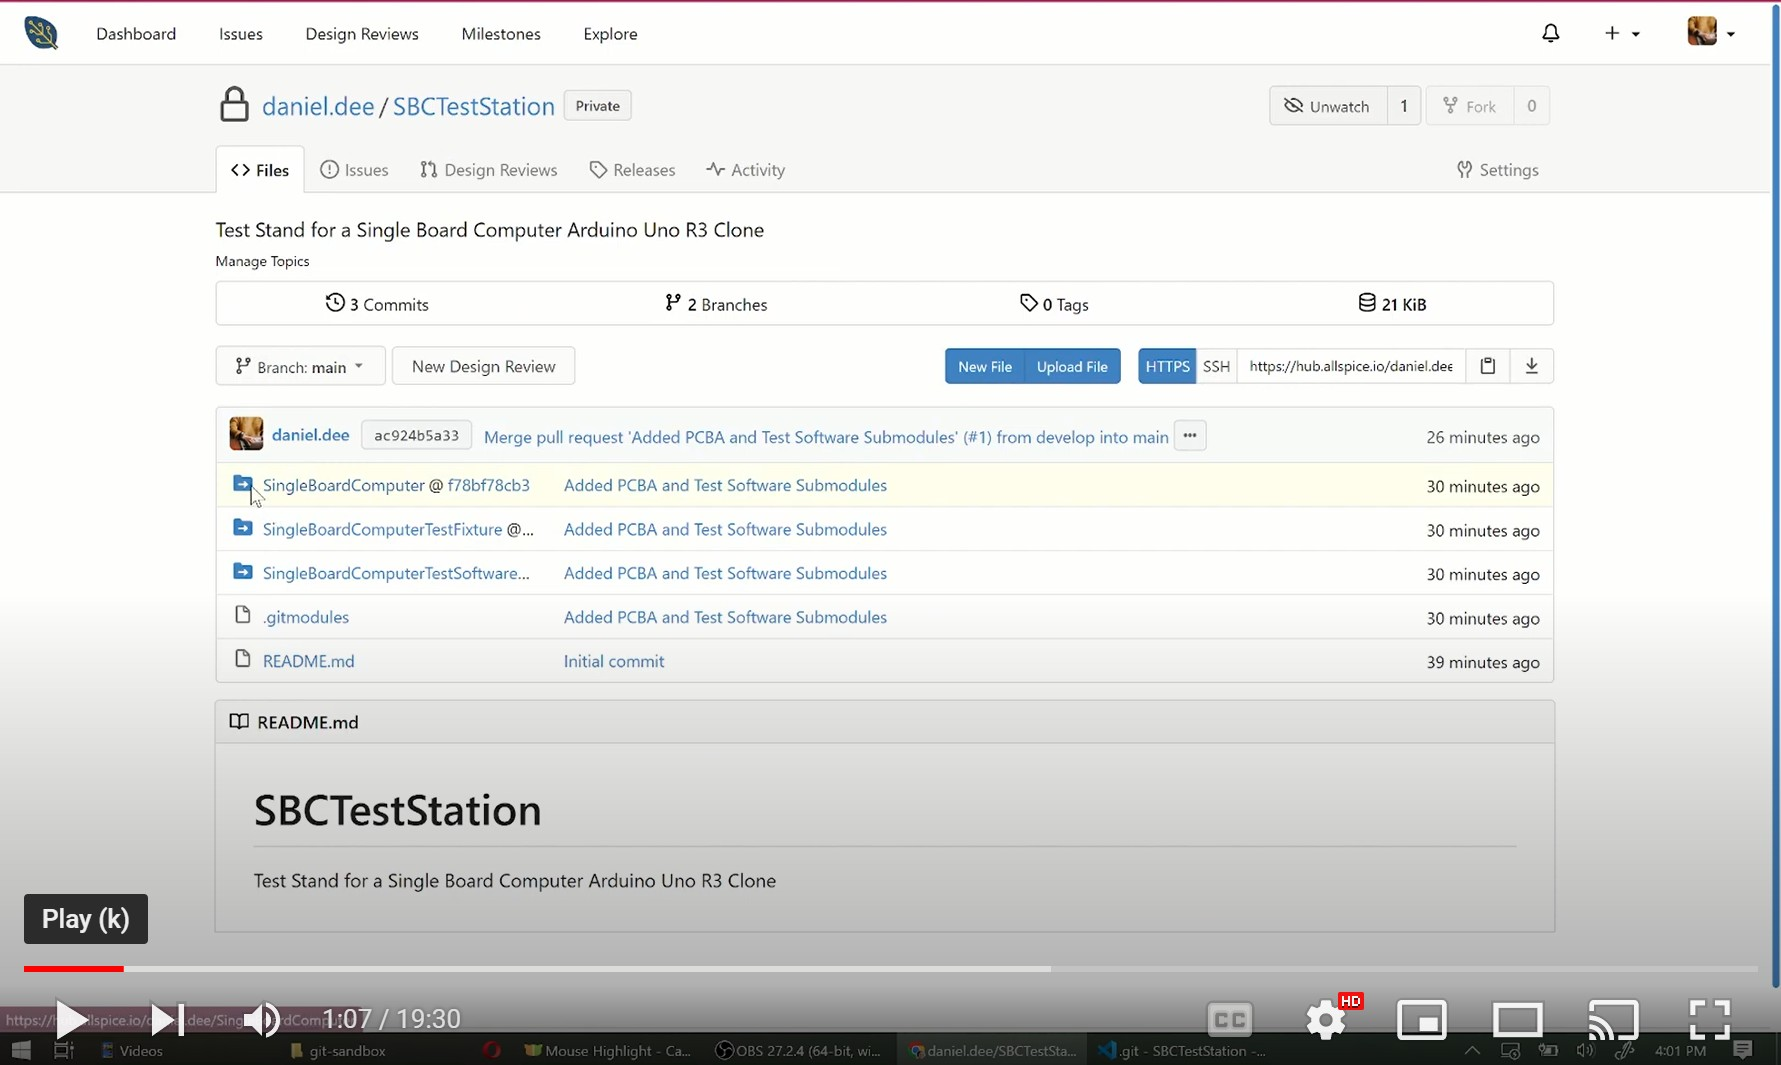
Click the image below or this link to view the full video tutorial or keep reading for the text tutorial.


Background
One of the most important features of revision control and Product Lifecycle Management (PLM) is to ensure that the right product is being built, using the right dependencies, even when those dependencies are being actively developed.
Most designs are assemblies and require more than one PCBA, cable harnesses, and assembly instrucitons. Complex designs are created with multiple levels of sub-assemblies.
You can use AllSpice Hub to create repos for each of the components and bring them all together into a separate upper level repo. Each of the sub-repos can be developed independently and then integrated when they are ready.
We are going to leverage git submodules for the sub-repos.
Types of files that can be used in a submodule
Product Lifecycle Management (PLM) systems typically include anything that changes the form, fit, function, cost, or production yields/speed. Keeping all the information in one assembly repo cuts down on production and assembly errors and helps with knowledge transfer so all the stakeholders truly understand what is being built and how.
- PCBA projects
- Schematics
- Test Procedures
- Manufacturing information
- Gerbers
- Drill files
- Part Position Files (xy)
- Fabrication specifications
- Bills of Material (BOM)
- Cost of Goods Sold (COGS)
- Assembly Instructions
- Test Firmware
- Production Firmware
- Test Software
- Cable Harnesses
- Enclosures
- Test Station
- Data sheets
# Subrepo strategies
Before we dive into how to use submodules, let's consider the different strategies and their pros and cons
Monorepo

It is possible to use a monorepo with separate files or subfolders for each sub-assembly, and to create commits into the one repo whether sub-assembly A or sub-assembly B are modified.
This approach is best used for smaller, simpler projects developed and maintained by a few people at most. Revision control works best when each subproject is modified independently so that each commit only affects a single subproject. Modifying more than one project per commit is a large vector for bugs, especially if changes need to be reverted or are part of a complex merge.
Monorepos are definitely not recommended if one of the sub-projects is used in multiple higher level assemblies. Unrelated assemblies will get commits when they don't change form, fit, or funciton. It becomes especially challenging when one upper level assembly requires one revision of a PCBA and a different assembly requires a newer revision. Keeping these all in one repo is an invitation for extra work and mismatched files.
Subtrees

Git Subtrees actually come in two flavors, the git subtree merge strategy and the git-subtree command. They both refer to a strategy similar to monorepos where the separate projects are kept in subdirectories.
Unlike a monorepo, with a subtree, you can commit, branch, and merge along side your project any way you want. You can even extract all of your version history at any time and create a new repo using any specific version.
The git subtree merge strategy, on the other hand, cannot extract the version history.
Some of the downsides of subtrees are similar to monorepos in that it is up to the user to commit the files atomic to their subprojects. It is very easy to blend commits between a project and it's subdirectory dependencies and makes for messy version control. If there is a related change to the two sets of files, it is recommended to make two separate commits for the same revision control action so that the changes can be separated.
Since there are no metadata files like .gitmodule, users might not even be aware that the subfolders are subtrees and requires it's own set of process and discipline.
Many software developers prefer subtrees over submodules, however the submodule process is the most accurate analog to traditional hardware PLM strategies.
Submodules

Submodules have the benefit of being tied to a specific revision of files that won't change no matter how much development is happening in the repo. Prototypes and production PCBA revisions can be consistently manufactured with the peace of mind of knowing you have the right files.
Subrepos have a slight downside as they are more complicated than operating a monorepo, but with tools like TortoiseGit, you don't have to learn the command line interface (CLI).
Another quirk with submodules is it is easy to clone or pull a submodule without initializing or updating the directories and be left with empty folders. This can be a benefit if your project is large, and only the needed files are downloaded.
# How to: Using submodules with AllSpice Hub
This section will help you understand and perform the actions needed to best manage large, complex projects with multiple PCBAs in AllSpice Hub using submodules
Scenario
For this example scenario we will be grouping three repos together into a test stand.
- SingleBoardComputer: an Arduino Uno R3 Clone, the shippable product or Device Under Test (DUT) https://hub.allspice.io/daniel.dee/SingleBoardComputer
- SingleBoardComputerTestFixture: an Arduino Uno "Shield" with components and loopback traces to test the DUT https://hub.allspice.io/daniel.dee/SingleBoardComputerTestFixture
- SingleBoardComputerTestSoftware: a simple manual software test of some of the DUT functionality https://hub.allspice.io/daniel.dee/SingleBoardComputerTestSoftware
Procedure
1. Create new repo
* Log into your Allspice.io account
<br>* At the top right corner, next to your profile, click the "+" button and select the New Repository dropdown
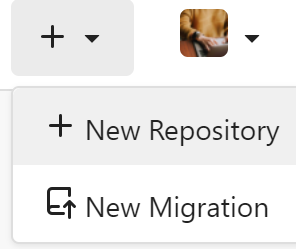
* Follow the instructions in Create a new repository
2. Clone your repo locally
* Copy the repo link from your repo example: https://hub.allspice.io/daniel.dee/SBCTestStation

<br> * There are two methods of authentication, https, which uses your AllSpice.io web login, and SSH, which requires generating and uploading a key to [AllSpice.io keys](https://hub.allspice.io/user/settings/keys). Here are both types of links for comparison:
* https://hub.allspice.io/daniel.dee/SBCTestStation.git
* git@hub.allspice.io:daniel.dee/SBCTestStation.git
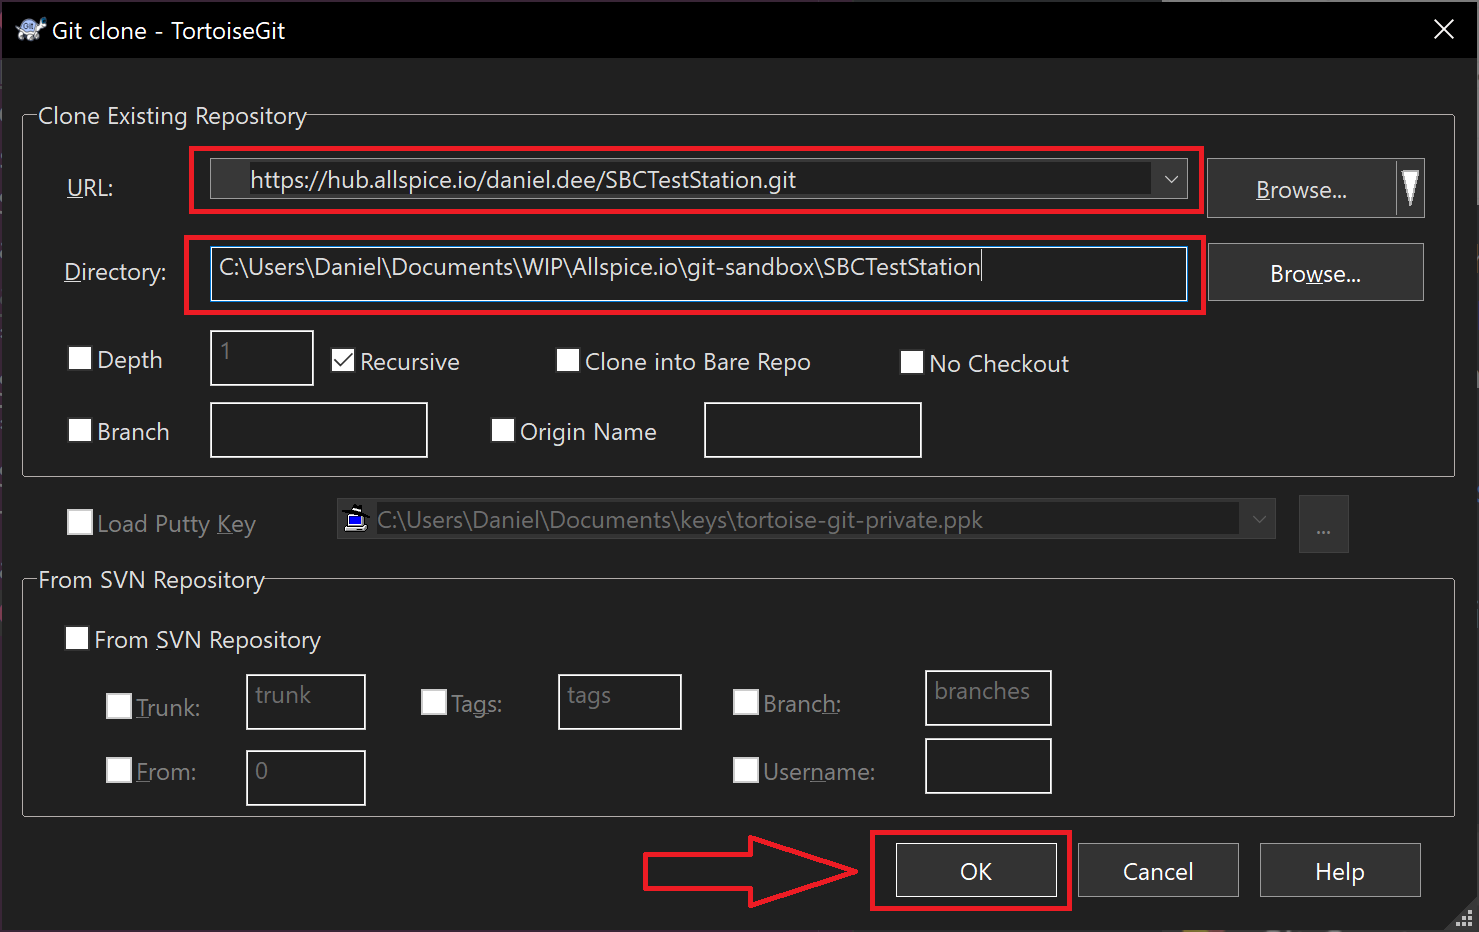
<br> * Using TortoiseGit, right click in the target folder, and select Clone Repo from the context menu

<br> * Paste your repo link into the URL. Your directory should be the same name as your repo.
<br> * Verify the Directory is in the location you wish to use
<br> * Click Okay
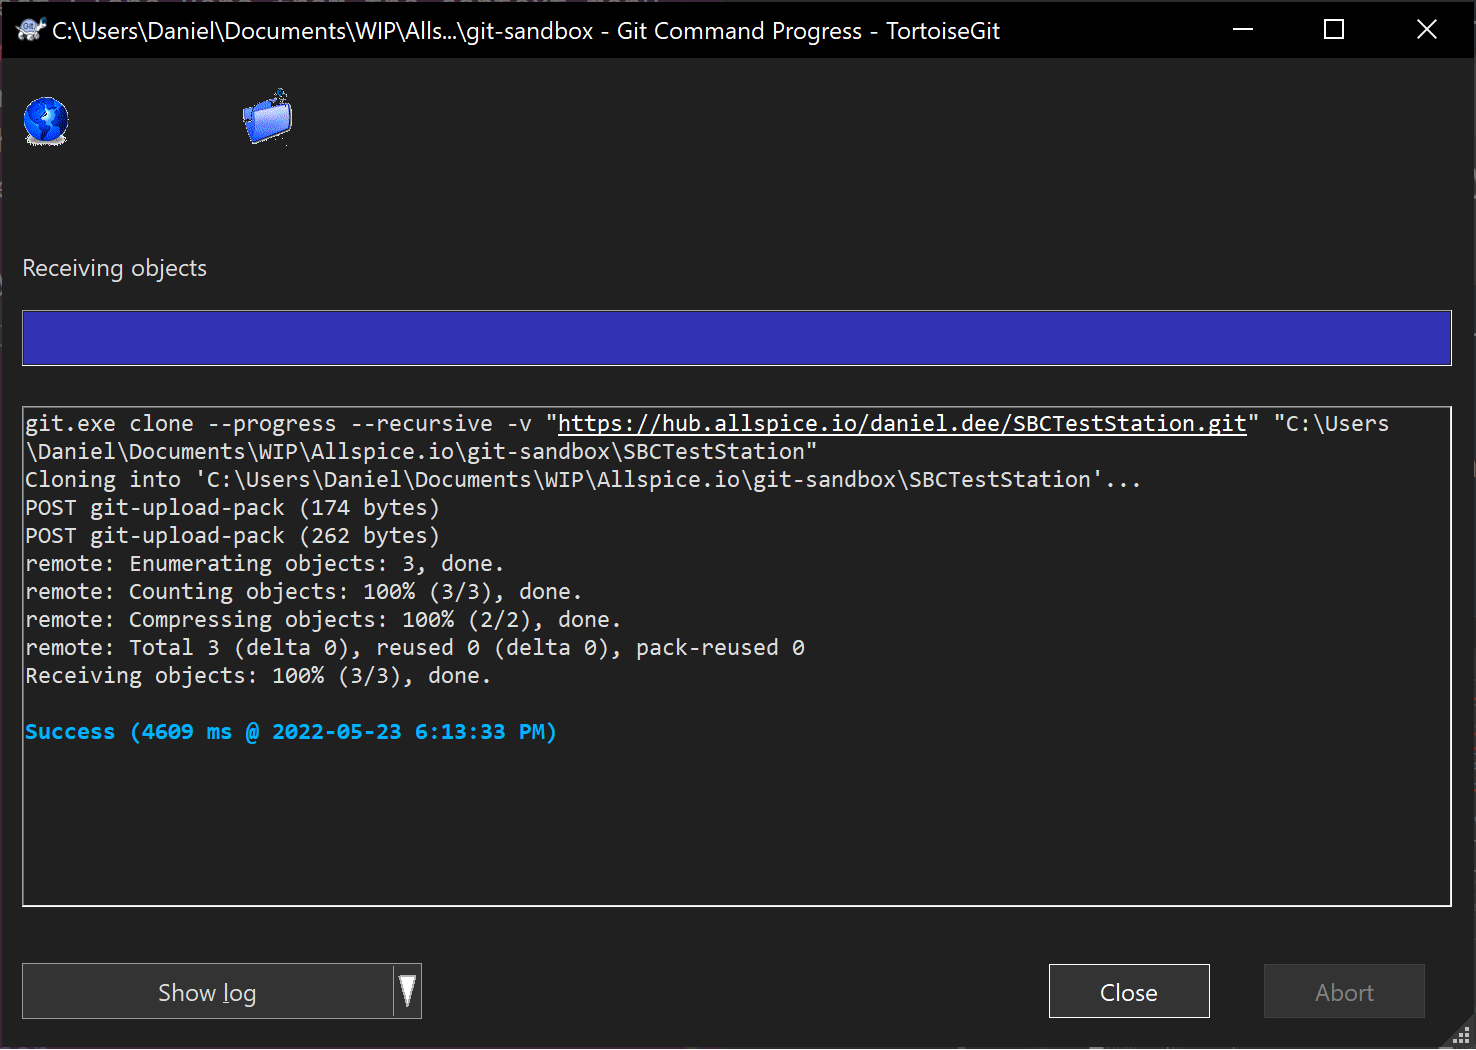
<br> * Ensure your results contain no errors
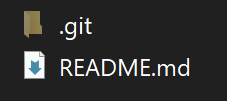
<br>* Your file folder should only contain a .git folder and a README.md file (The .git folder might be hidden on your filesystem)
3. Change your branch to develop
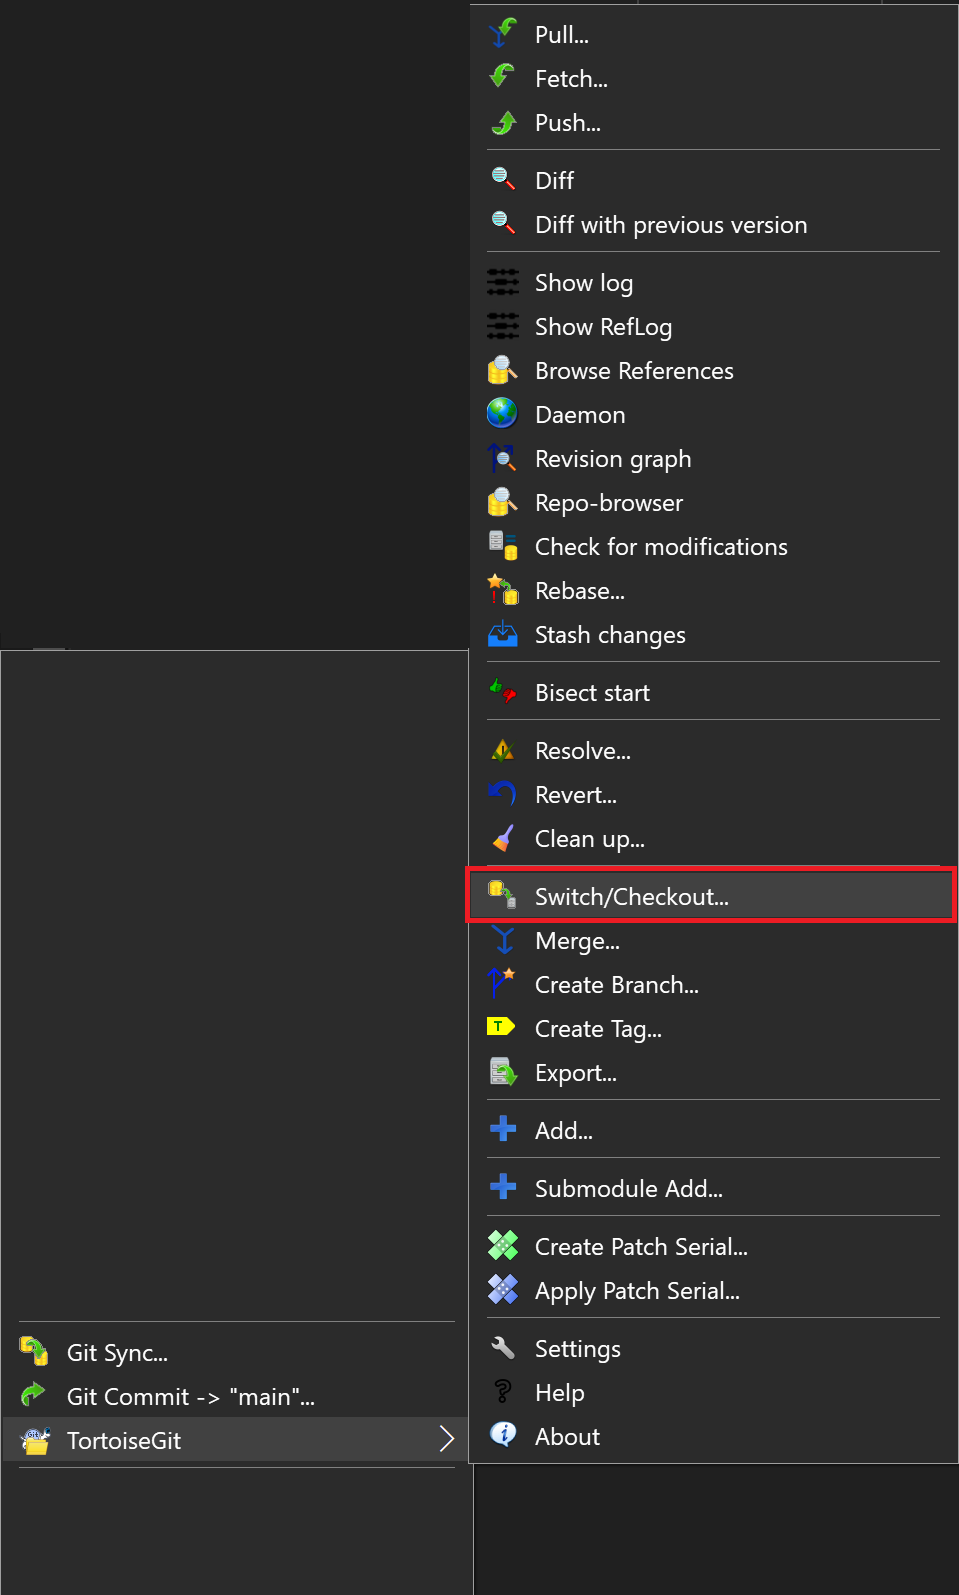
* Right-click in your repo folder and select TortoiseGit->Switch/Checkout
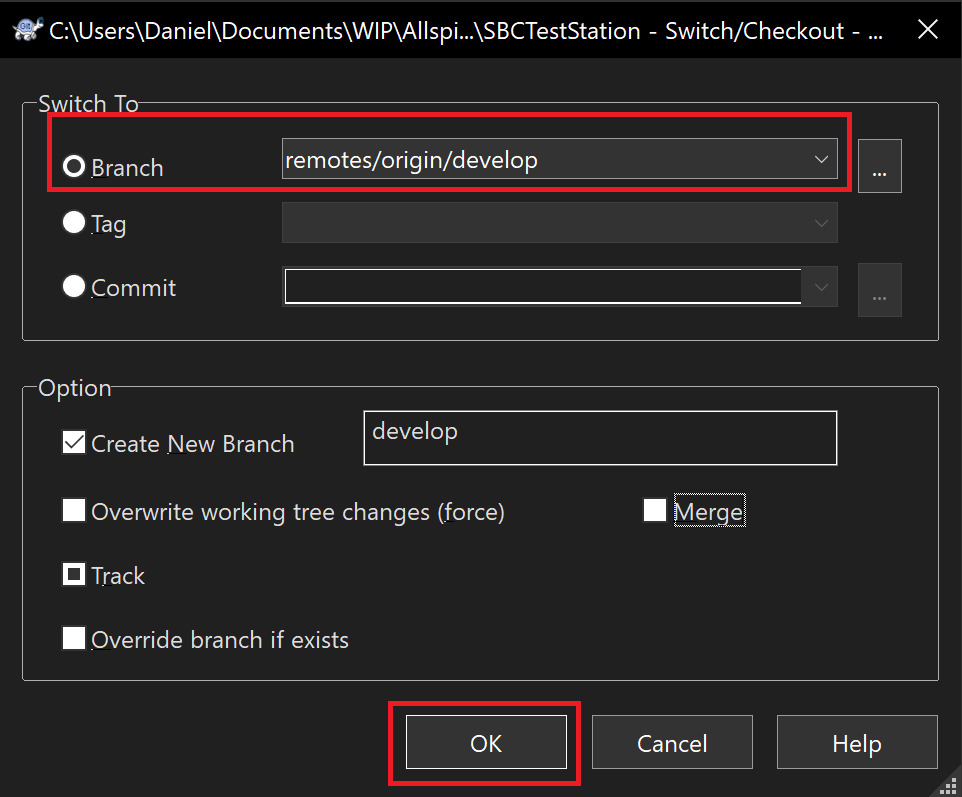
<br>* Change the Branch pulldown to Develop
<br>* Click OK
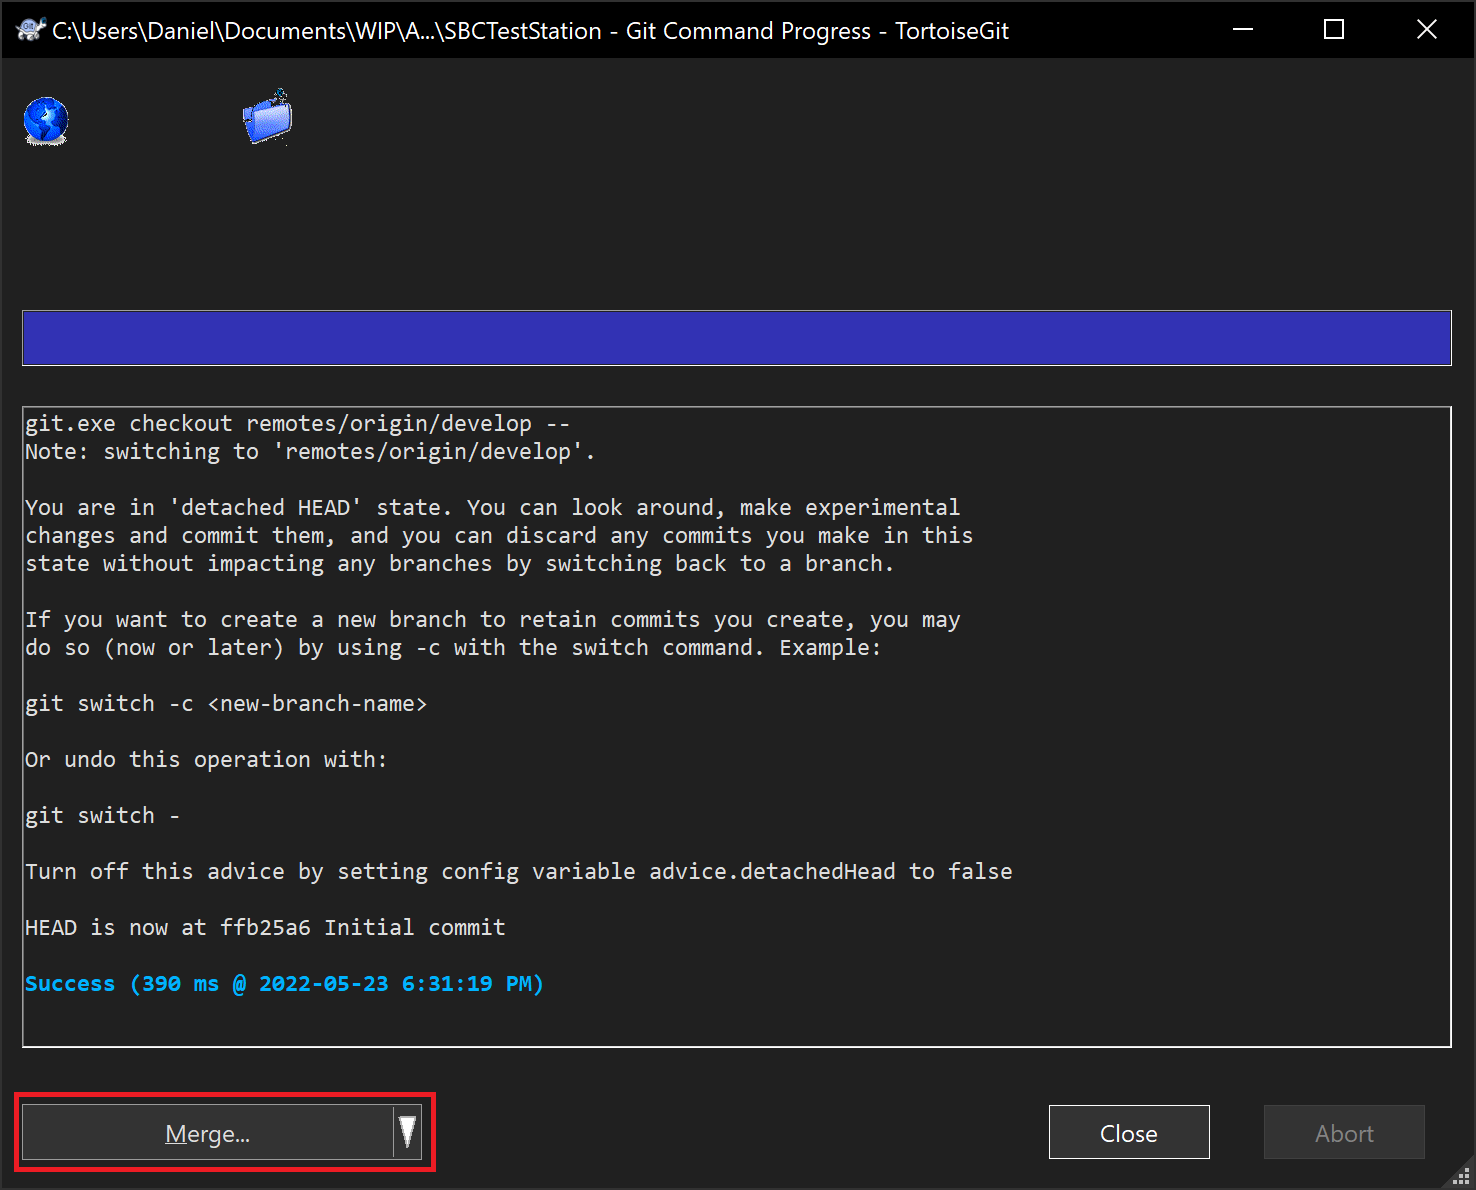
* Review the result dialog for errors. If none, click the Merge Button
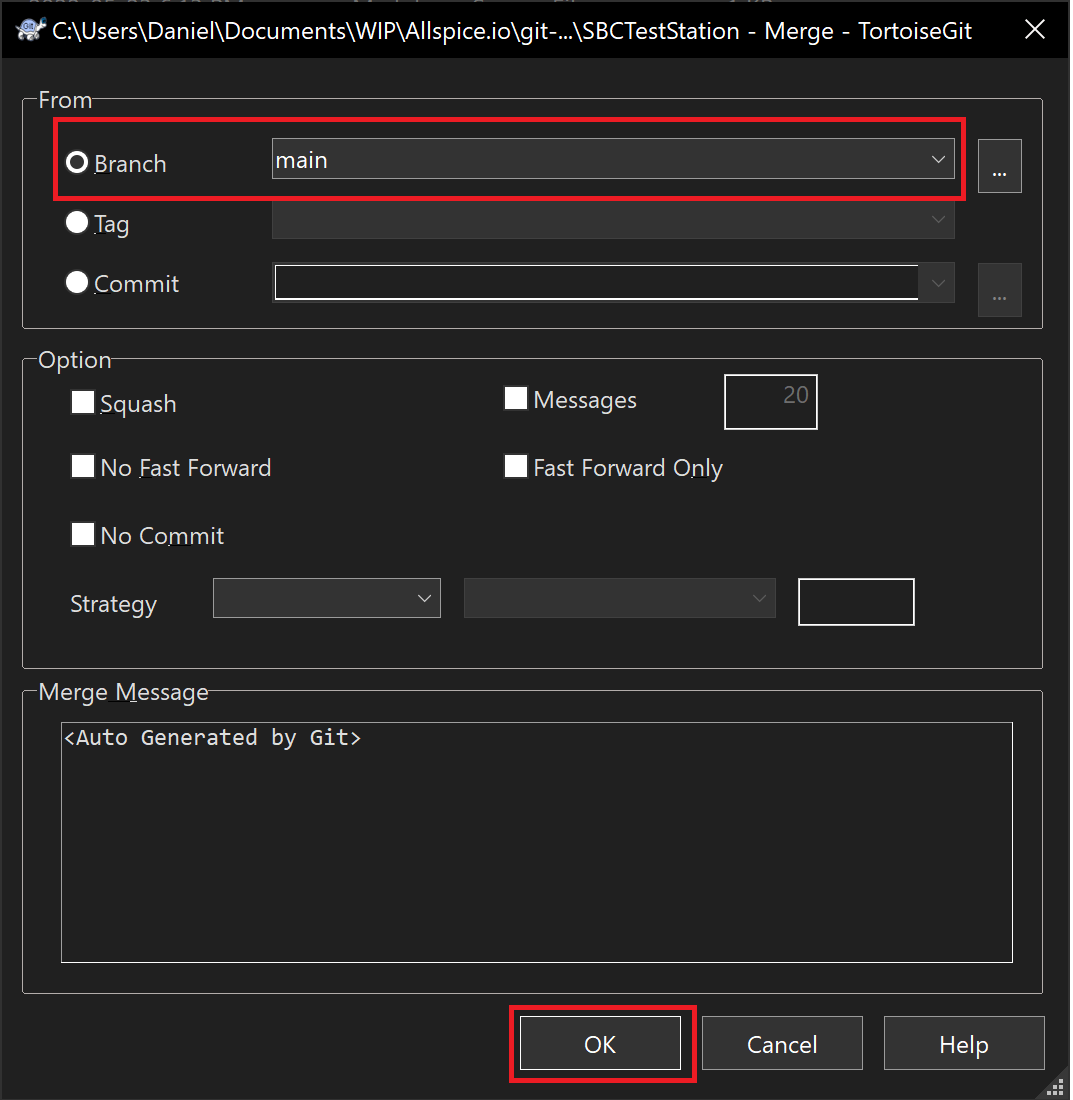
* Ensure the "from" branch is main and click on the OK button
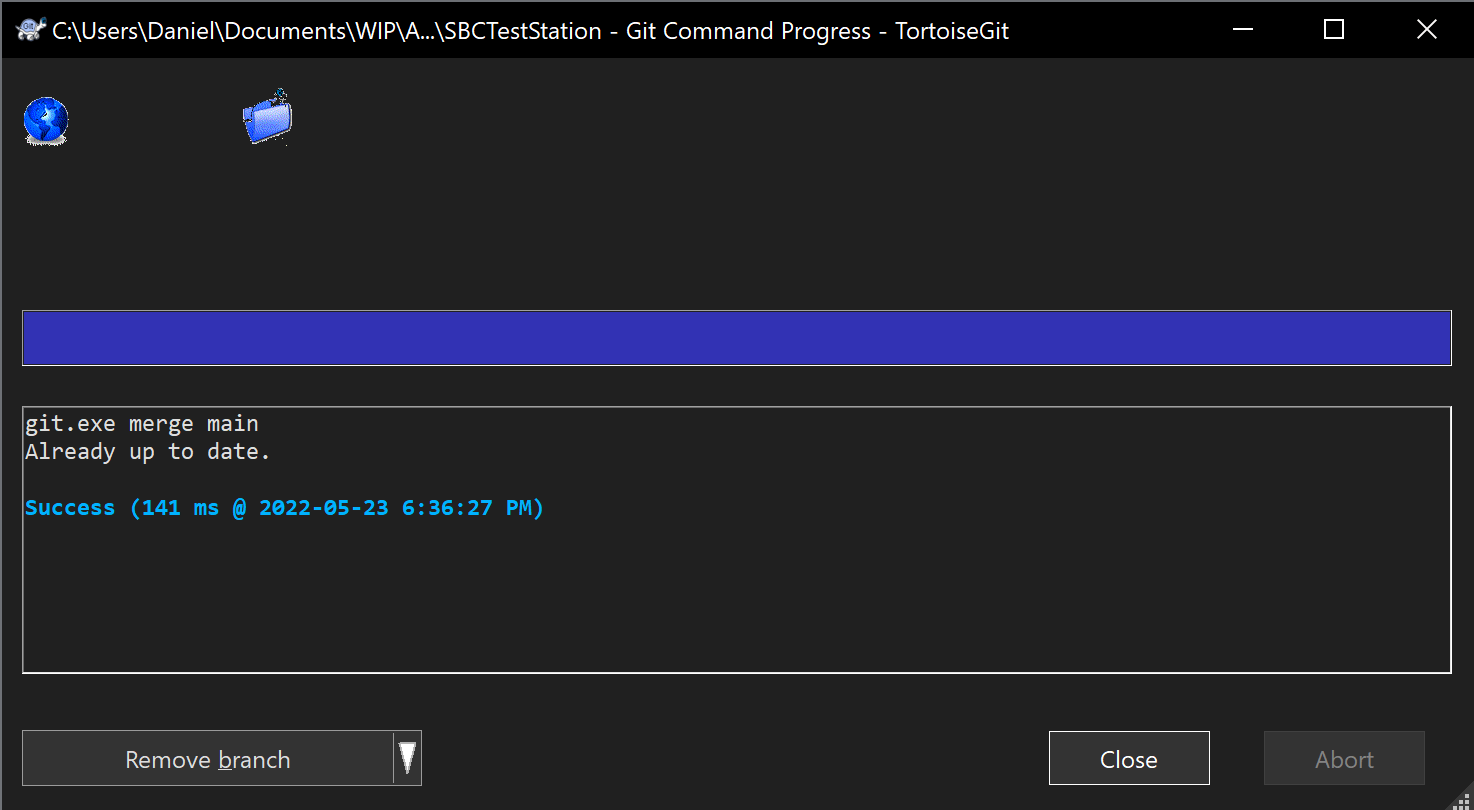
* Ensure the results have no errors
4. Add the submodules
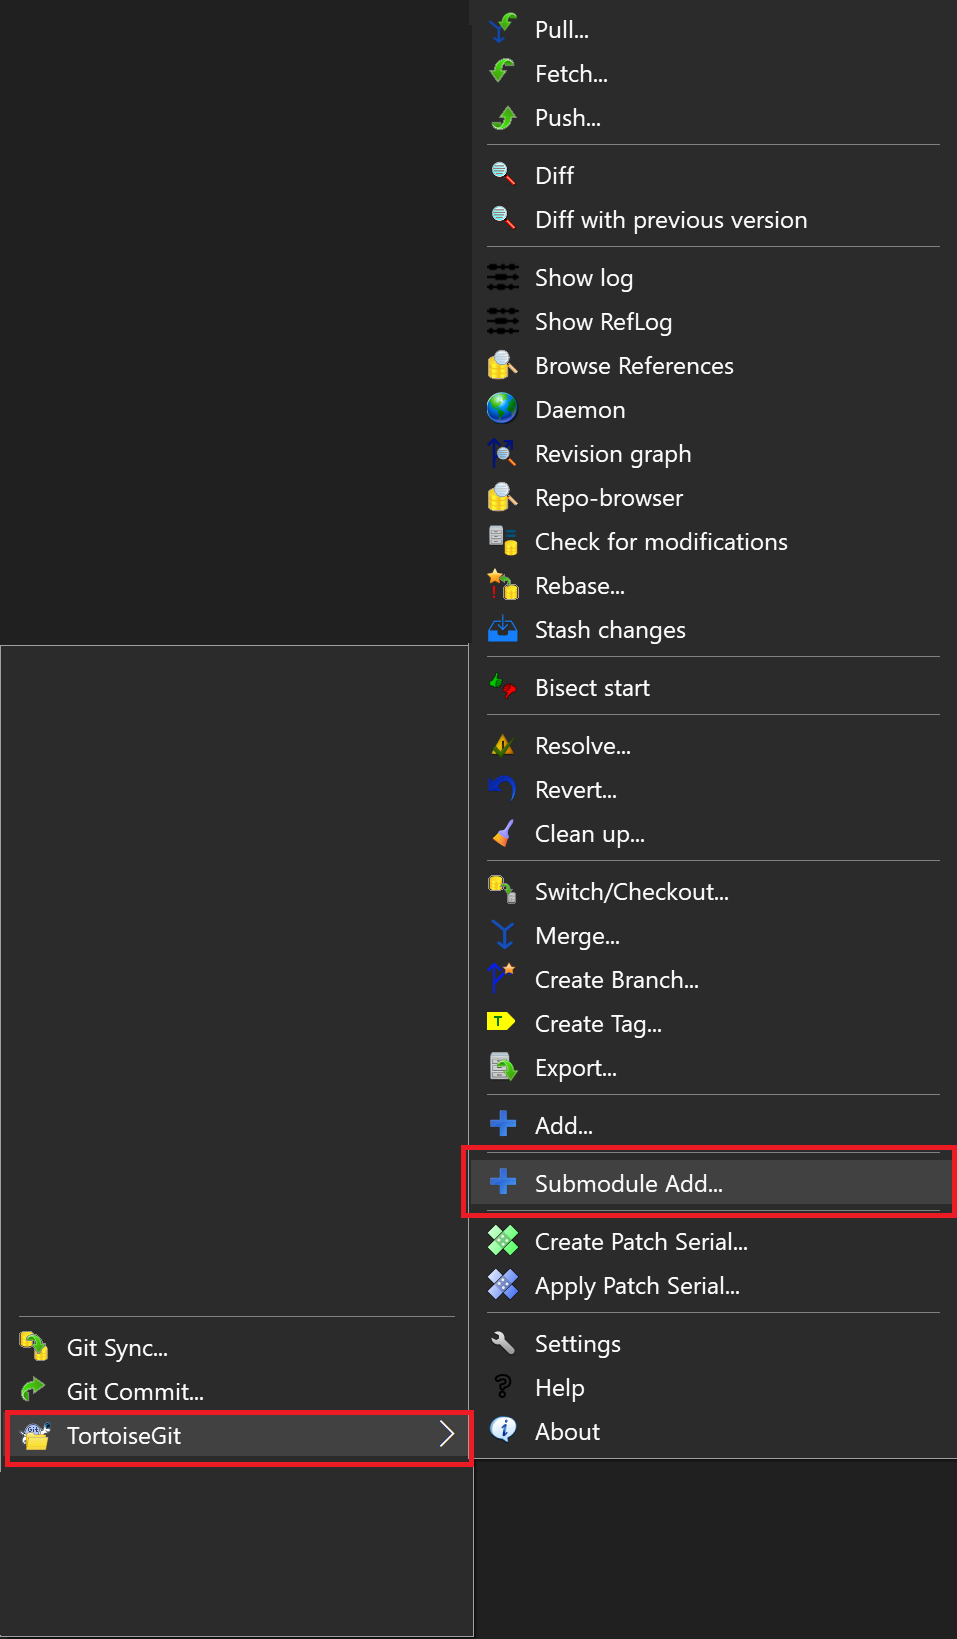
* Right-click in your repo folder and select TortoiseGit->Submodule Add...
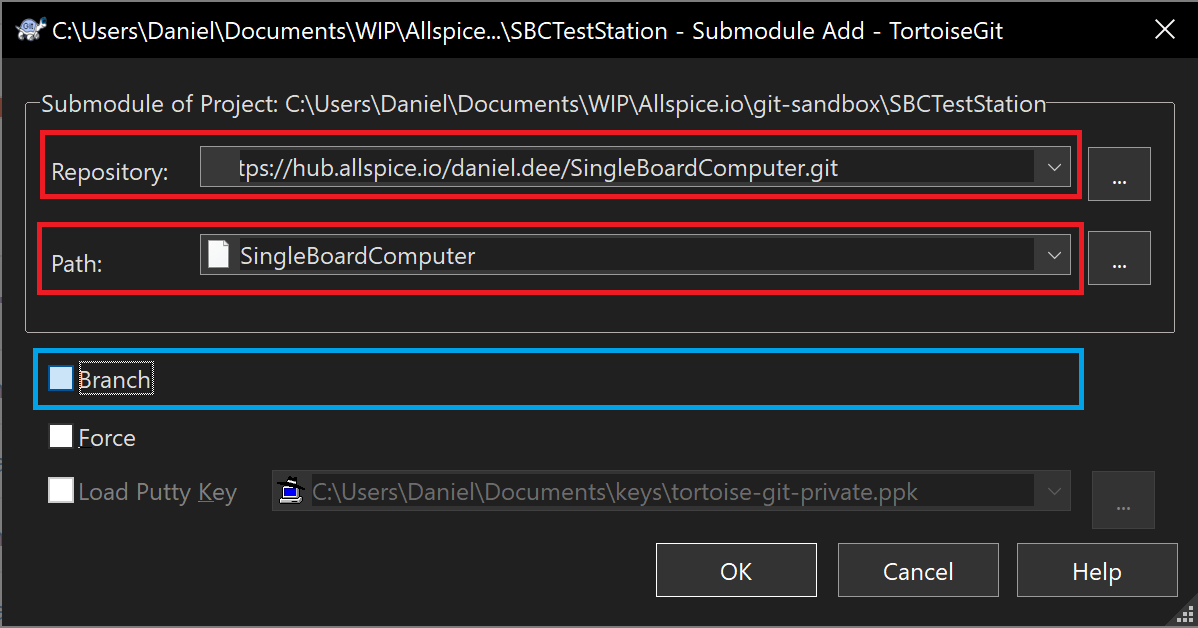
<br> * Enter the link to your submodule into the Repository and ensure the path name is the same. You can optionally select a branch besides main, but we are leaving this unchecked and unfilled out to select main
<br>* Verify that there are no errors in the results
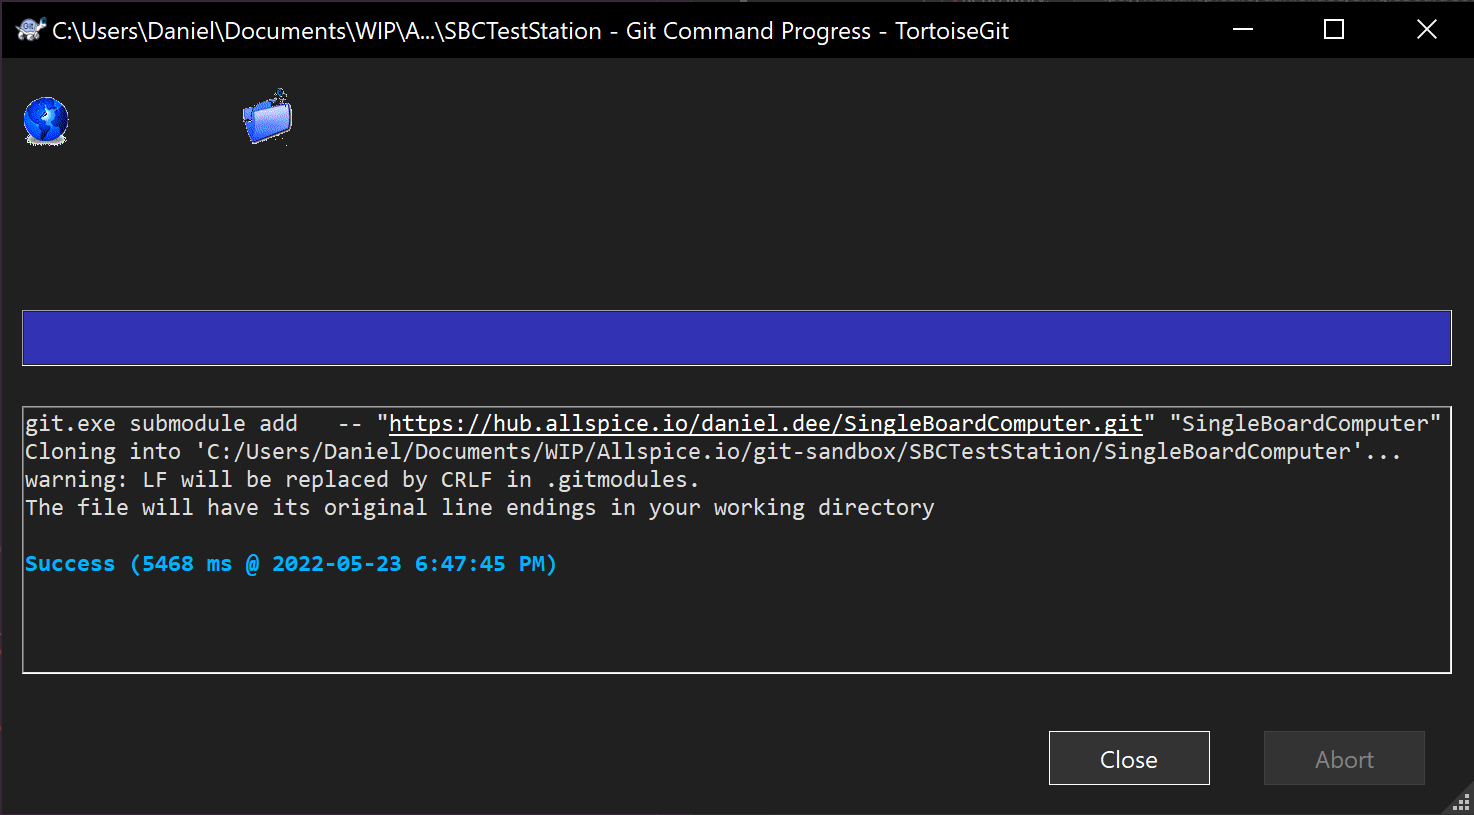
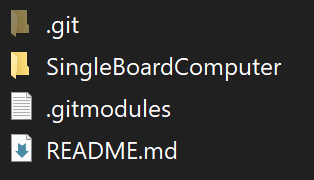
<br>* Verify in your filesystem that the folder was created and that the .gitmodules file was created or updated
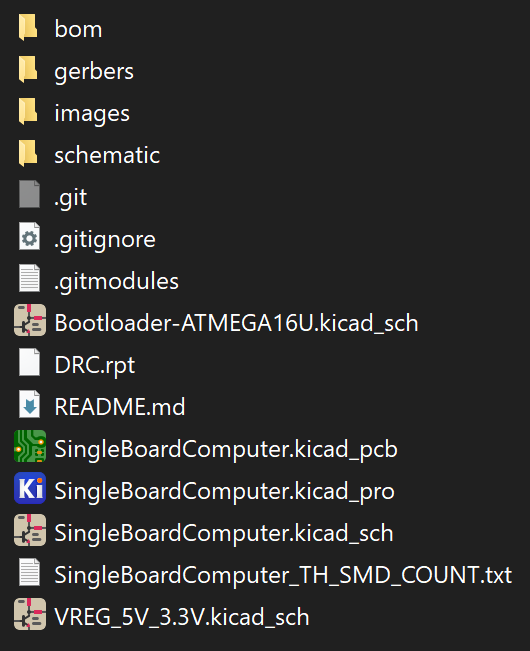
<br>* Checking the submodule directory shows that the files were recursively pulled
<br>* You can see that the submodule was added into the .gitmodules file
```
[submodule "SingleBoardComputer"]
path = SingleBoardComputer
url = https://hub.allspice.io/daniel.dee/SingleBoardComputer.git
```
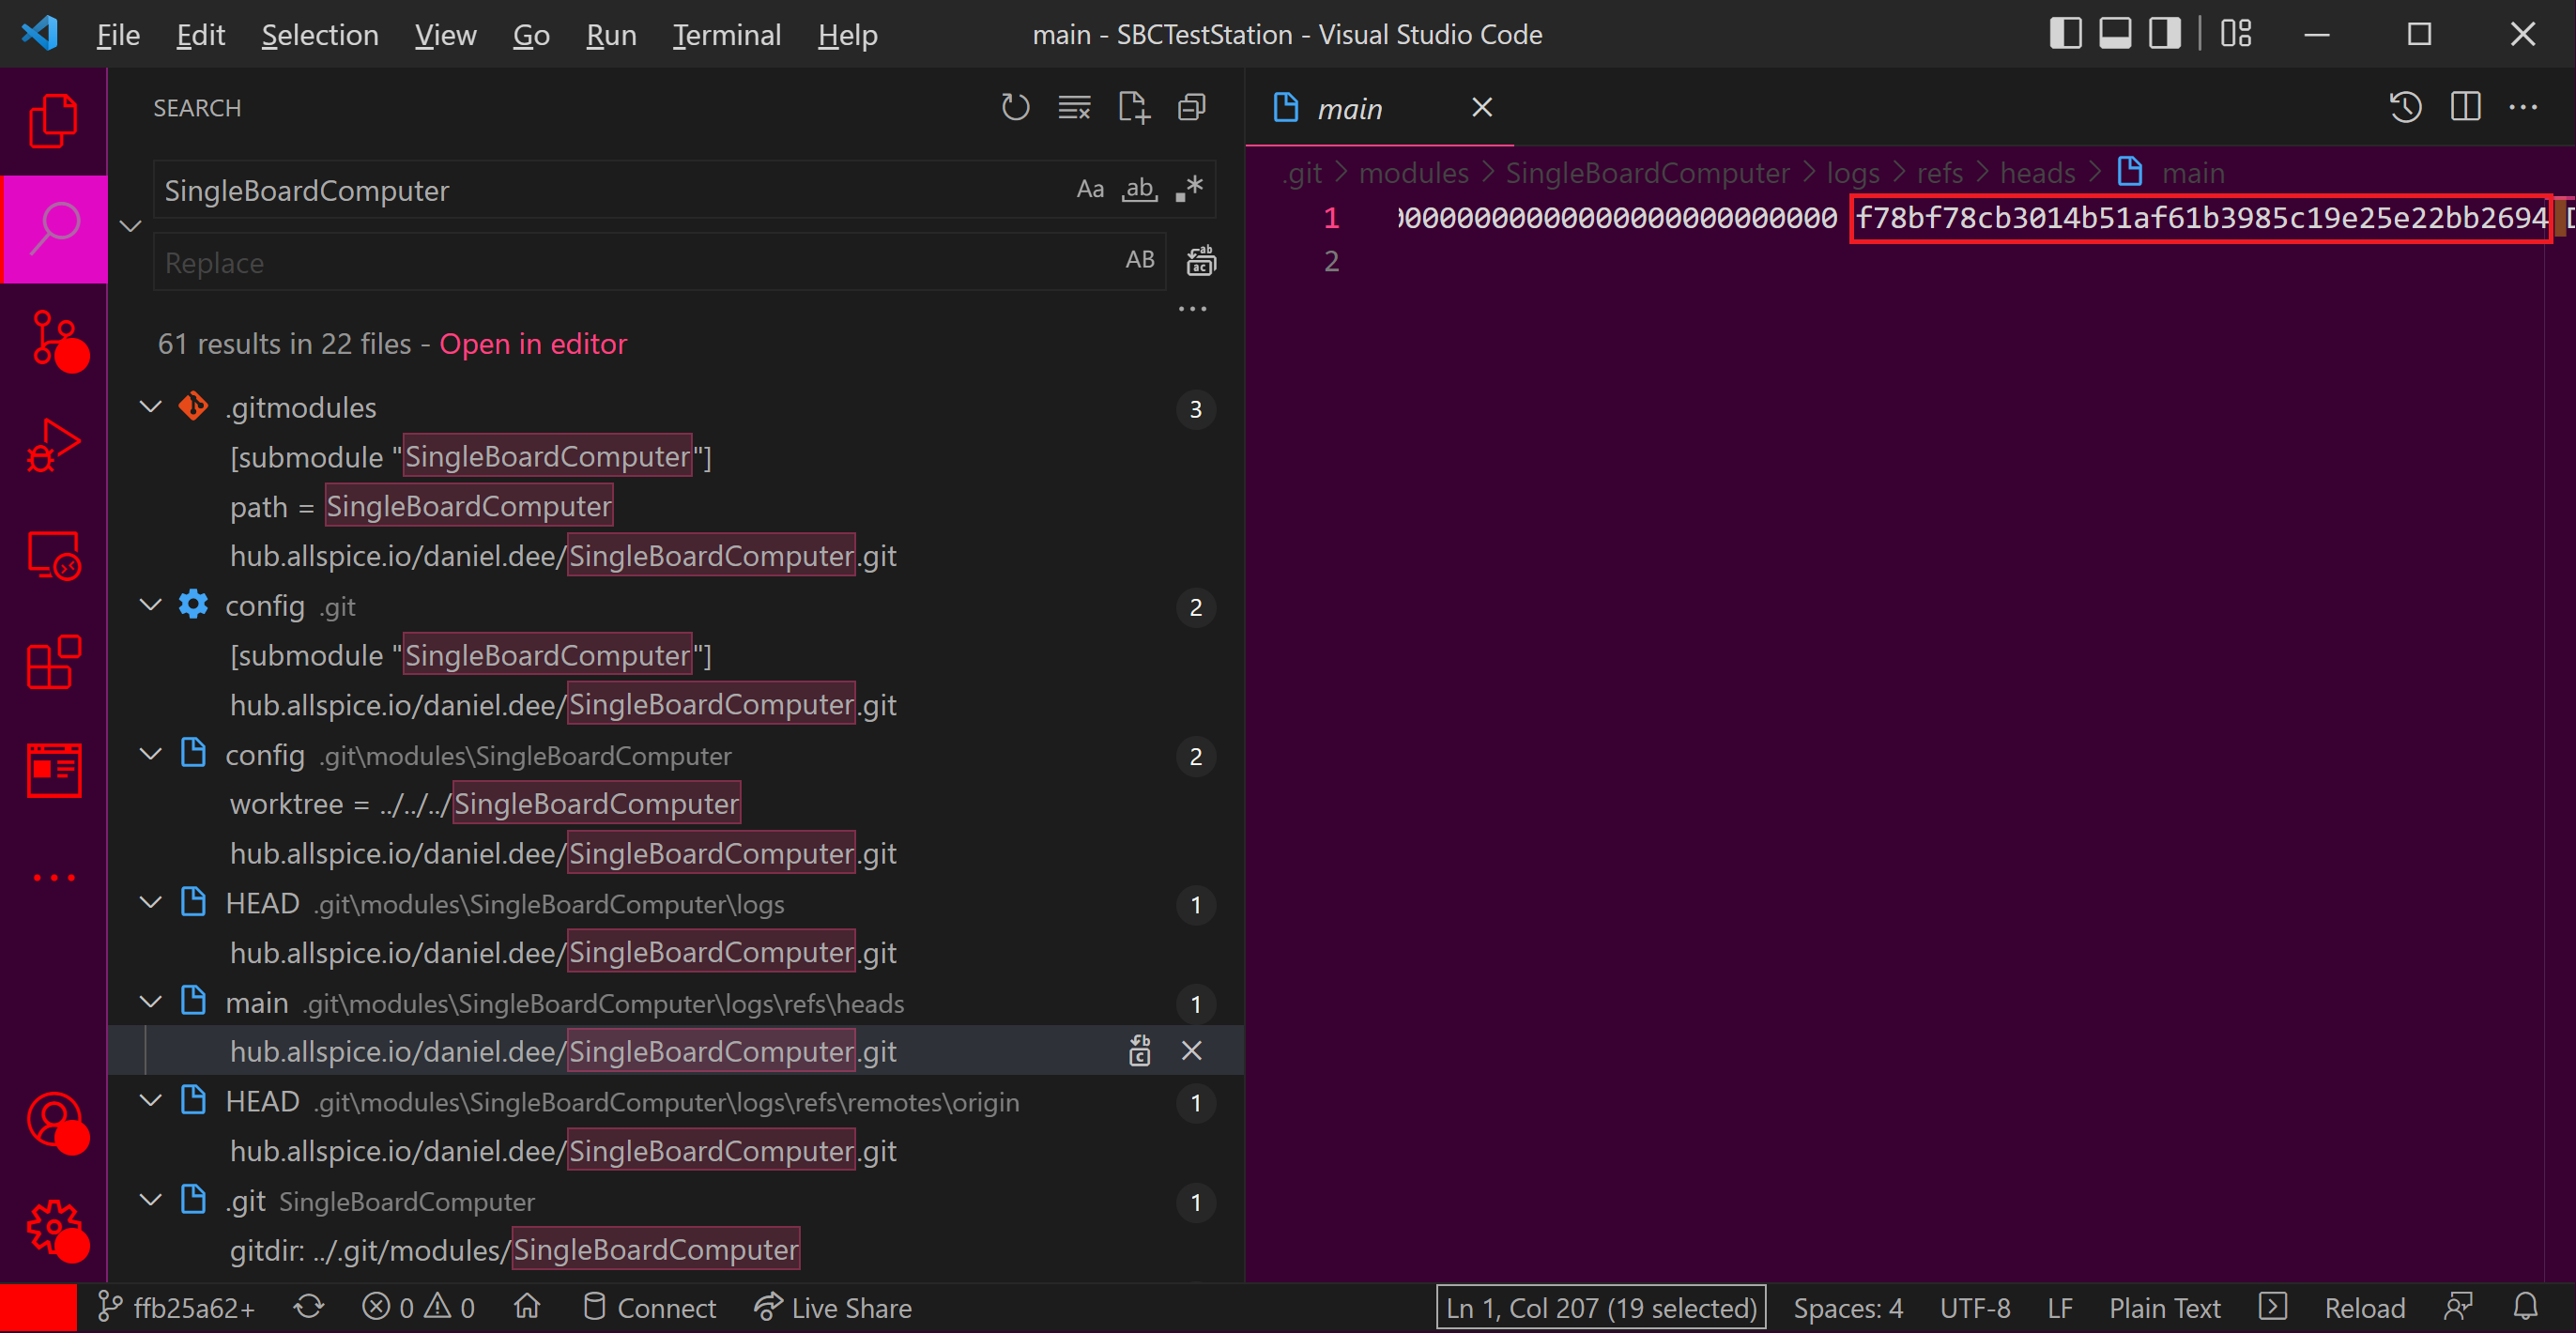
<br>* There is no need to check the automagic creation or modification of files, but the Submodule Add command creates the necessary files and pointers to track the project. Note the SHA1 Hash matches the repo release. This ensures that even after the submodule repo changes, this version will only ever point to this specific commit. (f78bf78cb3014b51af61b3985c19e25e22bb2694)
<br>* Repeat adding your repos as submodules until you have all the ones you want.
<br>* Although the repo information is included in the .gitmodules file and in other files of the .git folder, it may be a good practice to add the branch SHA1 link in the project's README.md file for easy access and to help verify the submodules are pointing to the correct location. Here is an example:
[submodule "SingleBoardComputer"](https://hub.allspice.io/daniel.dee/SingleBoardComputer/src/commit/f78bf78cb3014b51af61b3985c19e25e22bb2694)
[submodule "SingleBoardComputerTestFixture"](https://hub.allspice.io/daniel.dee/SingleBoardComputerTestFixture/src/commit/29706c6ad5abc393060473dc14629871de63a27f)
[submodule "SingleBoardComputerTestSoftware"](https://hub.allspice.io/daniel.dee/SingleBoardComputerTestSoftware/src/commit/2ec33895059e12ce88eb86c876045ff153558de5)
```
* The final file structure should look something like this
```
.
├── .git
├── .gitmodules
├── README.md
├── SingleBoardComputer //Submodule A
│ └── Repo files
├── SingleBoardComputerTestFixture //Submodule B
│ └── Repo files
└── SingleBoardComputerTestSoftware //Submodule C
└── Repo files
```
5. Commit and push your changes to the "develop" branch
* Commit the repo changes by right-clicking the main folder and selecting Git Commit-> "develop"

<br>* Add a commit message and ensure the new files in the changes section are checked to be added to the repo and click the Commit button
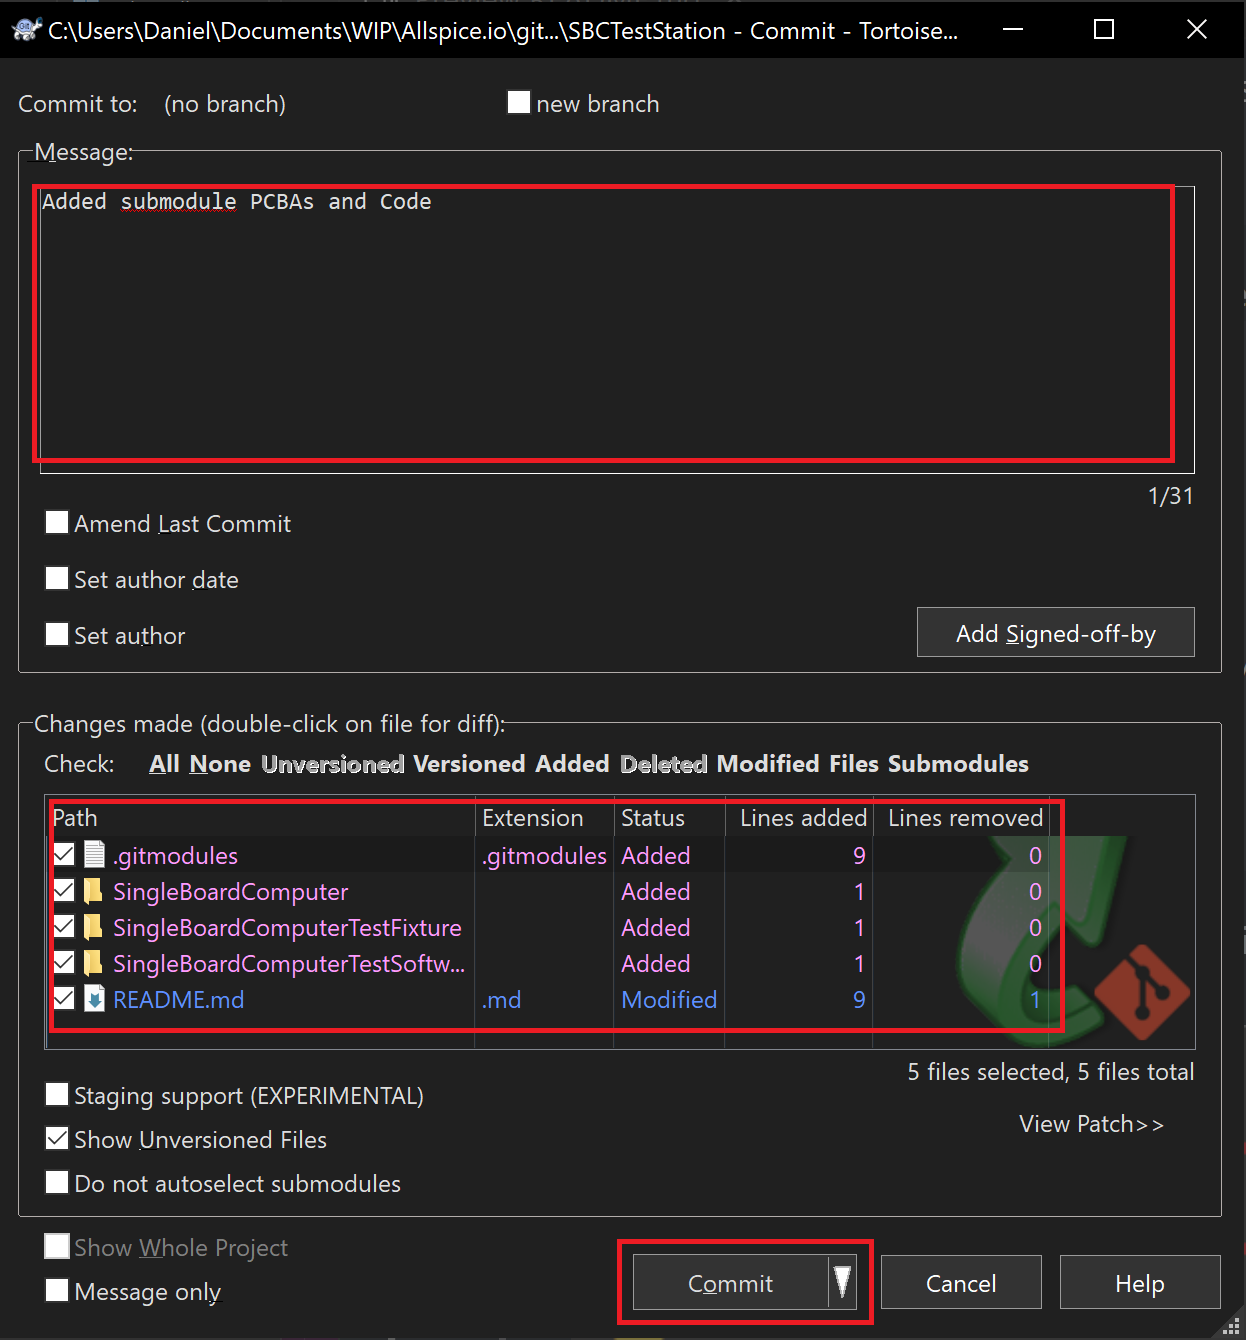
* Ensure the results contain no errors, then click the Push button
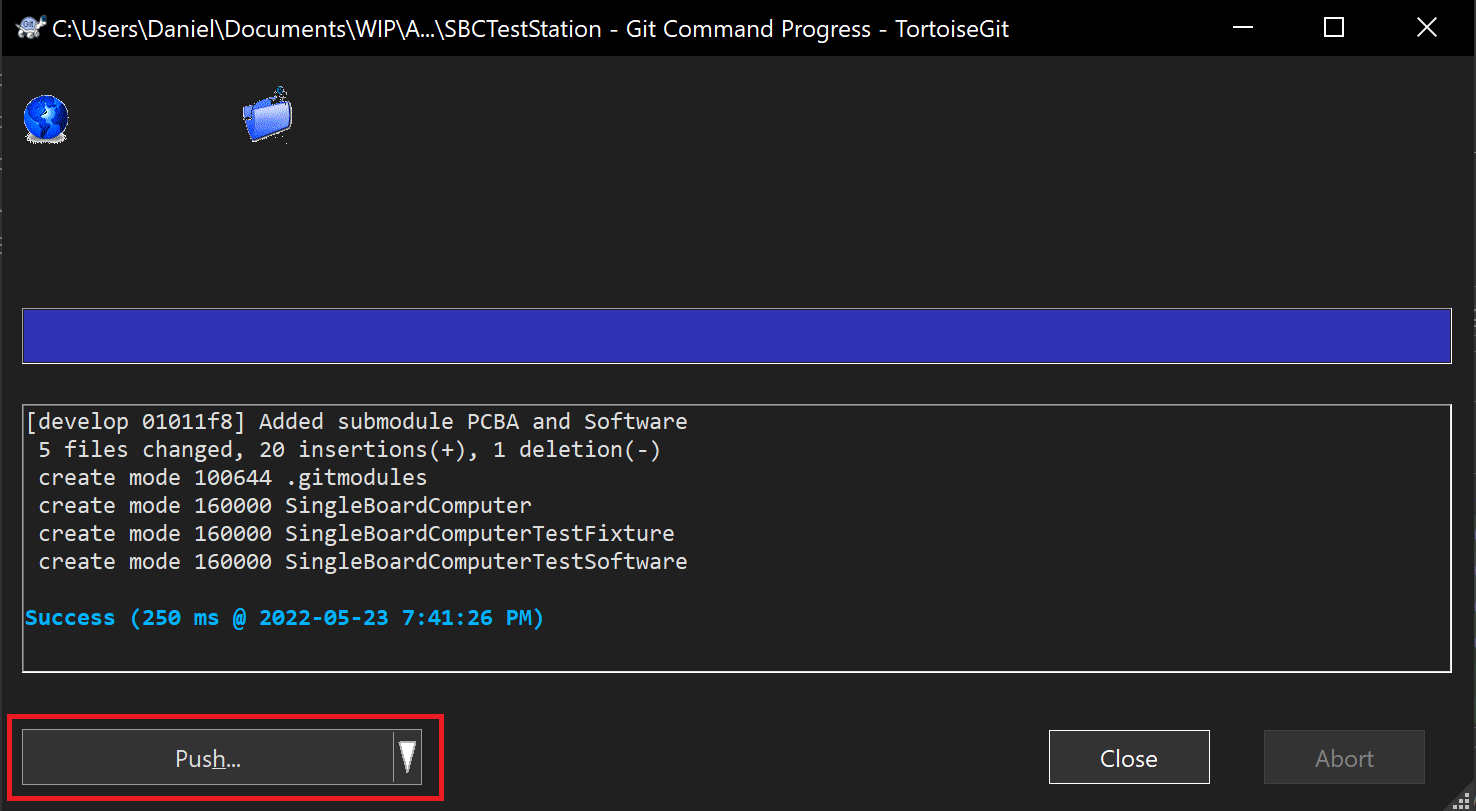
* Ensure the Local and Remote branches are "develop" and click on the OK button 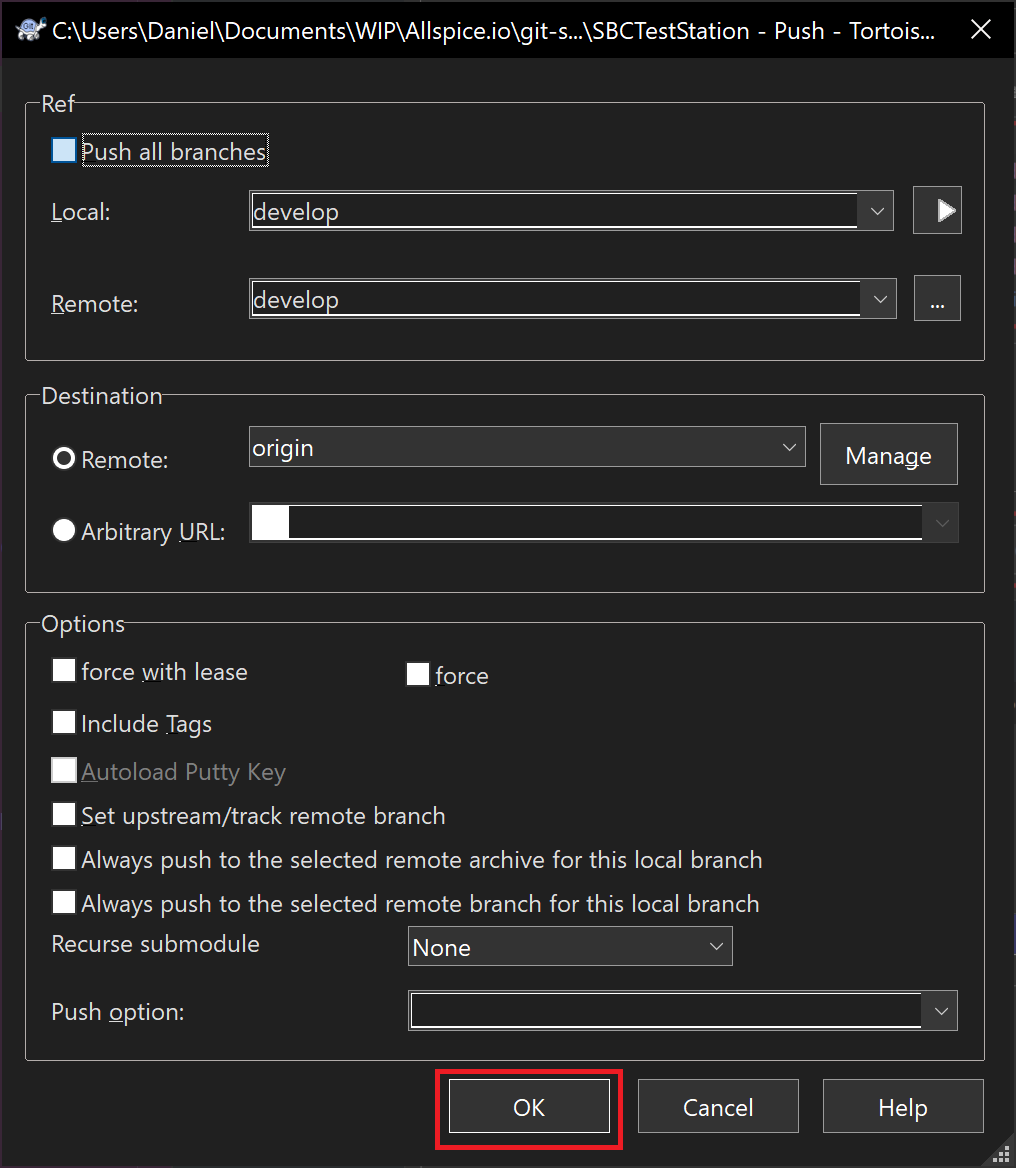
* Ensure the push results contain no errors 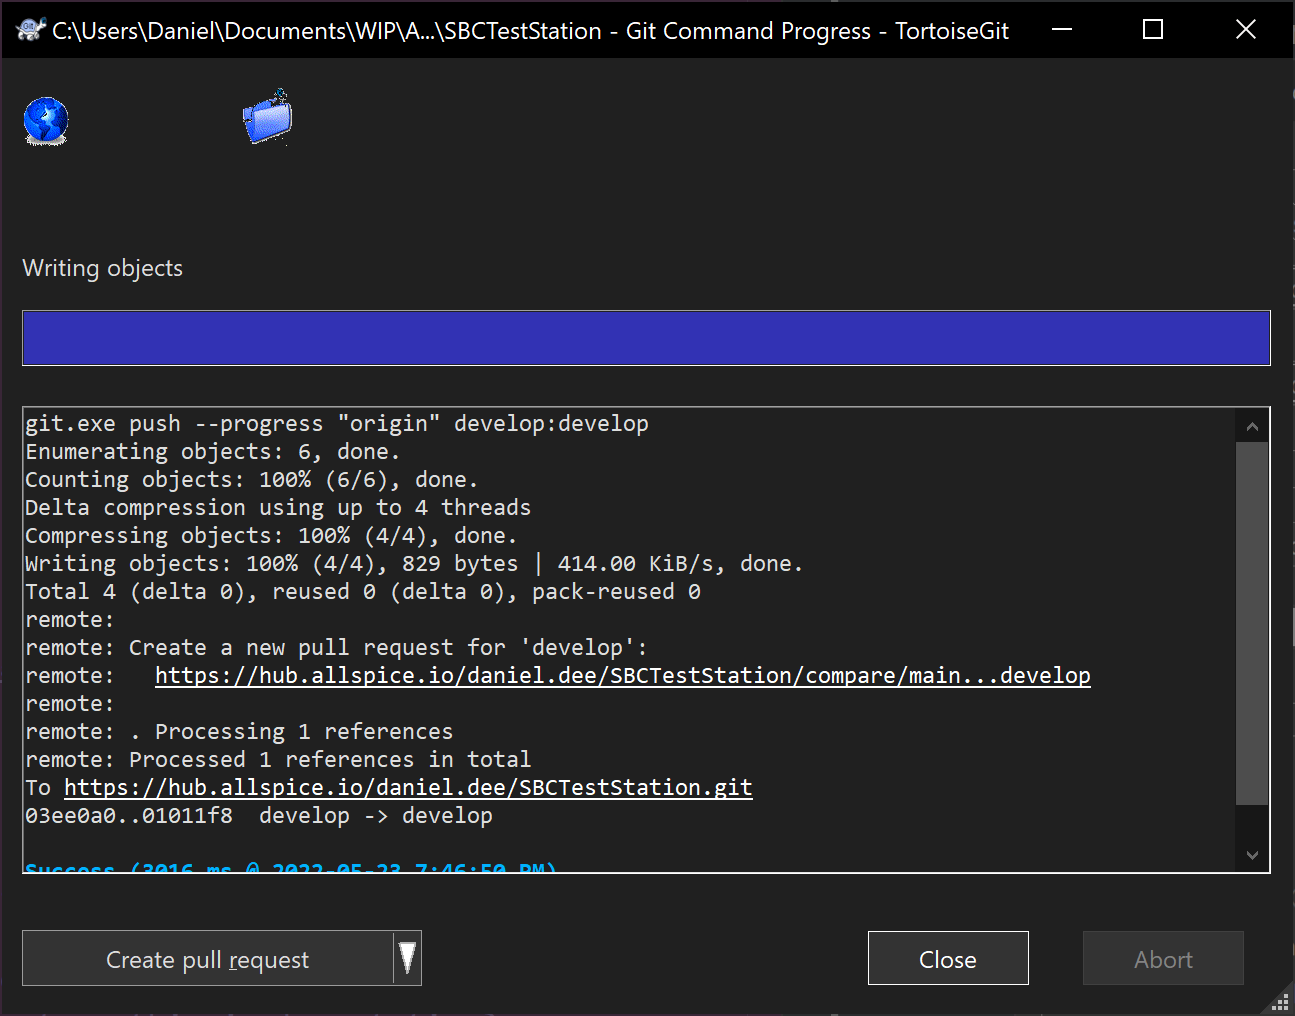
* You can see here that the develop branch now has submodule links to the the repos and SHA1 Hash for a specific commit.
6. Perform a Design Review
Follow the instructions in Design Reviews to merge the changes from the develop branch into main.
* In the Design Review changes, you can see that the repos are added, along with their SHA1 links 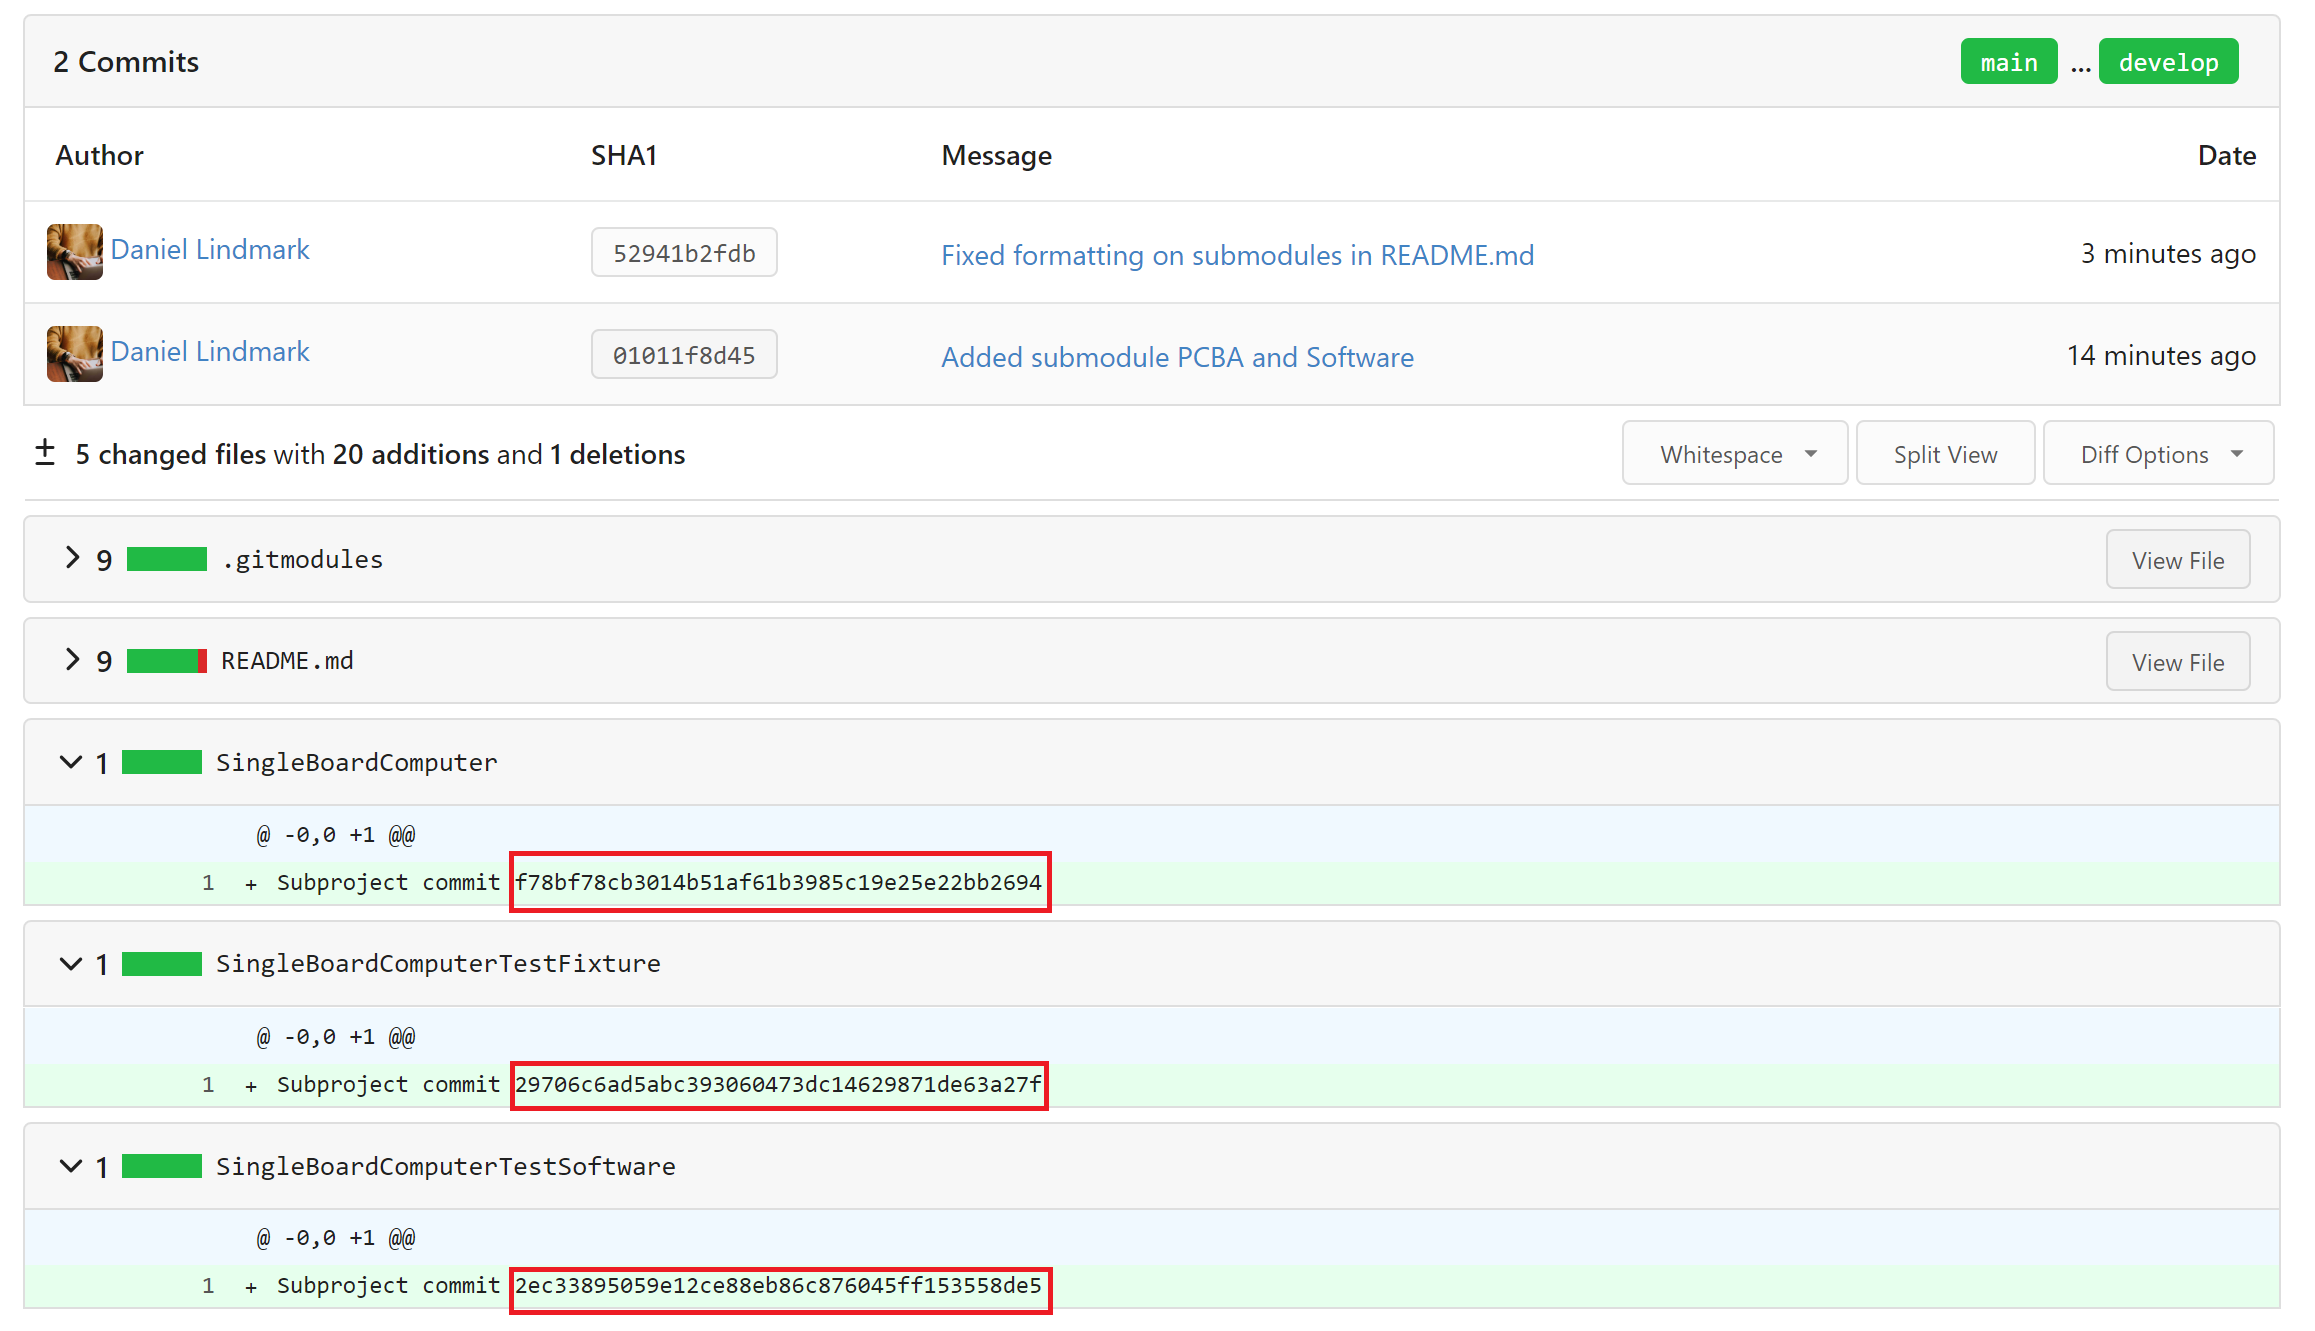
The main branch should now contain your submodule additions to the development branch and you can circulate the link / files to engineers, designers, and manufacturers.