Overview
Allspice Hub uses two different forms of authentication to sync your files between the hub and your local filesystem.
HTTPS uses web authentication. It is easier to setup, but might require you to log onto the server for each git action.
SSH uses secure keys to encrypt and decrypt your files. It allows for faster and more secure transfer of files.
In this tutorial, we will show you how to setup your system using SSH with OpenSSH.
Setting up OpenSSH Authentication
Open a terminal such as git-bash and run the following command:
ssh-keygen -t ed25519 -C "youremail@example.com"The program will prompt you for the name and location of the file. The default location is your user’s home directory (i.e. %HOMEPATH%). On windows this is c:\users\yourusername\.ssh\id_ed25519. We recommend you use the default so the key lookup is easier.
Generating public/private ed25519 key pair.
Enter file in which to save the key (/c/Users/Daniel/.ssh/id_ed25519):
Enter passphrase (empty for no passphrase):
Enter same passphrase again:
Your identification has been saved in /c/Users/Daniel/.ssh/id_ed25519
Your public key has been saved in /c/Users/Daniel/.ssh/id_ed25519.pub
The key fingerprint is:
SHA256:ToBmBILxjCdjcpBJ4iIPlQfZOVFfMvdb5TSMoI4KMCg youremail@example.com
You will be prompted to enter a passphrase twice. It is highly recommended to use a passphrase to secure the key.
Enter passphrase (empty for no passphrase):
Enter same passphrase again:
The program will output the private and public key location. Protect the private key as you would a password.
Your identification has been saved in /c/Users/Daniel/.ssh/id_ed25519
Your public key has been saved in /c/Users/Daniel/.ssh/id_ed25519.pub
The key fingerprint is:
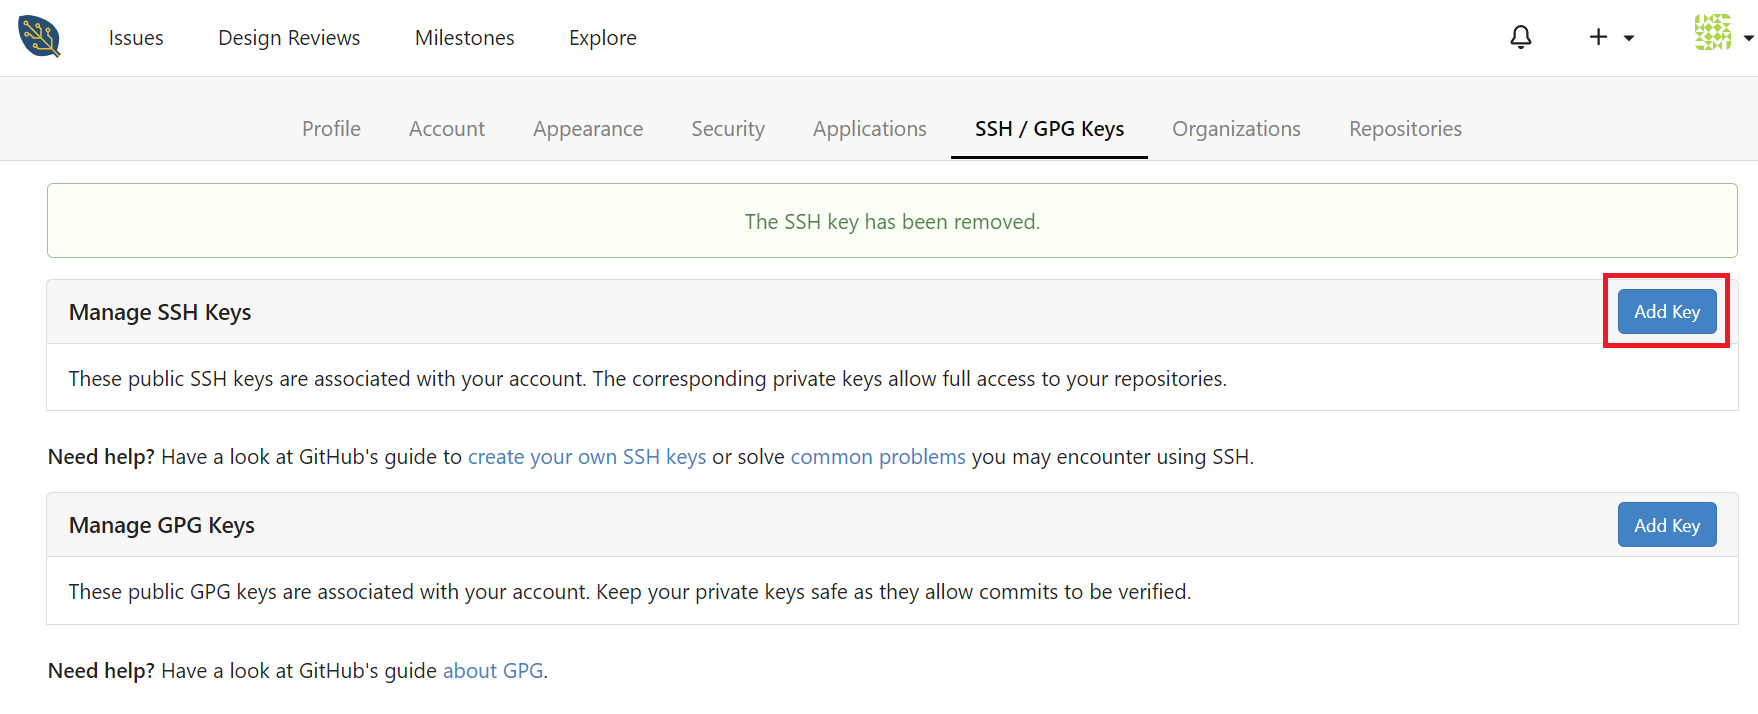
SHA256:ToBmBILxjCdjcpBJ4iIPlQfZOVFfMvdb5TSMoI4KMCg youremail@example.comLog into your hub.allspice.io account and navigate to https://hub.allspice.io/<user>/settings/keys and click Manage SSH Keys → Add Key.
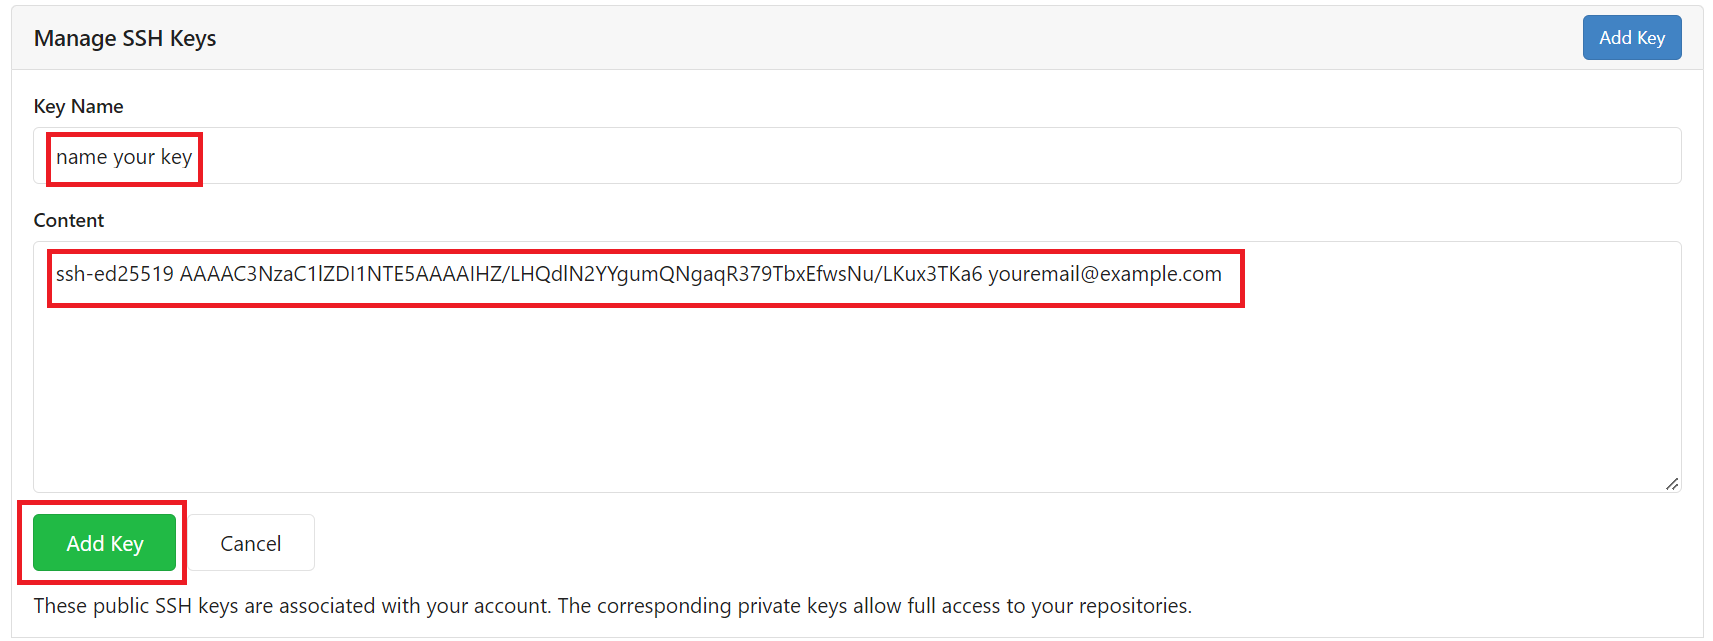
Copy the contents of the public key file either by opening the file and copying the contents, or by running the following command in git-bash:
cat ~/.ssh/id_ed25519.pub | clipName your key, then paste the public key value into the Content field, and click Add Key.
You should see your key, along with the SHA256 fingerprint, which should match the fingerprint from the key generator.
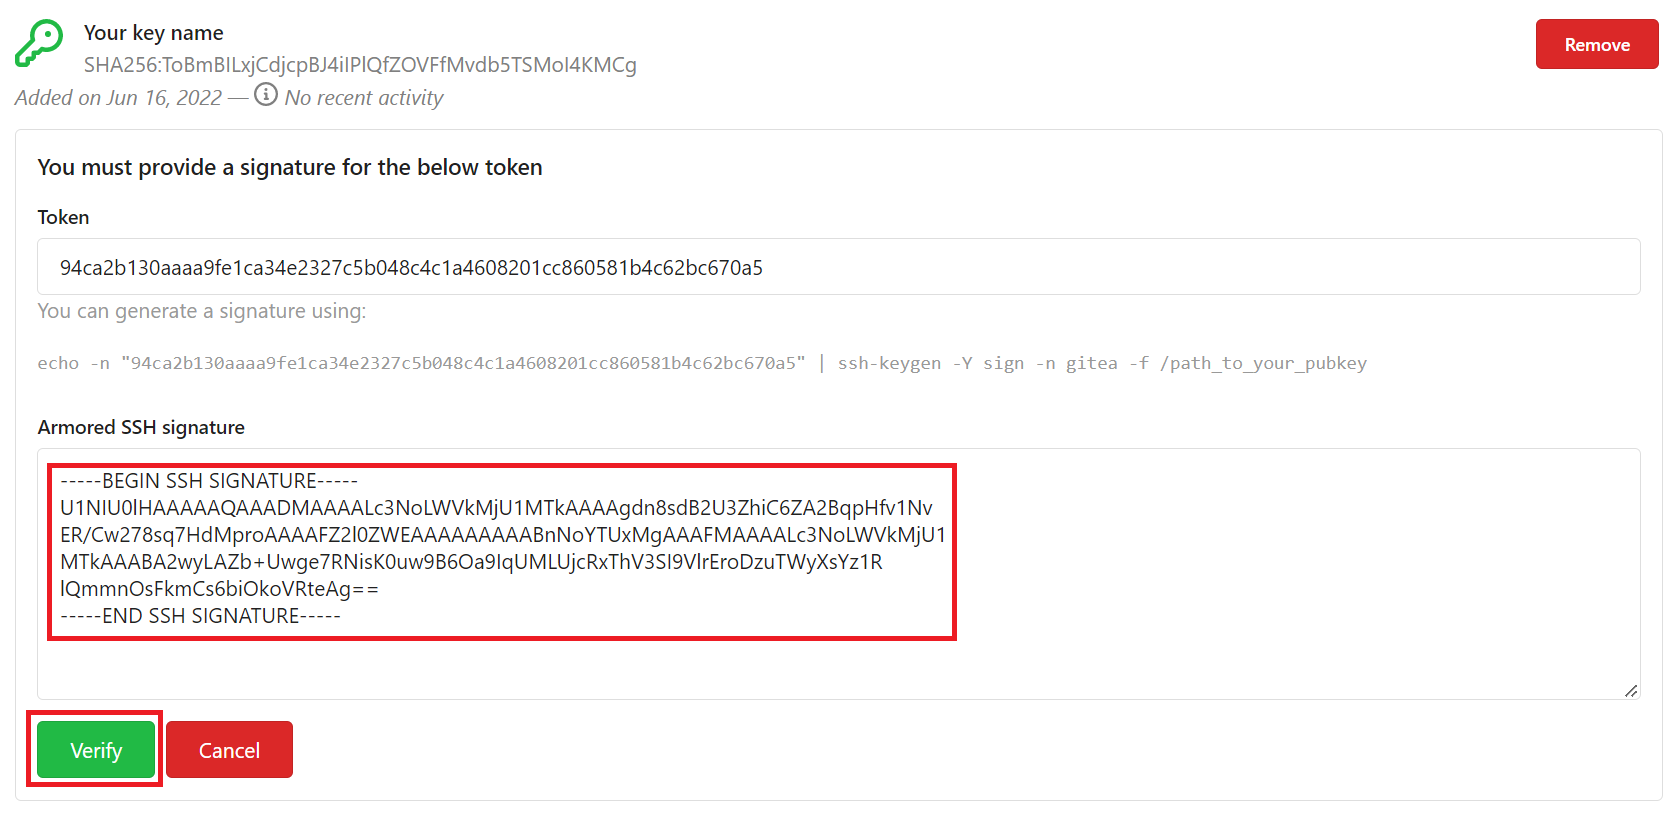
Click Verify to start the process to verify the key.

The verification dialog will generate a token and a command for you to run in the terminal.
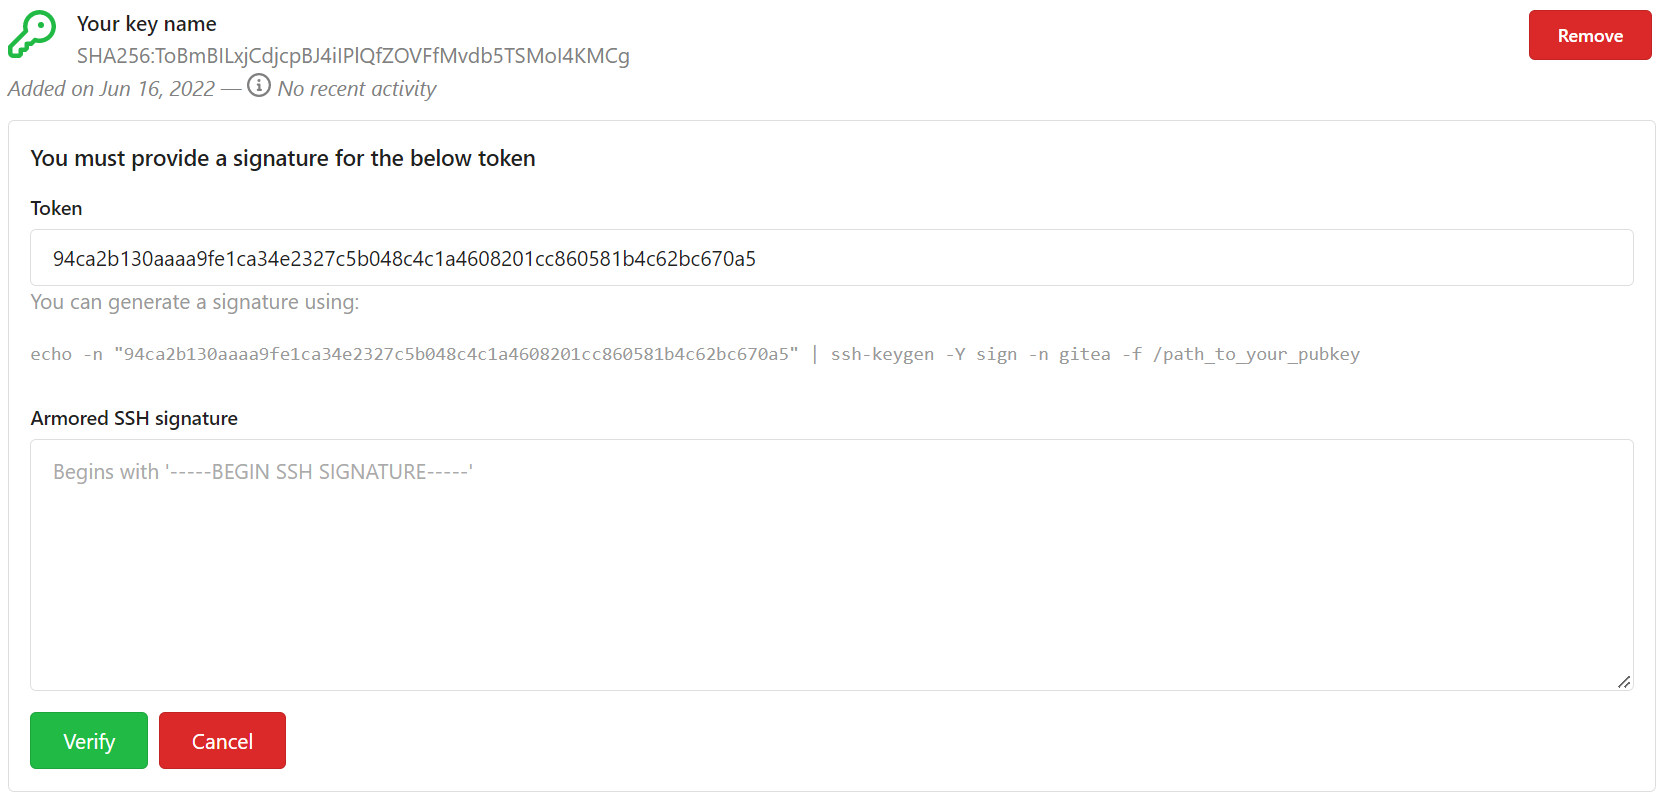
Copy the command that the website generates and run it in a terminal like git-bash
Change /path_to_your_pubkey to the location of your public key, most likely %HOMEPATH%/.ssh/id_ed25519.pub
Your token will be different and generated live by the website.
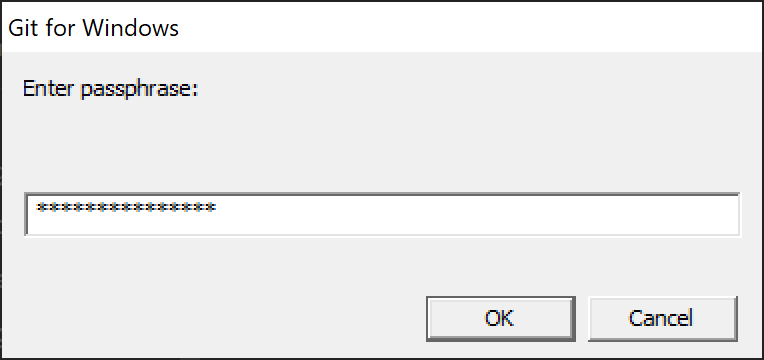
echo -n "94ca2b130aaaa9fe1ca34e2327c5b048c4c1a4608201cc860581b4c62bc670a5" | ssh-keygen -Y sign -n gitea -f /path_to_your_pubkeyHere is an example with the default path:
echo -n "94ca2b130aaaa9fe1ca34e2327c5b048c4c1a4608201cc860581b4c62bc670a5" | ssh-keygen -Y sign -n gitea -f ~/.ssh/id_ed25519.pubYou will be prompted to enter your passphrase:
The program will return an SSH signature. Copy the sig.
-----BEGIN SSH SIGNATURE-----
U1NIU0lHAAAAAQAAADMAAAALc3NoLWVkMjU1MTkAAAAgdn8sdB2U3ZhiC6ZA2BqpHfv1Nv
ER/Cw278sq7HdMproAAAAFZ2l0ZWEAAAAAAAAABnNoYTUxMgAAAFMAAAALc3NoLWVkMjU1
MTkAAABA2wyLAZb+Uwge7RNisK0uw9B6Oa9IqUMLUjcRxThV3SI9VlrEroDzuTWyXsYz1R
lQmmnOsFkmCs6biOkoVRteAg==
-----END SSH SIGNATURE-----
Paste the signature into the “Armored SSH signature” field and click Verify.
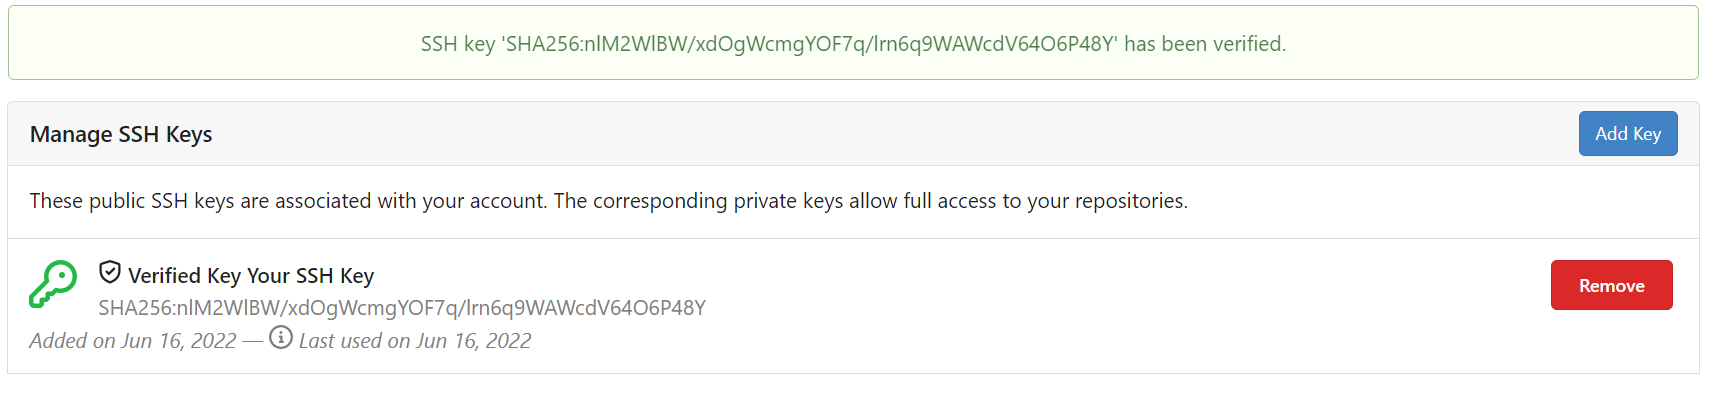
Here is an example of a successful key verification:
If the process doesn’t work, remove the key from hub.allspice.io and your local machine and start over and generate a new key, paying special attention to all the details.
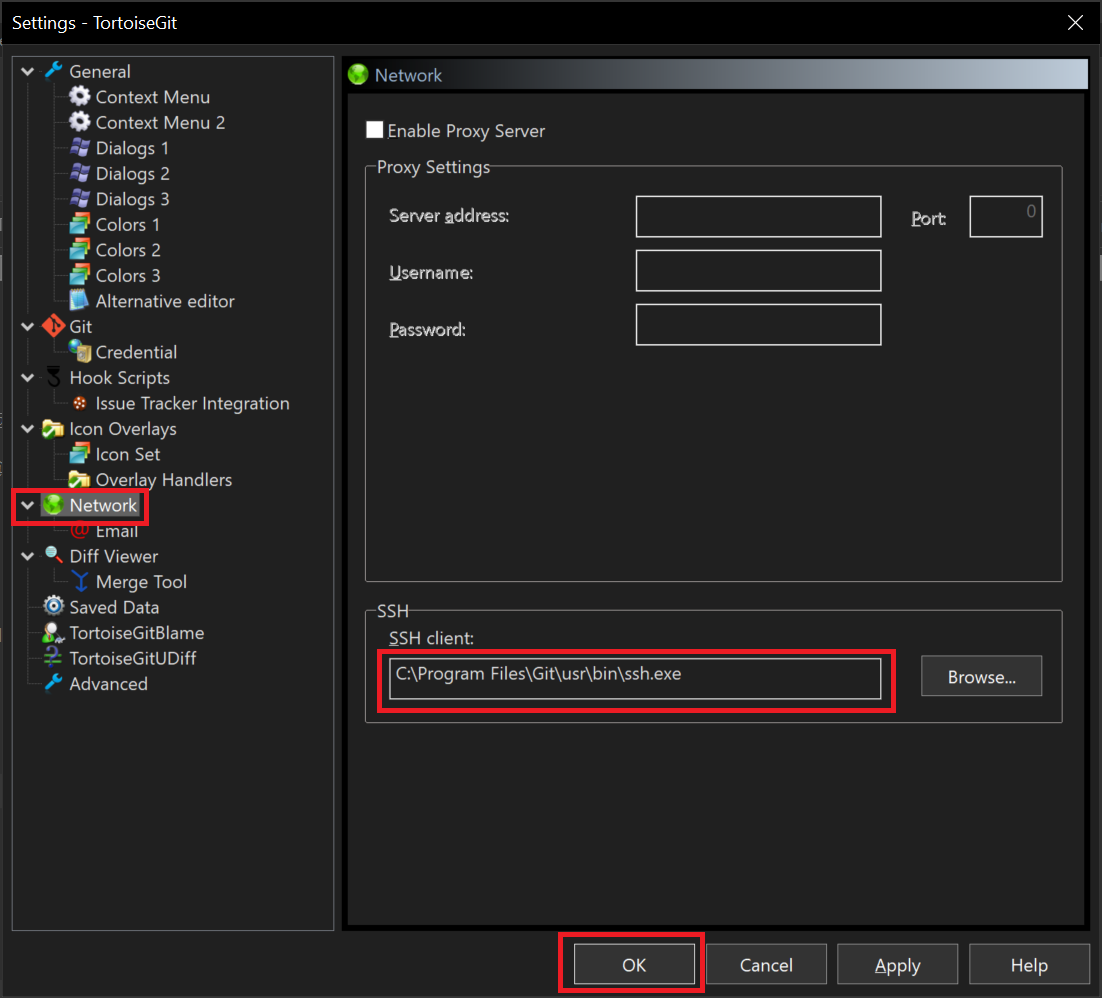
Set up SSH in TortoiseGit
Right click in a file explorer and select TortoiseGit→Settings.
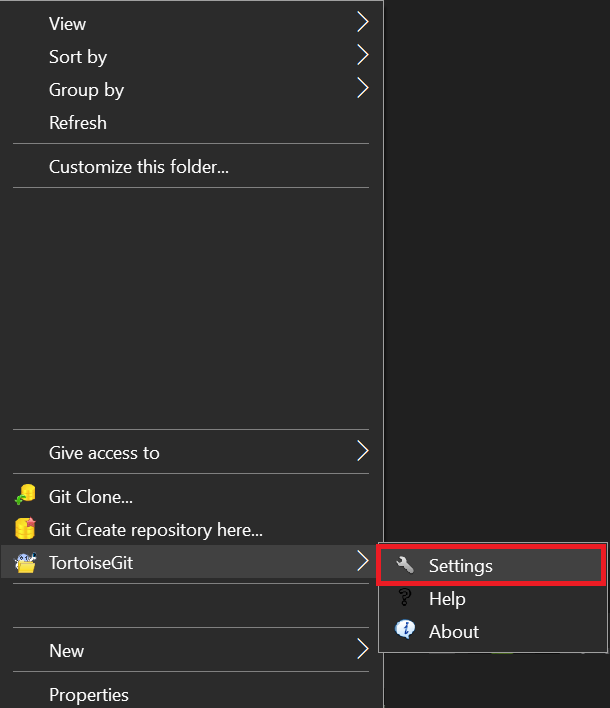
Select Network.
Enter the location of your SSH client in the “SSH Client:” field and then click OK.
common locations are:
c:\Program Files\Git\usr\bin\ssh.exe
C:\Windows\System32\OpenSSH\ssh.exe
Test SSH key
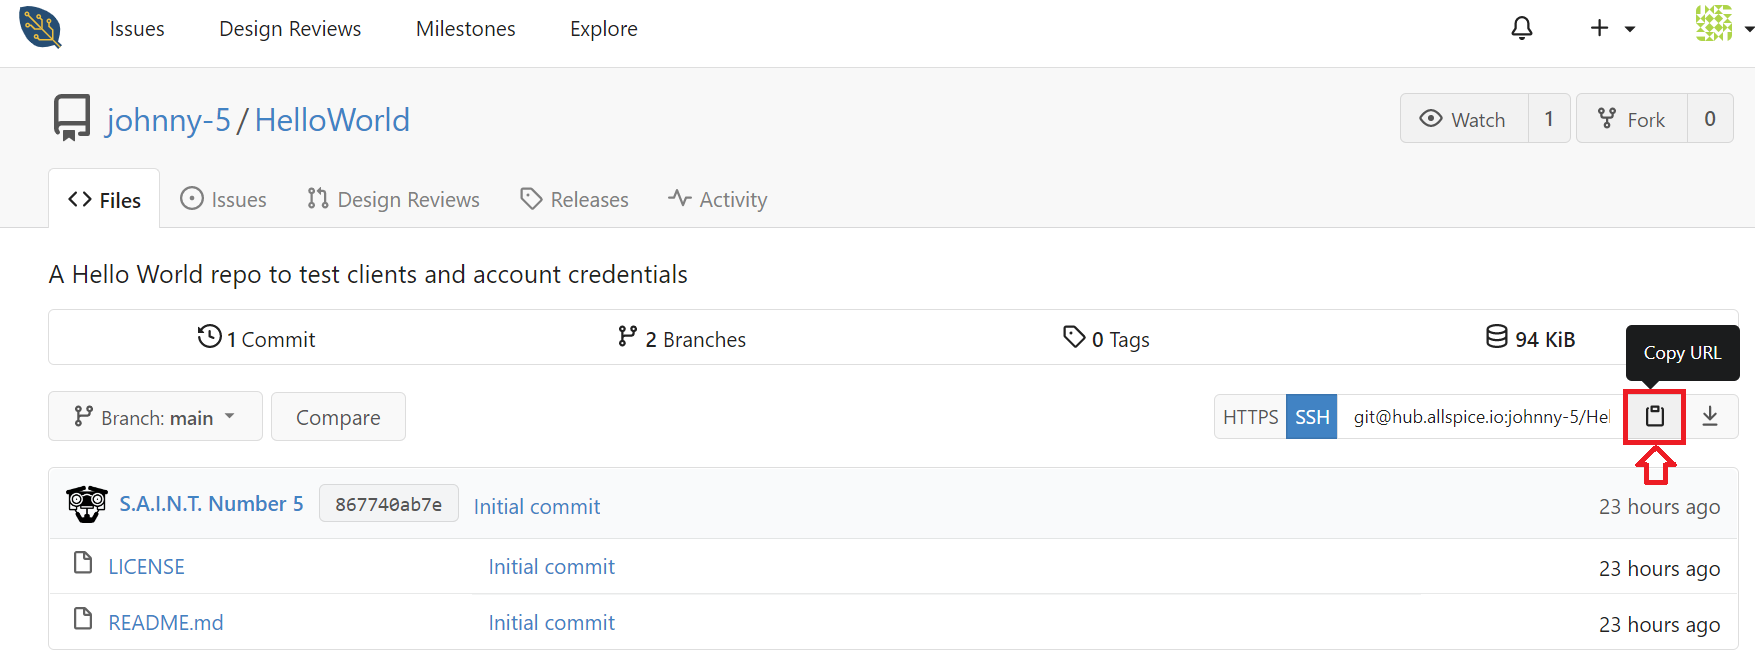
Copy a SSH repo link, either from our example, or from your own repository.
Example URL: git@hub.allspice.io:johnny-5/HelloWorld.git
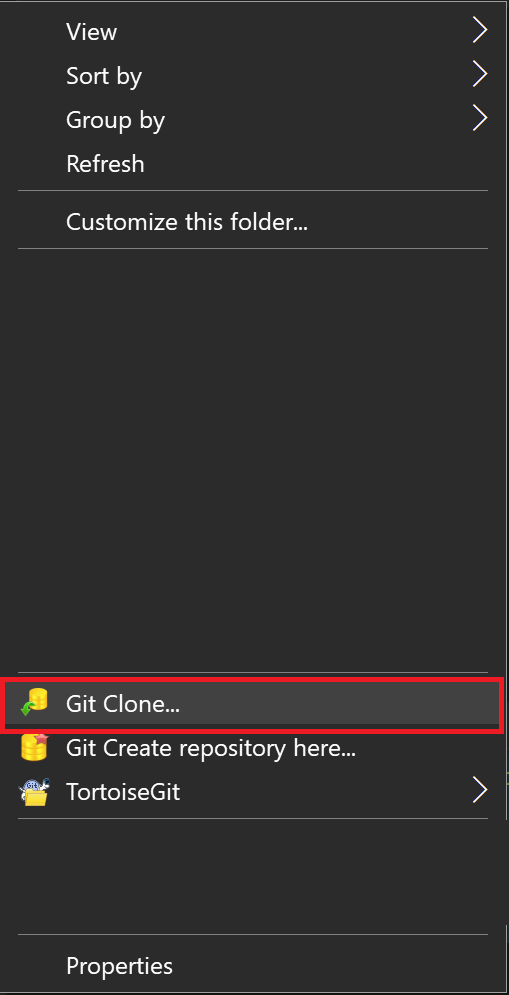
Right click in a file explorer window and select Git Clone.
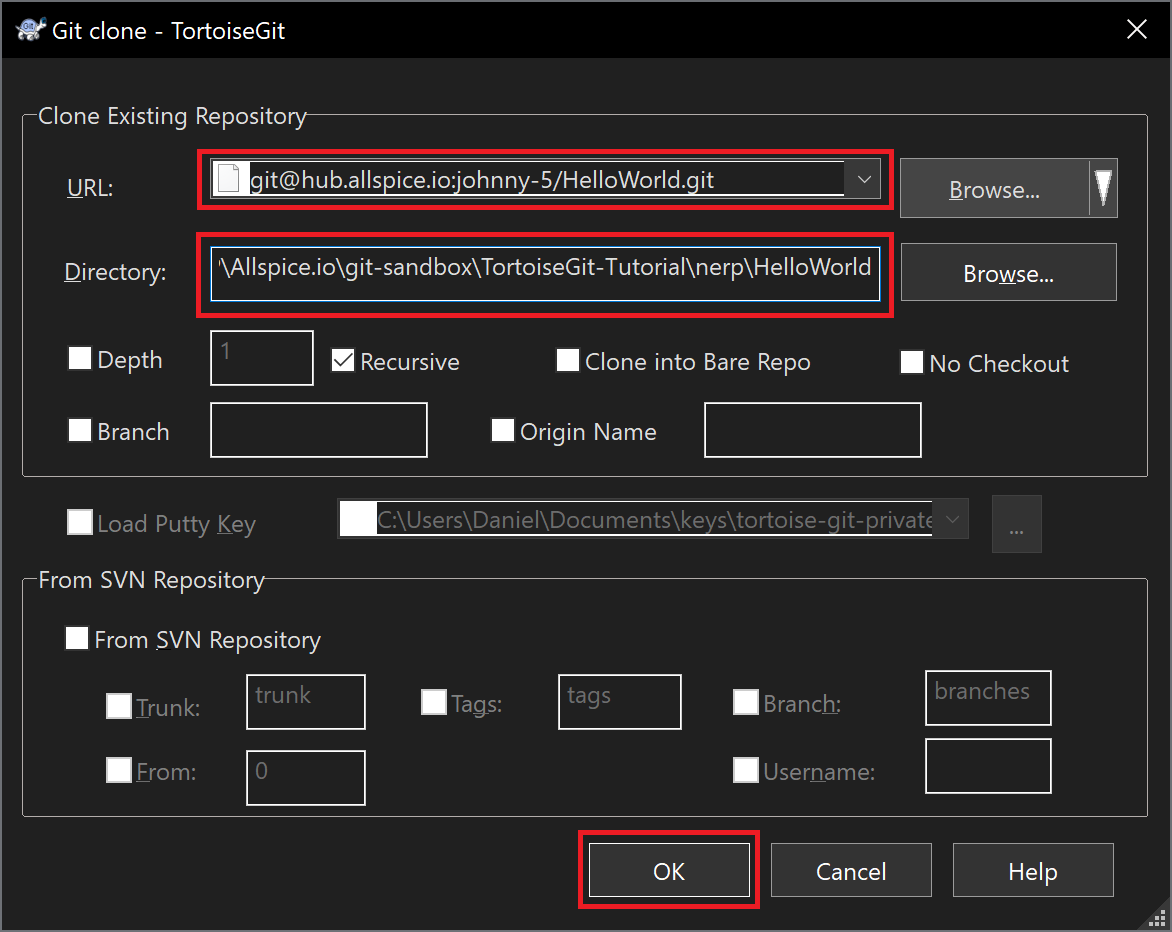
Enter the SSH link into the URL field and verify that the Directory is the correct location then click OK.
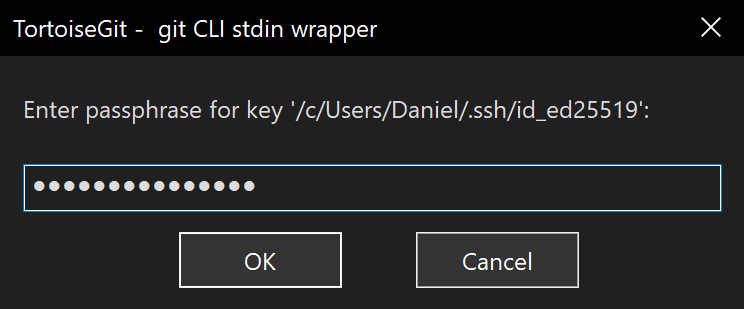
You may be prompted to enter your passphrase.
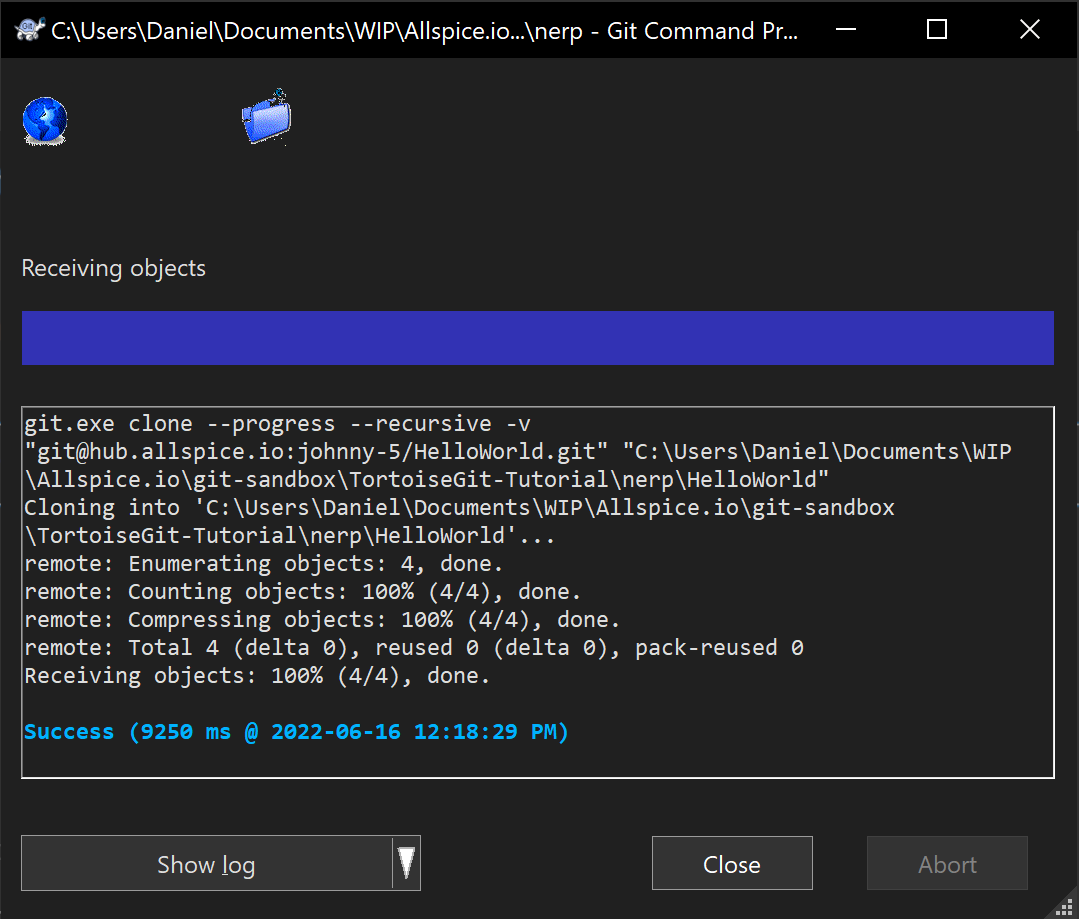
This is an example of a successful clone:
Congratulations
You are now set up to use TortoiseGit with SSH! You should be able to commit changes and push them to Allspice Hub.