Setting Up Your First Action
Actions requires the repository owner be an organization, not an individual. If you need to transfer a personal repository to an organization, please refer to How to transfer ownership of a repo.
Workflow files
Actions are defined in workflow.yml files.
Your repository needs one or more workflow files to trigger an Action workflow run.
Note: you must put workflow files in .allspice/workflows/ folder
Creating your first workflow file
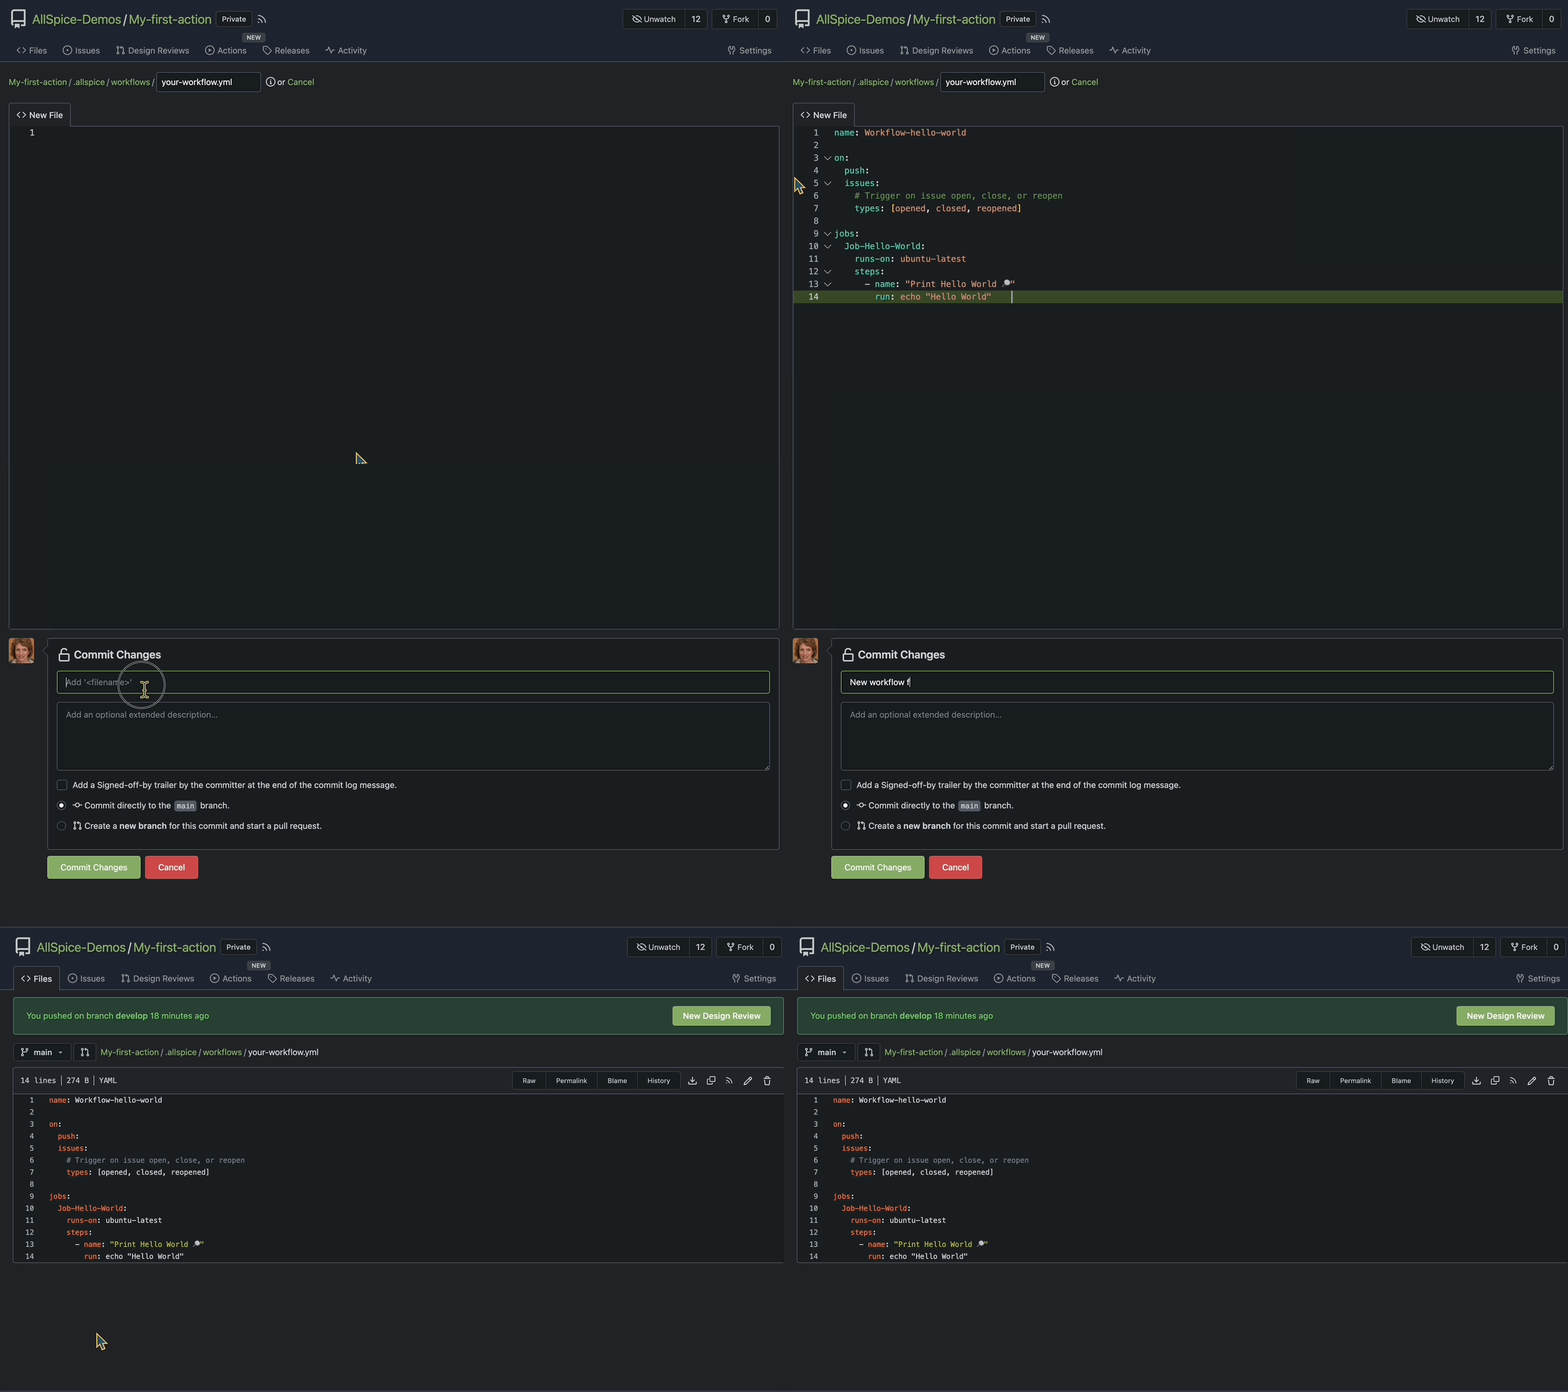
Follow along with this interactive demo to see how easy it is to create your first workflow.
- Create a file in your repo
.allspice/workflows/hello-world.yml- Select
repository→Add File→New File
- Select
.png)
-
Make sure the file is saved to /.allspice/workflows/your-file-name.yml

-
Copy the following example workflow into the web text editor:
name: Workflow-hello-world

on:
  push:
  issues:
    # Trigger on issue open, close, or reopen
    types: [opened, closed, reopened]

jobs:
  Job-Hello-World:
    runs-on: ubuntu-latest
    steps:
      - name: "Print Hello World 🔎"
        run: echo "Hello World"
- After you have pasted the code block, click the “Commit Changes” button to commit the workflow file to the repository.

Trigger your first action
The example above should trigger an action as soon as you commit the files.
This workflow specifies that actions will trigger on push or issue open/close
To trigger this action again do one of the following:
- Push changes to the repo
- Open/New issue (This is the easiest to check)
- Close an issue
View Actions results
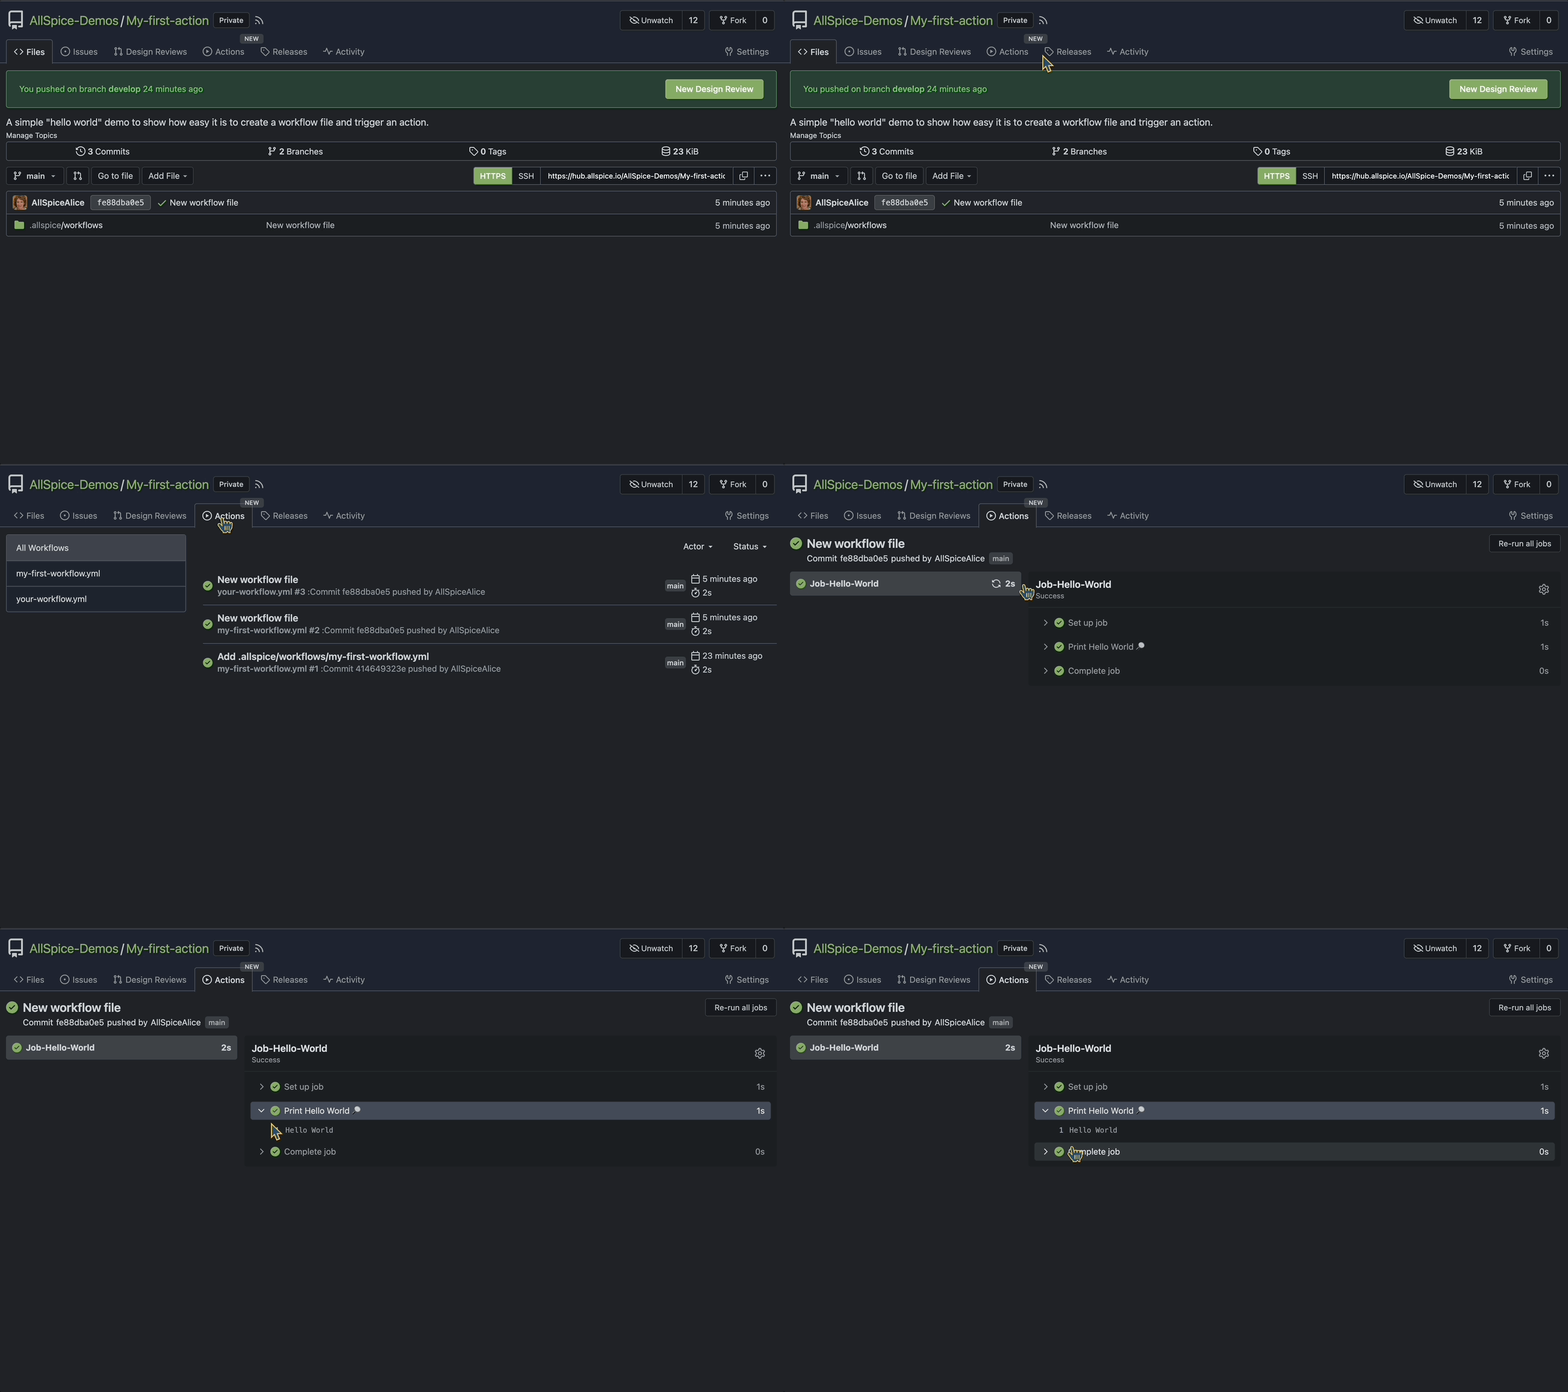
Visit the Actions tab and see the actions result.
[] Add gif
Click on a workflow run. Explore the run by clicking on the Step toggles.
