Using the AllSpice API
AllSpice provides a robust API that allows you to interact programmatically with your repositories, manage your hardware projects, and automate various tasks. There are two primary ways to access the AllSpice API:
- Preferred Method: Using the
py-allspicePython wrapper. - Direct Method: Using the REST API with Swagger interactive documentation.
This article will guide you through both approaches, including examples and links to further documentation.
1. Using the py-allspice Python Wrapper (Preferred)
The py-allspice Python wrapper simplifies interactions with the AllSpice API by abstracting raw HTTP requests into easy-to-use Python methods. This is the preferred way to integrate AllSpice's functionality into your workflows due to its ease of use, especially for Python developers.
Key Resources:
- Documentation: The
py-allspicedocumentation, built with pdoc, is available here. - Examples: Example Python scripts using the
py-allspicewrapper are hosted in the GitHub repository.
Installing the py-allspice Wrapper
To get started, you can install the latest py-allspice wrapper via pip:
pip install py-allspice
Authenticating with AllSpice
You’ll need an AllSpice authentication token to interact with the API. You can pass the token when initializing the API client. By default, the client connects to hub.allspice.io, but if you're using a self-hosted instance, you can specify the URL.
from allspice import AllSpice

# For AllSpice Hub
allspice_client = AllSpice(token_text="YOUR_API_TOKEN")

# For self-hosted instances
allspice_client = AllSpice(allspice_hub_url="https://your-allspice-instance.com", token_text="YOUR_API_TOKEN")
Common Use Cases and Example Scripts
Below are a few common use cases when using the py-allspice wrapper, along with links to example scripts from the official AllSpice GitHub repository.
1. Retrieving Repositories
You can easily retrieve a list of repositories associated with your user account using the get_repos method:
# Retrieve repositories
repos = allspice_client.get_repos()
for repo in repos:
    print(repo['name'])
For more examples, check out the generate netlist.
2. Creating a Pull Request
Automate the process of opening pull requests through the API:
# Create a pull request
pull_request = allspice_client.create_pull_request(
    repo_owner="your-org",
    repo_name="your-repo",
    base_branch="main",
    head_branch="feature-branch",
    title="New Feature",
    body="This adds a new feature to the repository."
)
print(f"Created PR: {pull_request['html_url']}")
Refer to working with DRs for more details.
3. Handling Issues
Managing issues programmatically is also straightforward:
# Create a new issue
issue = allspice_client.create_issue(
    repo_owner="your-org",
    repo_name="your-repo",
    title="Bug report",
    body="There's a critical bug in the system."
)
print(f"Issue created: {issue['html_url']}")
2. Using the AllSpice API with Swagger
For more direct or custom integrations, the AllSpice API can be accessed via its RESTful interface. The AllSpice Hub provides a Swagger-based interactive API documentation that allows you to test and explore the API endpoints without needing to write any code.
Key Resource:
- Swagger Interactive Documentation: AllSpice API Swagger
How to Use Swagger
Swagger offers a UI to interact with the AllSpice API, making it easy to understand the available endpoints, the required parameters, and the responses.
-
Navigate to the Swagger Documentation: You can access the Swagger documentation at https://hub.allspice.io/api/swagger.
-
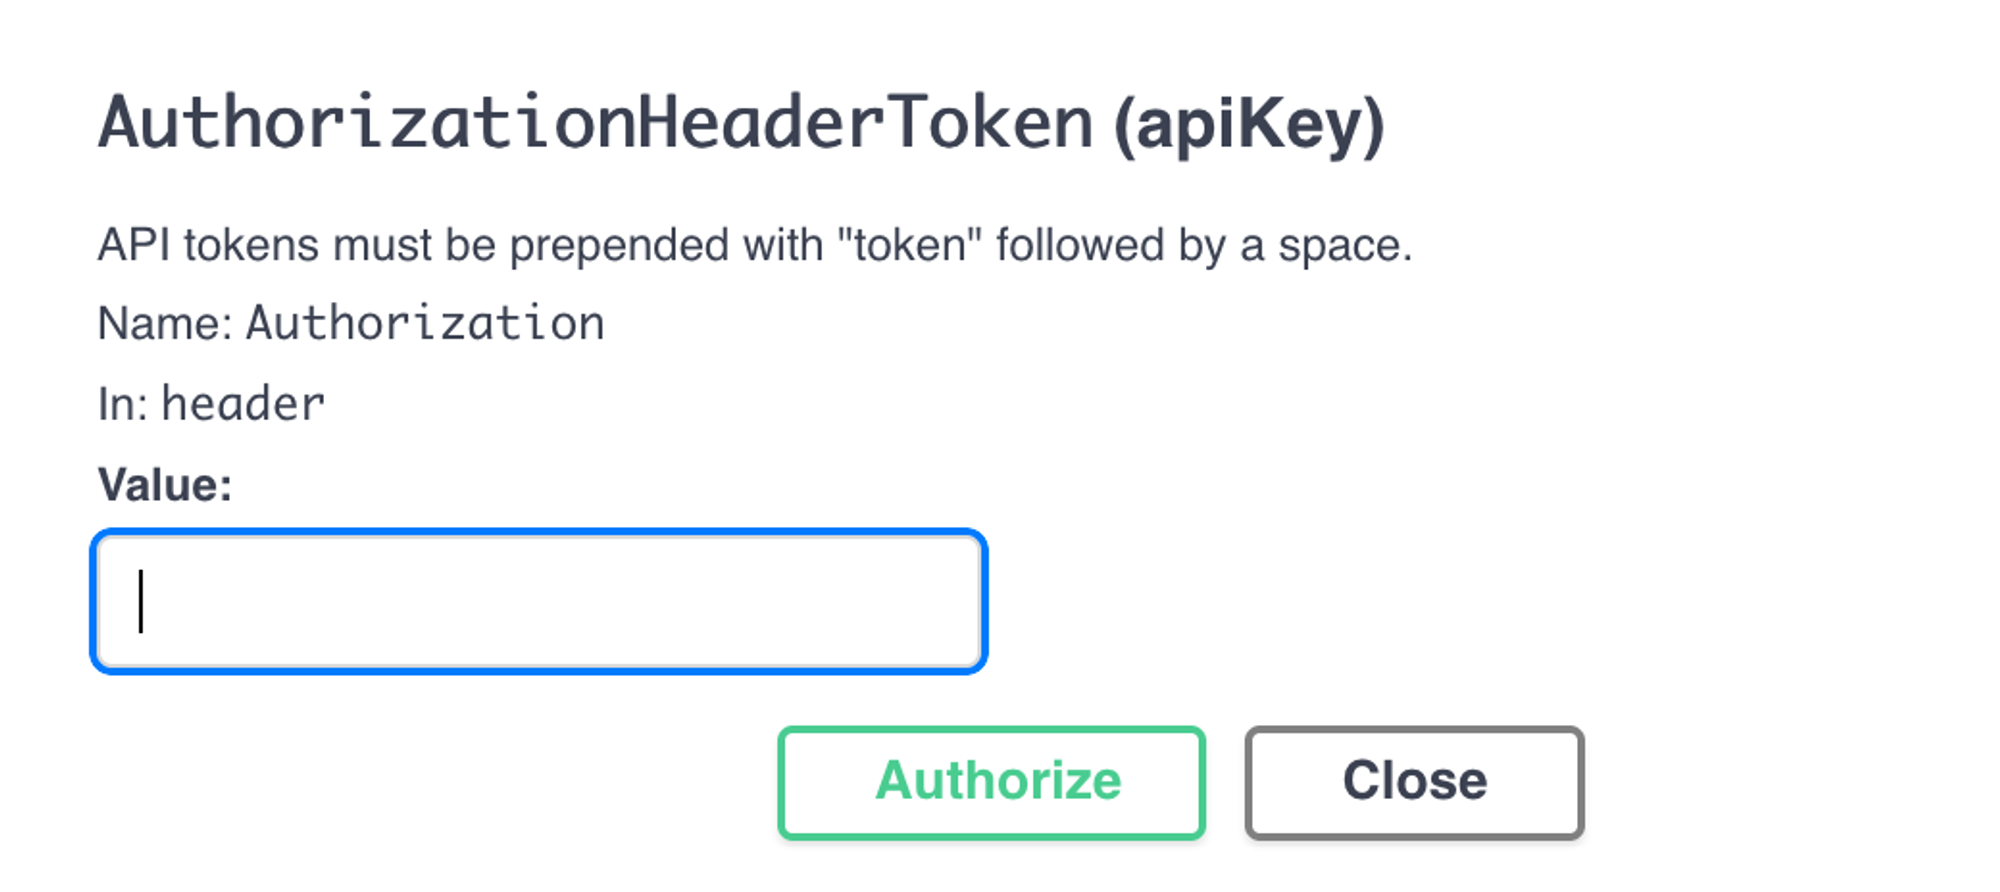
Authenticate with Your Token: To interact with authenticated endpoints (e.g., creating pull requests, managing repositories), you'll need to pass your API token. Swagger allows you to input the token directly into the UI.
- Click the "Authorize" button at the top of the Swagger page.
- Enter your token in the
AuthorizationHeaderToken (apiKey)field:Value - API tokens must be prepended with "token" followed by a space. Ex:
token d82634f0bd3fd21a473c24a2c7a439bfa5af5417
- Explore Endpoints: Use Swagger's interface to explore available API endpoints for repositories, pull requests, issues, and more. For each endpoint, you can see the necessary parameters and try requests directly within the UI.
Example: Retrieving Repositories via Swagger
To retrieve a list of repositories:
- Endpoint:
GET /api/v1/repos - Parameters: None required.
- Response: A list of repositories in JSON format.
Once authenticated, simply click the "Try it out" button for the endpoint and execute the request.
Example: Creating a Pull Request via Swagger
To create a pull request:
- Endpoint:
POST /api/v1/repos/{owner}/{repo}/pulls - Parameters:
owner: The owner of the repository.repo: The repository name.- Request body containing the
base,head,title, andbodyof the pull request.
- Response: The pull request details in JSON format.
Enter the required parameters, then click "Try it out" to execute the request and create the pull request.
Custom Integrations Using Swagger
If you’re developing custom integrations with systems outside of Python or need advanced custom workflows, using the AllSpice API via Swagger allows you to understand the underlying API and build on top of it with any technology that supports HTTP requests.
Conclusion
Whether you're using the py-allspice Python wrapper for streamlined integration or interacting directly with the API via Swagger, AllSpice provides flexible options for programmatic access to its features. The preferred method for most users is the Python wrapper, which simplifies API interactions and integrates seamlessly into Python-based workflows. For more advanced use cases or non-Python environments, the Swagger interface offers a direct and interactive way to explore the full API.
To get started with the py-allspice wrapper, explore the documentation and example scripts. For direct API exploration, visit the AllSpice API Swagger and try out the endpoints to see what’s possible.
If you have any questions or need further support, don’t hesitate to reach out to the AllSpice team or consult the interactive API documentation for detailed usage guidelines.