Design Review Quickstart (Git Based Workflow)
This guide walks through a complete design review using repositories and Git in AllSpice.
If you want the fastest way to review a design without Git or setup, start with Quick Review instead.
What you will do in this guide
In this walkthrough, you will:
Add a design repository to AllSpice
Create an issue to track a design change
Start a design review comparing two revisions
Review visual diffs for schematics, PCB, and BOM
Leave contextual comments directly on the design
This guide focuses on how design reviews work in a Git based workflow.
Sign in to AllSpice
Log in to your AllSpice account at:
https://hub.allspice.io/user/login
After signing in, you will land on your dashboard. New accounts may appear empty until repositories are added.

After logging in, the first screen you'll see is your Dashboard. It'll look very empty since you're a new user. To quickly fill your organization with files to test, we'll clone one of AllSpice's demo projects so you can try a few features.
Add a demo project
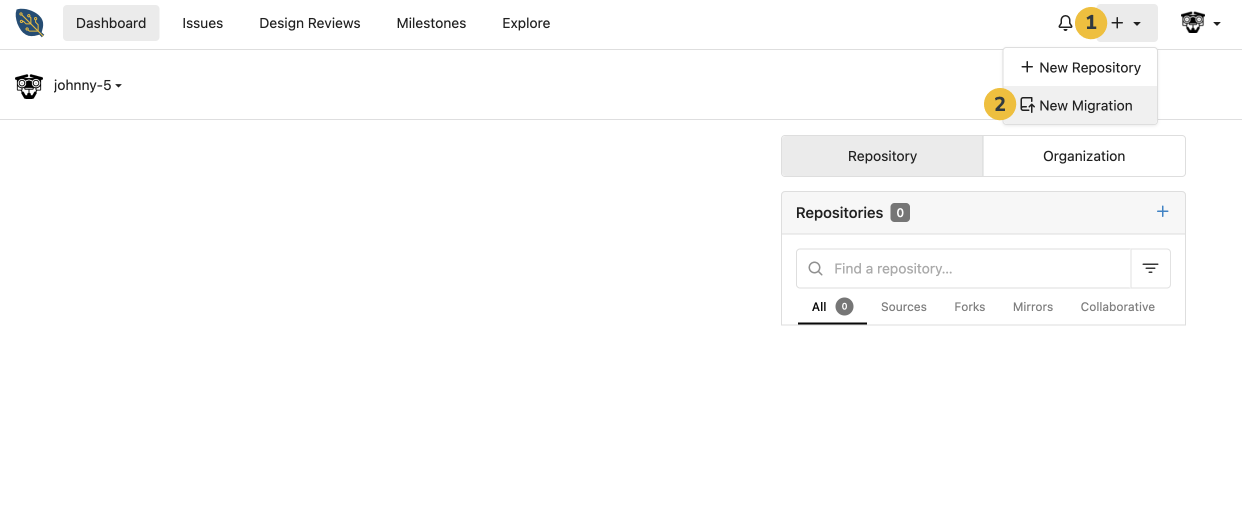
1. Expand the + sign drop-down menu at the top right corner of the screen next to your profile image.
2. Click New Migration
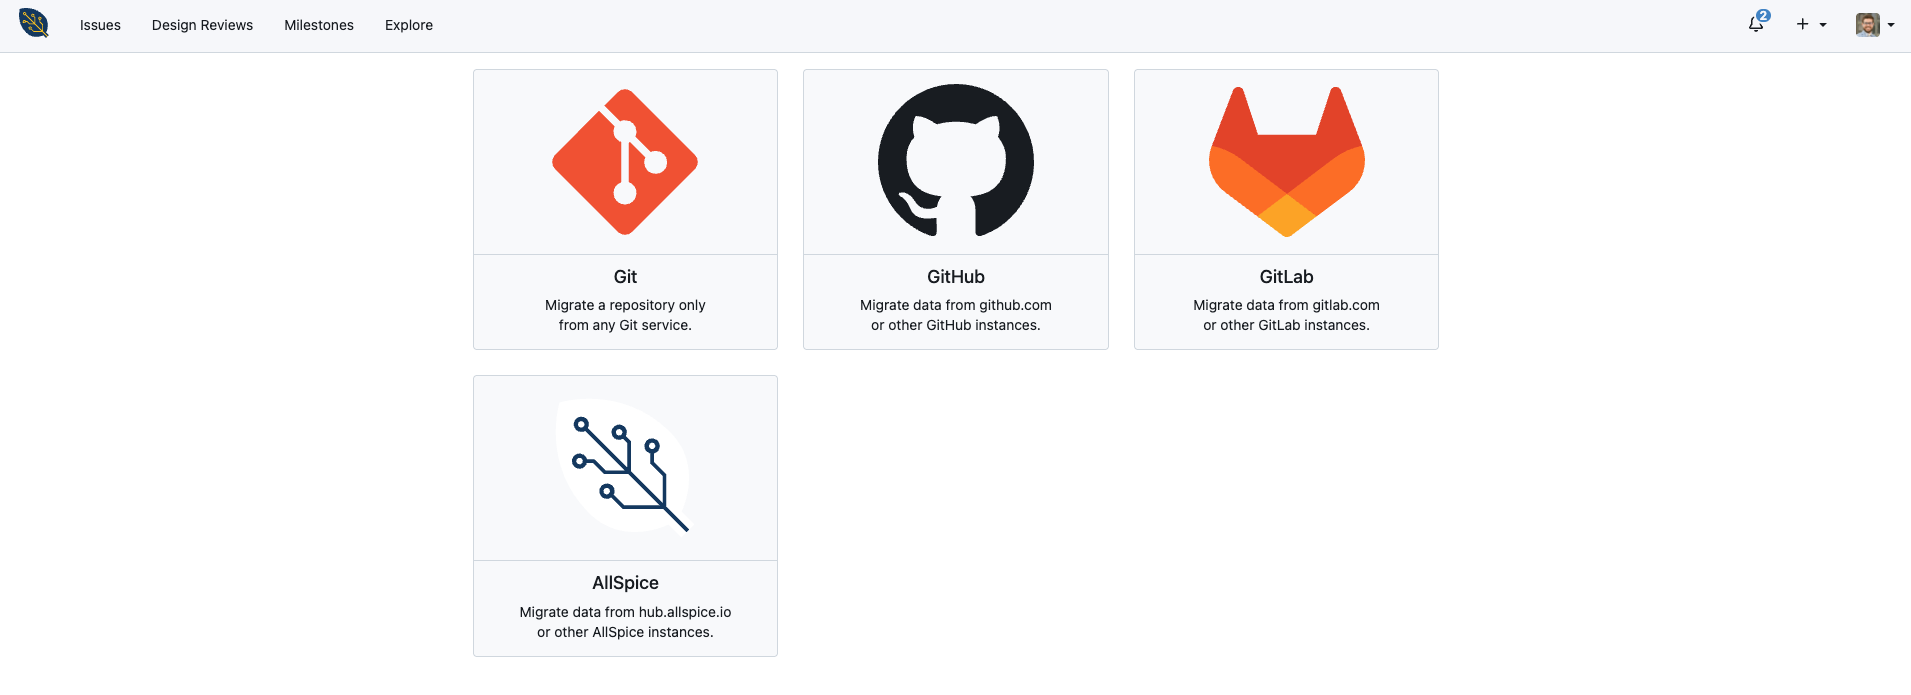
3. From the migration tool alternatives, select Allspice.
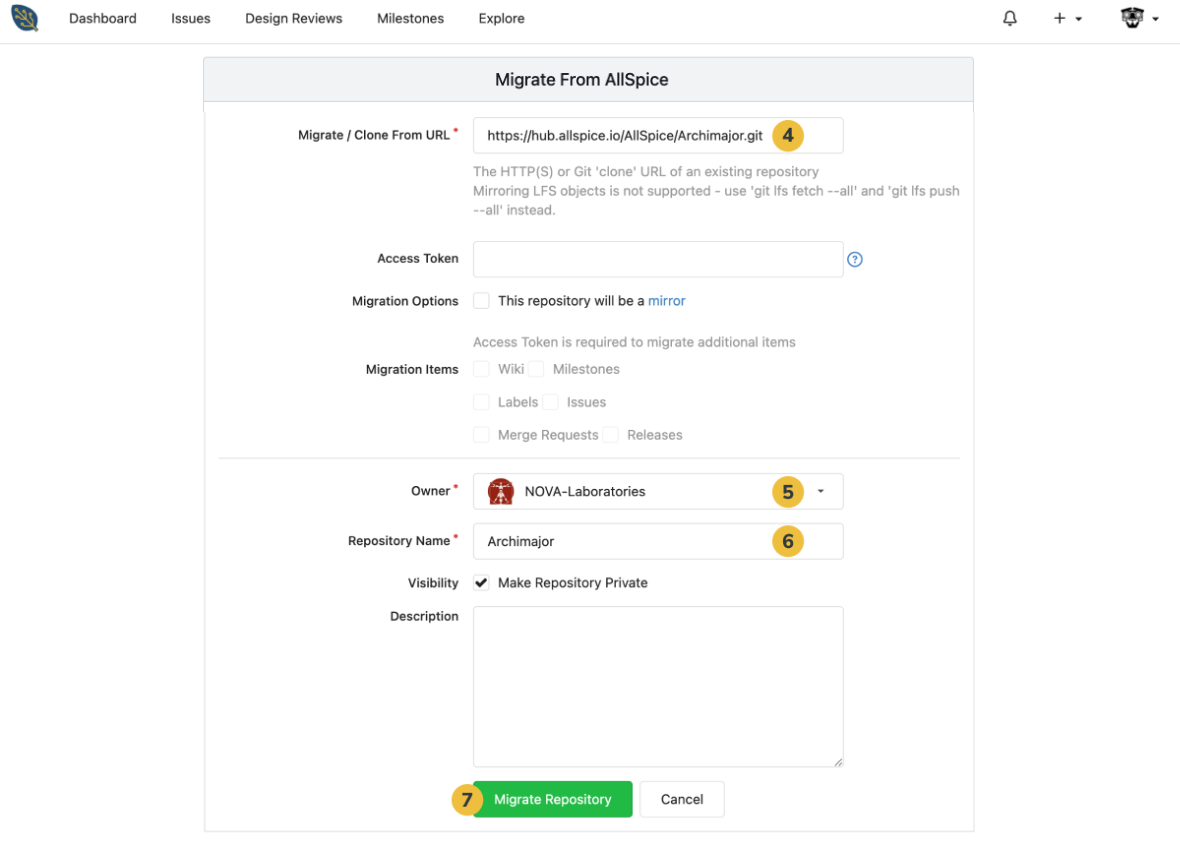
4. In the first field, Migrate / Clone From URL, enter:
https://hub.allspice.io/AllSpice-Demos/Altium-Demo/. This is a demo Altium repository.
5. Change the Owner from your user to your organization. This is a general best practice so all other users in your org can see the repository you're creating.
6. Enter a Repository Name. In this example, we use 'Archimajor'.
7. For the purposes of this tutorial, you can leave the rest of the fields blank or with their default settings and continue to click Migrate Repository.
Once you do so, it can take a few seconds for your new repo to populate.
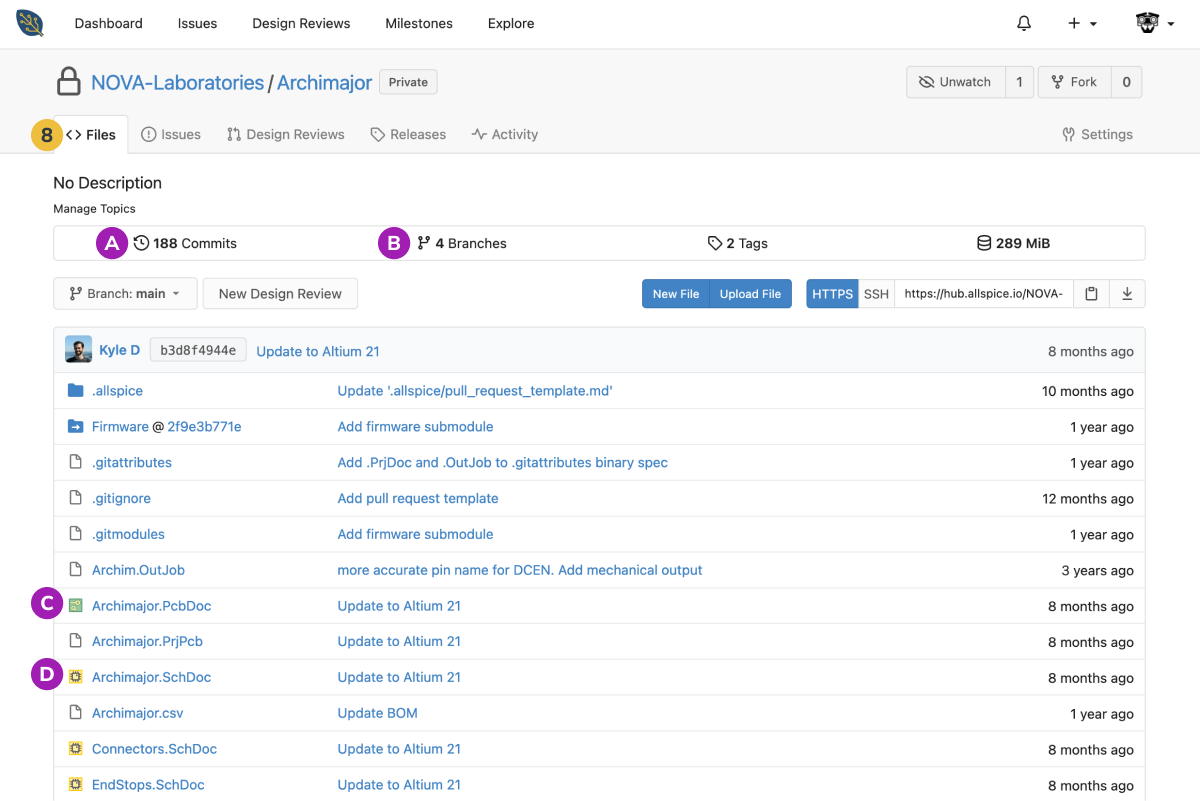
8. The first screen you'll see for your new repository is the Files. In here, you'll find all the project contents: files, folders, and submodules.
A few things worth pointing out on this page:
A. You can view your repository history from the Commits
B. Any Branches will appear at the top of the page
C. Clicking on PCB files, identified with a green icon, will show you a browser render.
D. Schematic files are supported as well, and they're accompanied by a yellow icon
Open an issue
Your repository is the design project you work on. Let's say after a few days of work, you discover a bug that needs to be addressed before the next release. With a repository in place, you can now open your first Issue.
Before jumping in though, you'll add labels to keep your work organized.
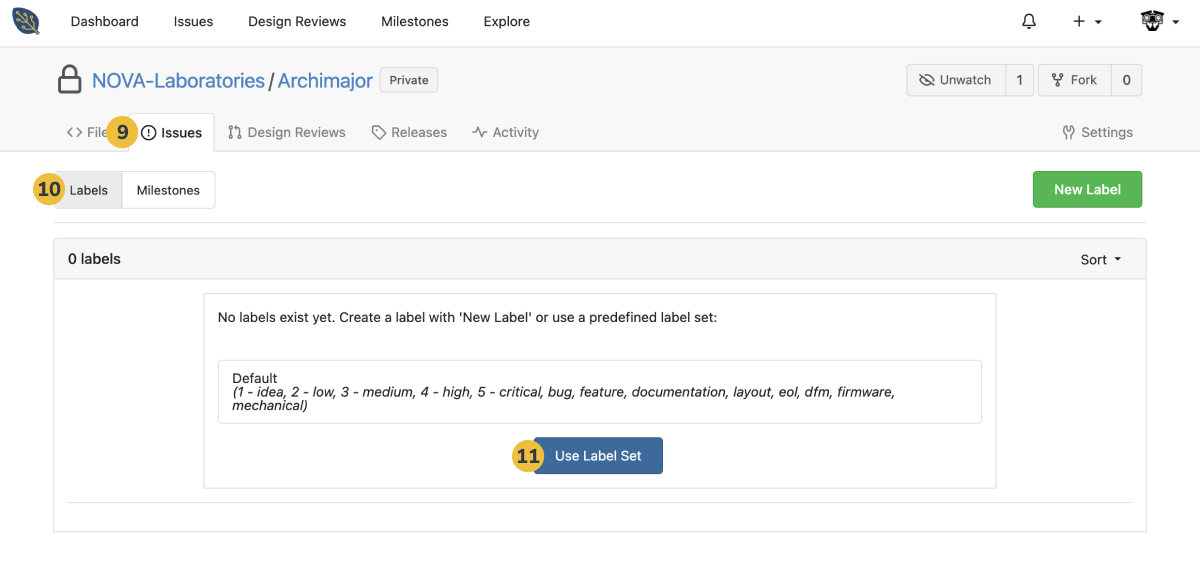
9. Navigate to the Issues tab.
10. Click Labels
11. You'll see a predefined set of labels created by the AllSpice Team. For this tutorial, the default label set will work, though you can always add new labels or modify them later to better suit your needs.
Select Use Label Set and 13 labels will populate that you can use going forward.
12. Go back to the Issues tab.
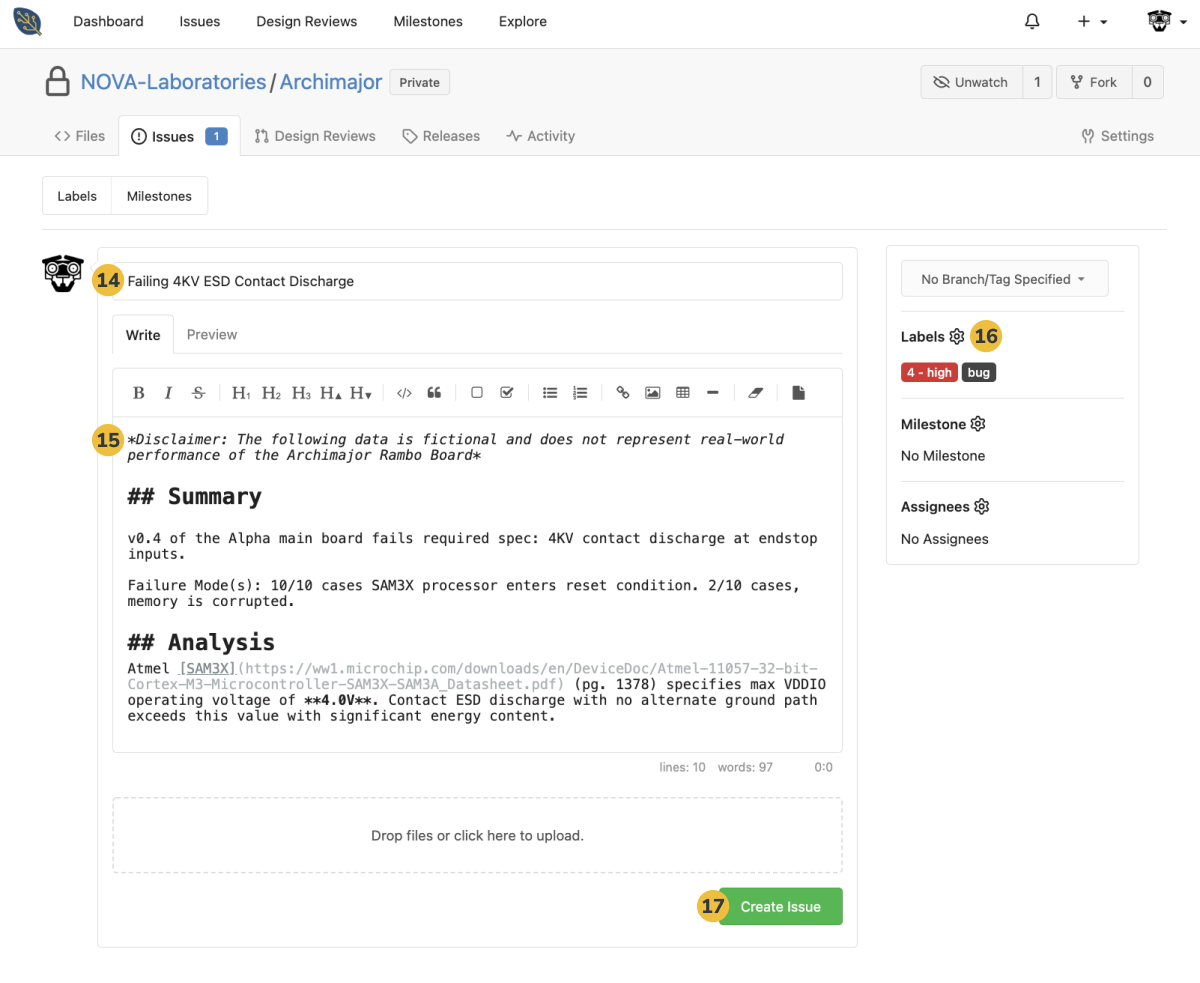
13. Open a New Issue.

14. Enter a Title for your issue
15. Write a Description. You can use Markdown to add basic styling.
16. Add a few Labels.
17. When ready, click Create Issue at the end.
Create a design review
Let's say after creating the Issue, you push a few commits to your develop branch to fix the bug. Once ready to merge, you'll start a design review to collect feedback from your peers, make any necessary final changes, and approve the board when everything looks good.
18. Navigate to the Design Reviews tab.
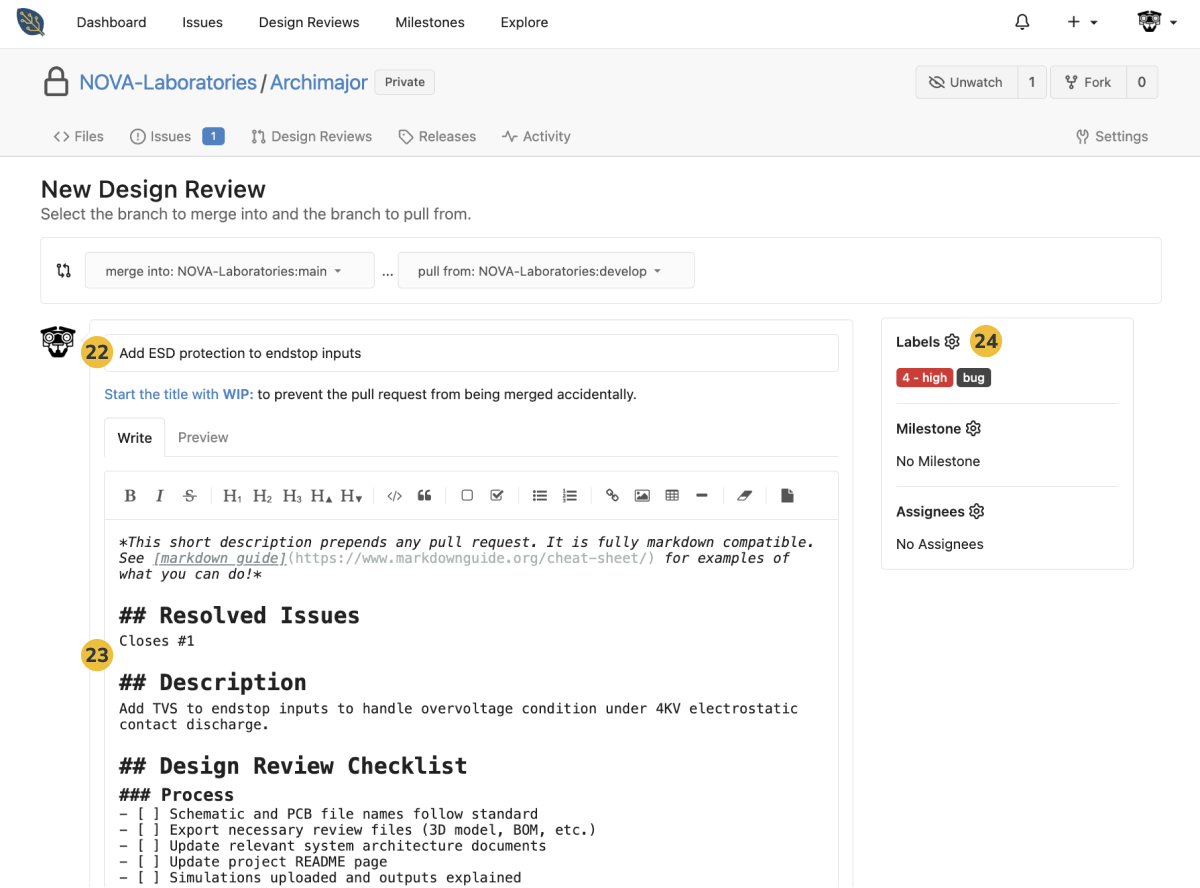
19. Start a New Design Review.

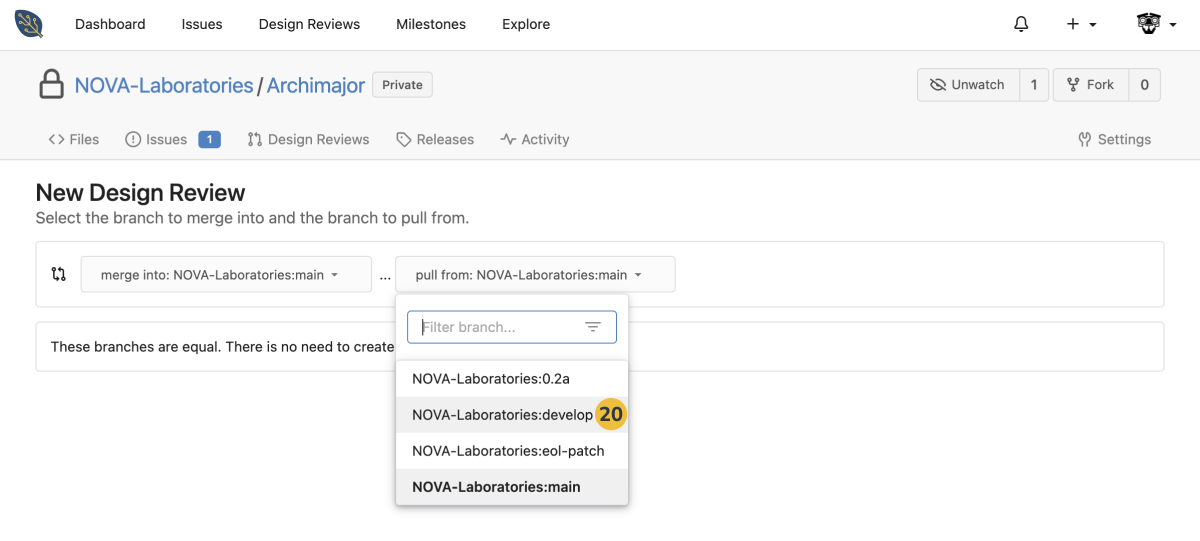
20. In the New Design Review page, select [ORG-NAME]:develop in the 'pull from' drop-down menu.
This will compare the design in the develop branch with the updates to fix the Issue you created against the main branch that contains the last approved version.
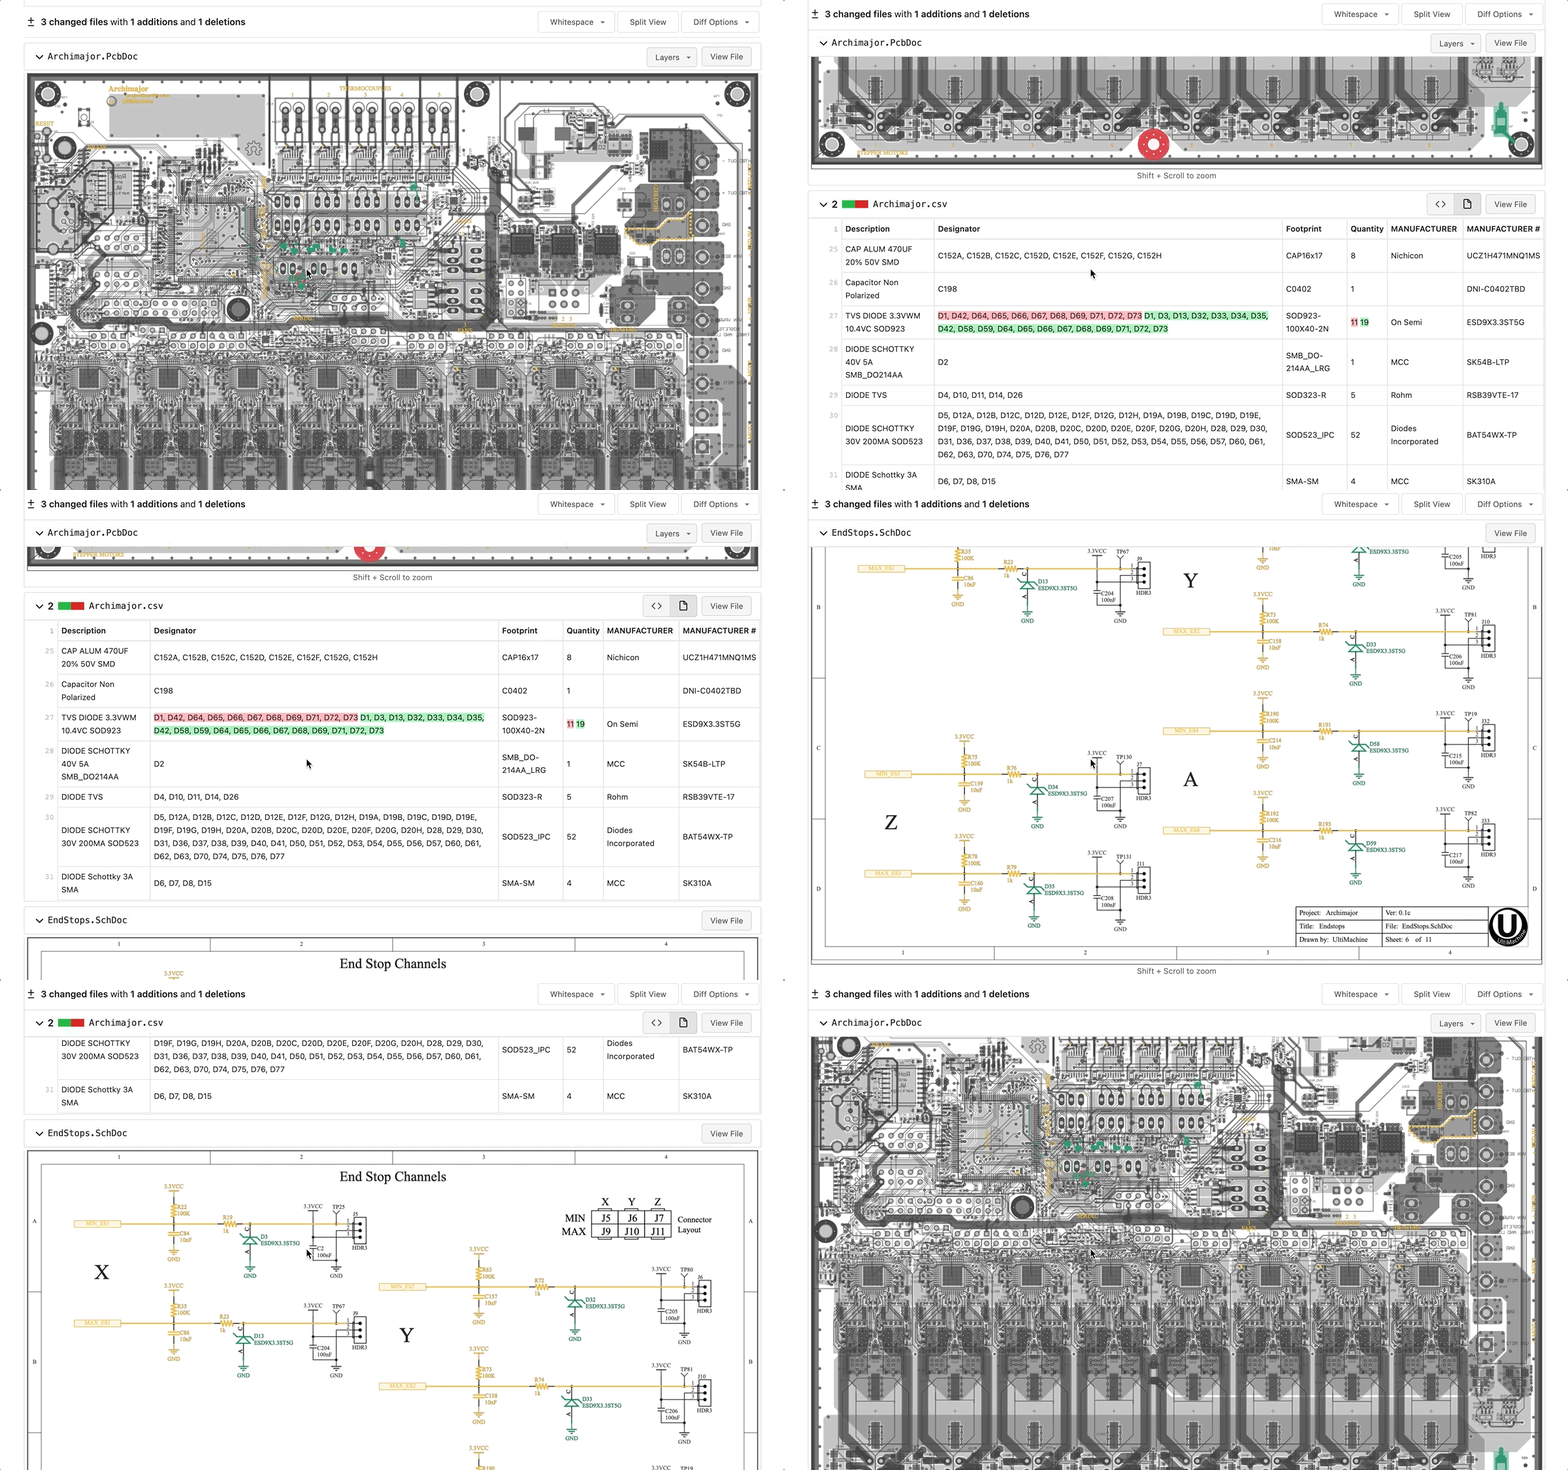
21. Redlines for review packages are automated. Every design review generates a visual comparison, or diff, between the last approved revision and the current one under review. These visual diffs highlight changes in PCBs, schematics, and BOMs.
After you review the changes, click New Design Review.

22. Update the Title of your review.
23. Edit the Description and add any supporting context.
You'll see pre-populated placeholders and a review checklist, inherited from the demo repo you cloned. To learn more about creating your own for future repositories, read our guide on design review templates.
This section supports Markdown as well, so you can use that to incorporate basic formatting - titles, subtitles, bullets, checkboxes, etc. See the Markdown cheat sheet for examples of what you can do!
For this demo, we recommend:
- Linking the previously created Issue by adding "Closes #1" under the Resolved Issues placeholder.
- Entering some context below the 'Description' placeholder.
24. Add Labels to identify the review.
We'll skip the rest of the fields for now. To learn more about all the features, read our Design Reviews 101 guide.
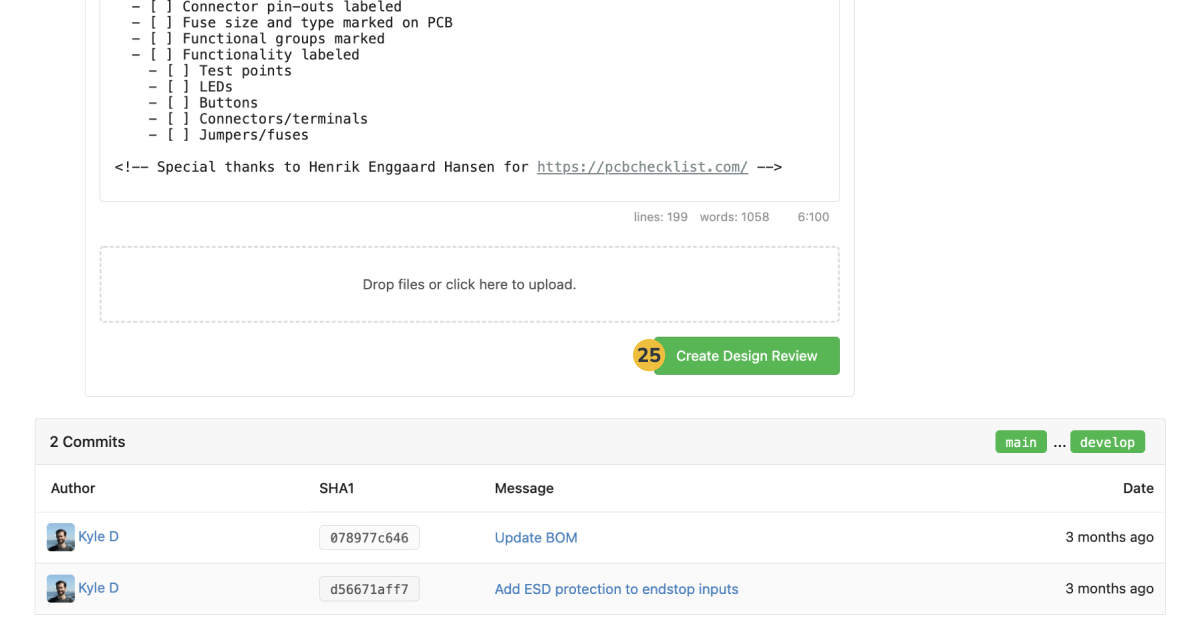
25. Once everything looks ready to you, scroll to the end of the description and select Create Design Review.
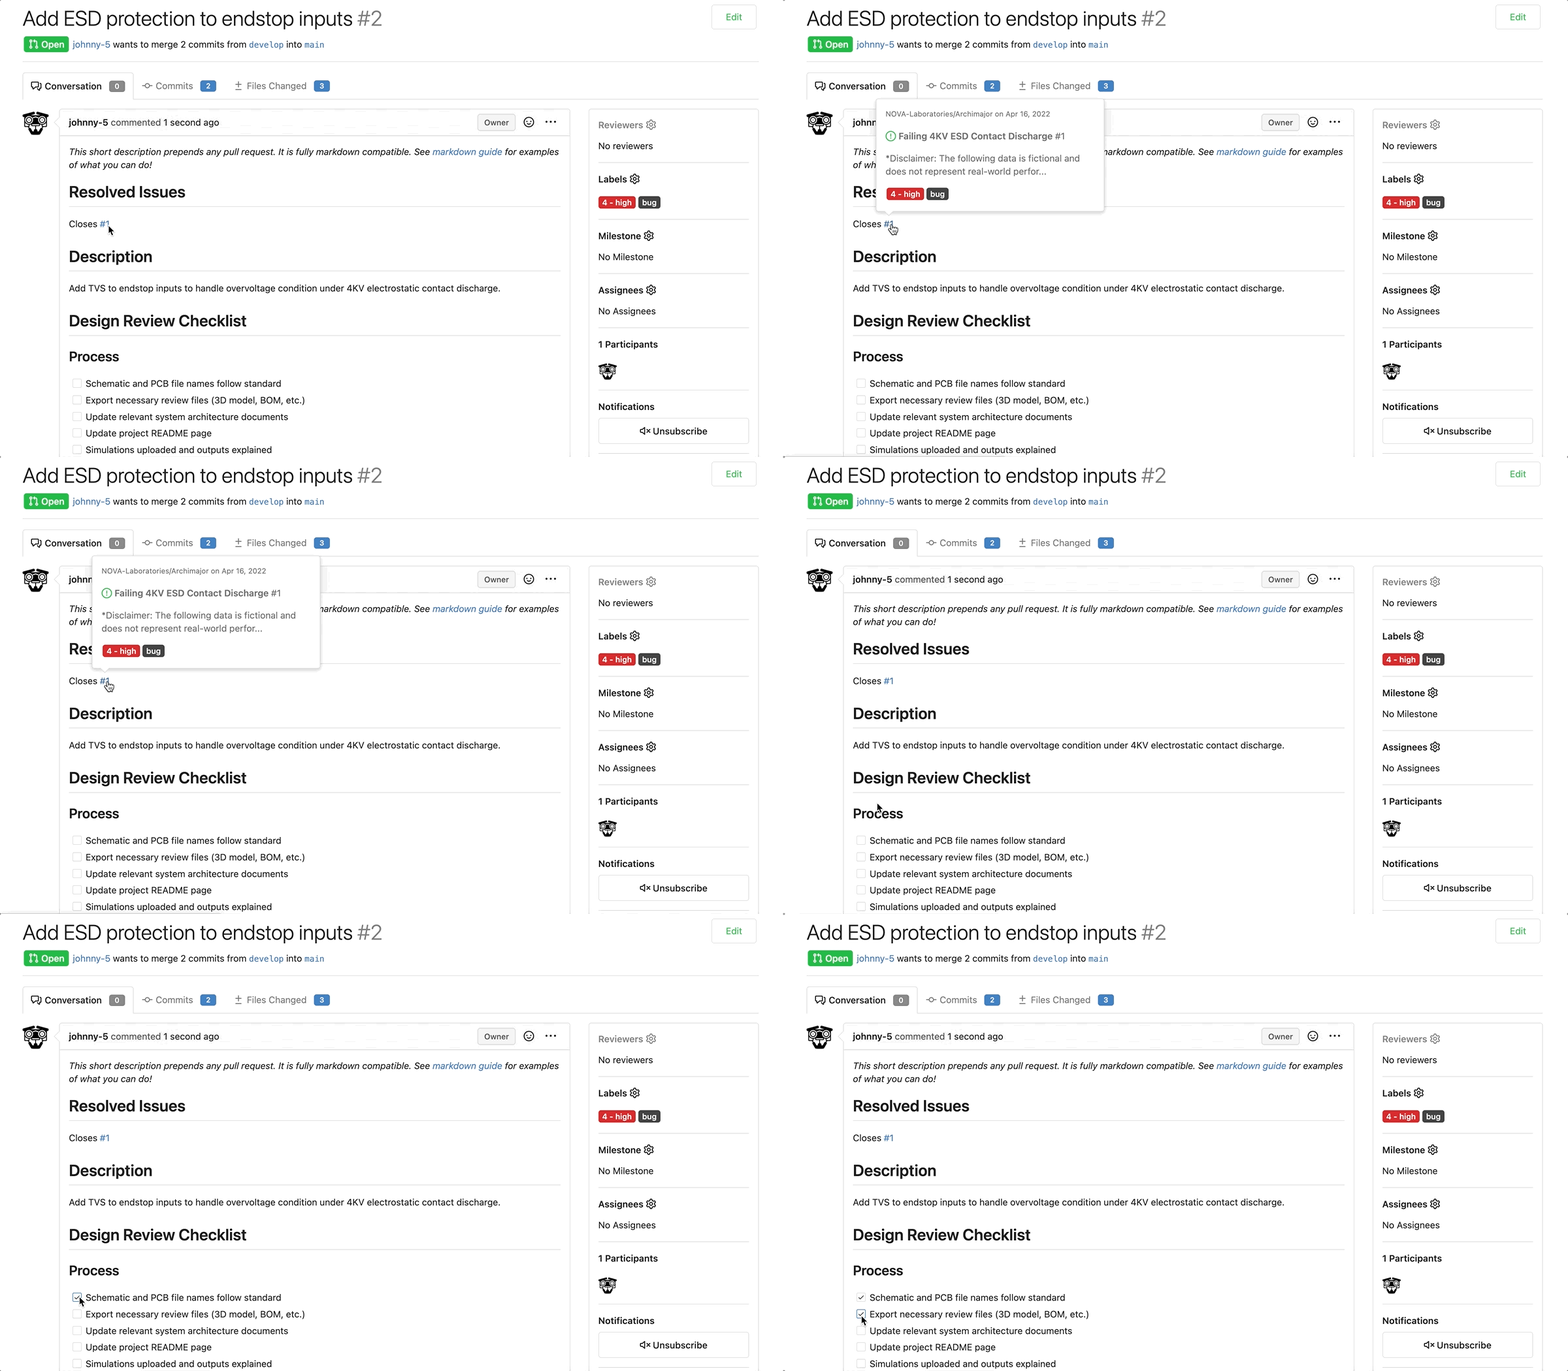
In your Design Review, you can hover over the linked Issue to see a brief description and try ticking some of the items in the checklist.
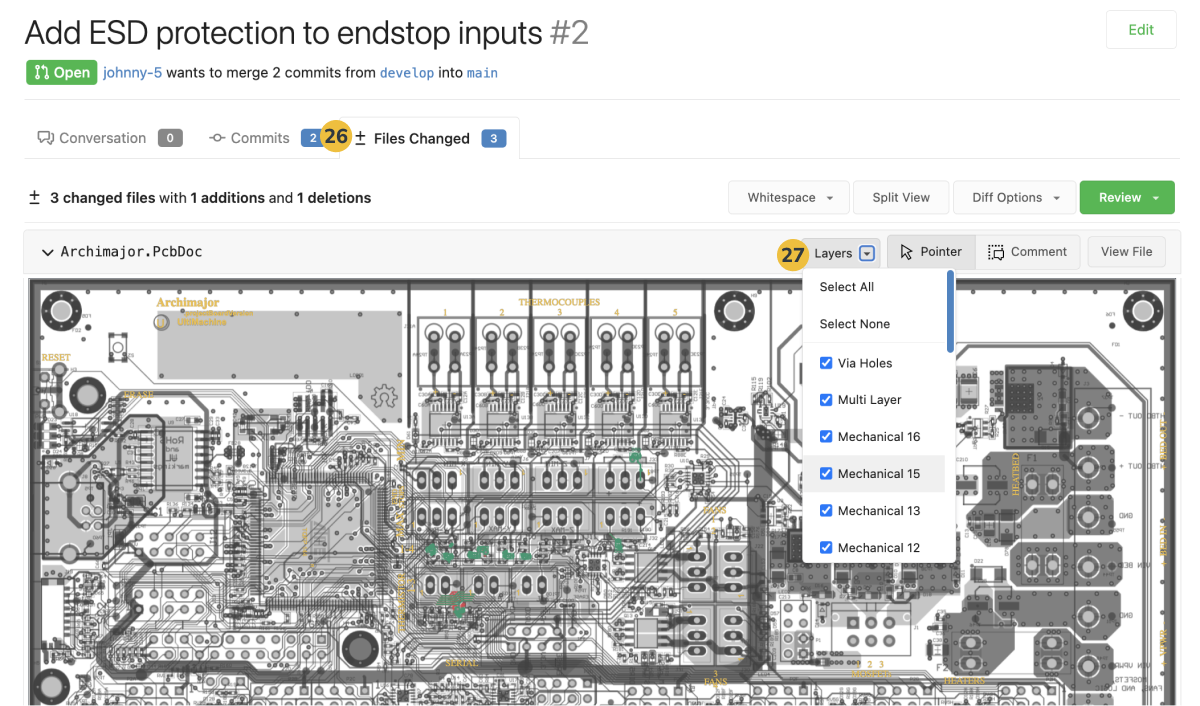
26. To view the diffs, go to Files Changed. In there, you can see the design PCB, BOM, and schematic redlines.
27. You can toggle layers on and off in PCBs from the drop-down menu at the top of the file.
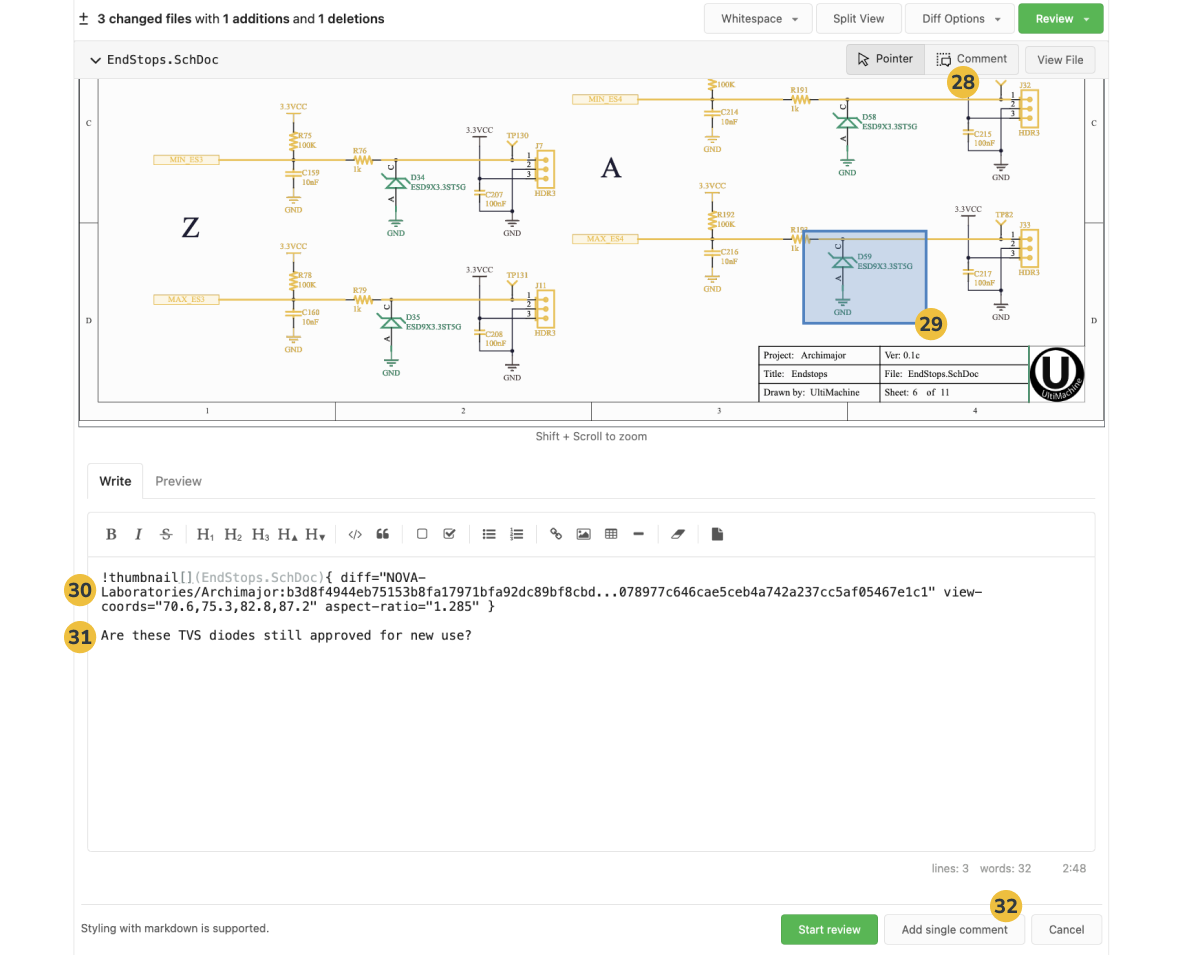
28. You can enter a Comment directly in PCBs or schematics from the top bar option.
29. In comment mode, you can select an area to reference, and click the + sign to create a snippet to go with your notes.
30. In the comment card, you'll see the Markdown-style reference to the thumbnail in the body. You can click Preview to see the snippet.
31. Back in the Write tab, type a message after the thumbnail placeholder.
32. When ready, select Add single comment.
Feel free to add more comments, reply to the comment you just created, or try any other interactions.
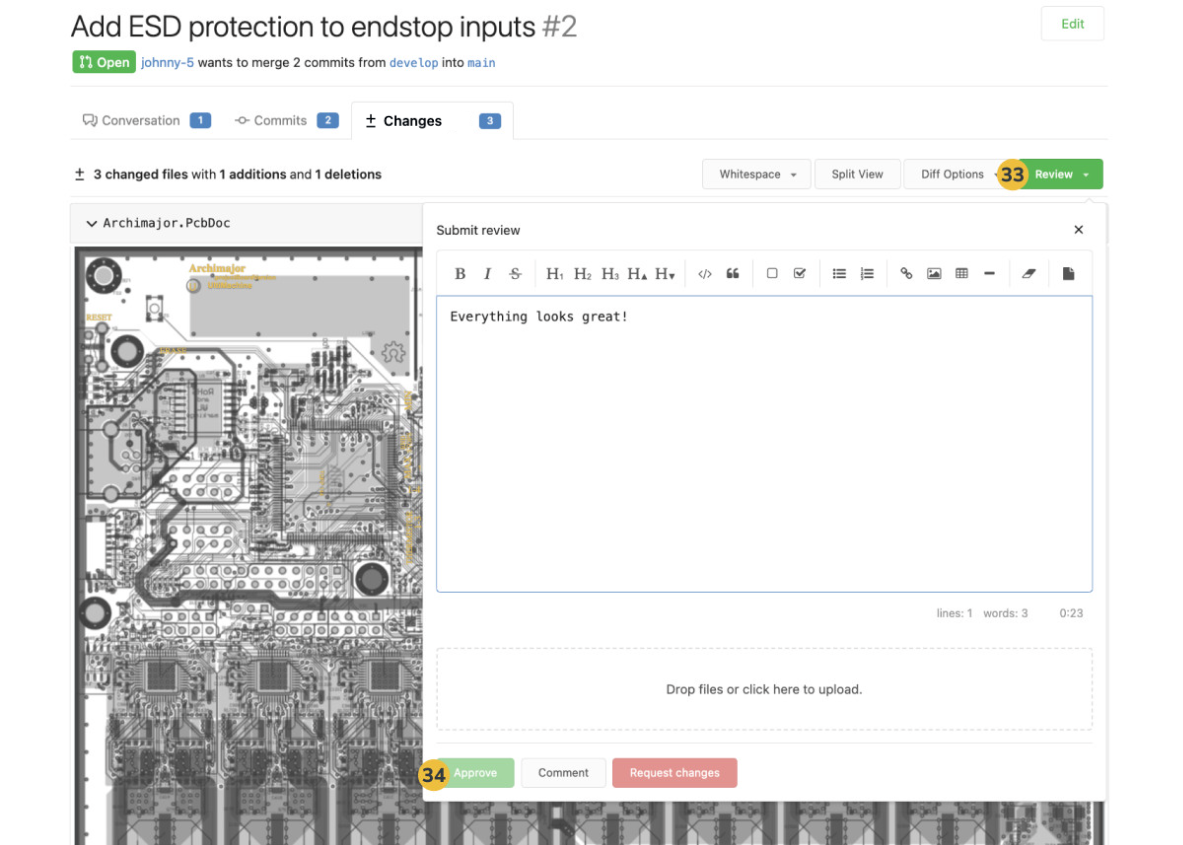
Even though in this case you actually won't be able to approve the design review since you're the owner (you'll notice the button greyed out), to do so you would:
33. Head to Review at the top right of the Changes tab.
34. From there, you can enter a message to record the context of your decision and Approve.
And that is it! This concludes the AllSpice crash course.
To keep learning how to use AllSpice, check out the rest of the Getting Started tutorials.
And, if you have any questions as you get started, contact us at support@allspice.io and we'd be happy to help.