Overview
Repository templates are pre-configured settings and information you can use to pre-populate new repositories. They help you standardize documentation across teams, avoid human error, and streamline workflows.
Steps to create a repo template
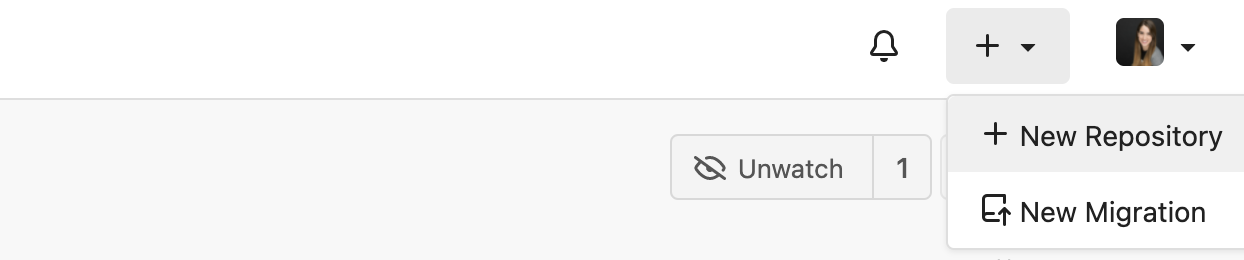
0. Open a New Repository page
Start a new repo from the drop-down menu to the left of your profile picture, at the top right corner of the screen. This will open a new page where you'll enter all the repository template configurations.
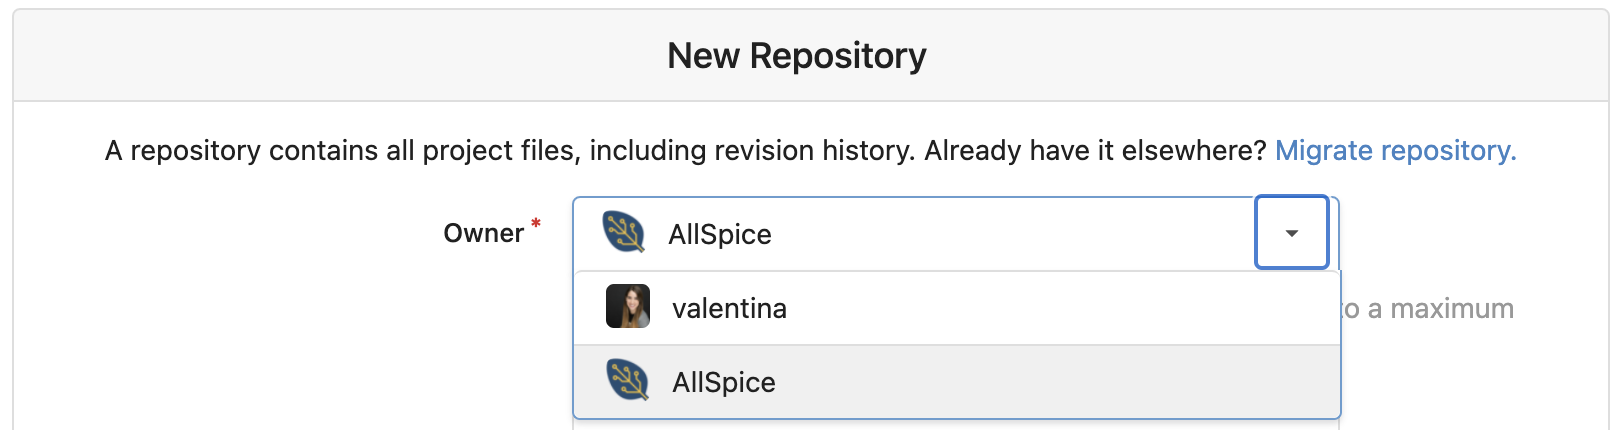
1. Set the owner
In the new repo page, start by selecting the owner. If you are part of an organization, you should make your organization the owner so others in your team will have access to the new repo. Set yourself as the owner only if you intend to use this template for personal projects, and don't plan to share it with your teammates initially.
2. Repository name
Name your repository using only alphanumeric, dash ('-'), underscore ('_') and dot ('.') characters. We recommend including the word 'template' or similar to make it easy to find and identify.

3. Visibility
By default, you should set visibility as private. This will allow only teams and organization members access to the new repository if they have been granted permissions in the organization's settings. Members can also be granted direct access in repository settings after the repository is created.

If the owner in step 1 above is set to your organization, unchecking "Private" will have different behaviors depending on how organization visibility is set:
- Visibility Private (default): All users in an organization can view the repository content.
- Visibility Limited: Anyone with an AllSpice login can view the repository content.
- Visibility Public: Anyone can view the repository content.
If the owner above is set to your username, unchecking "Private" will allow anyone to view the repository content. If you do this, we strongly suggest adding an open-source license in Step 7 below.
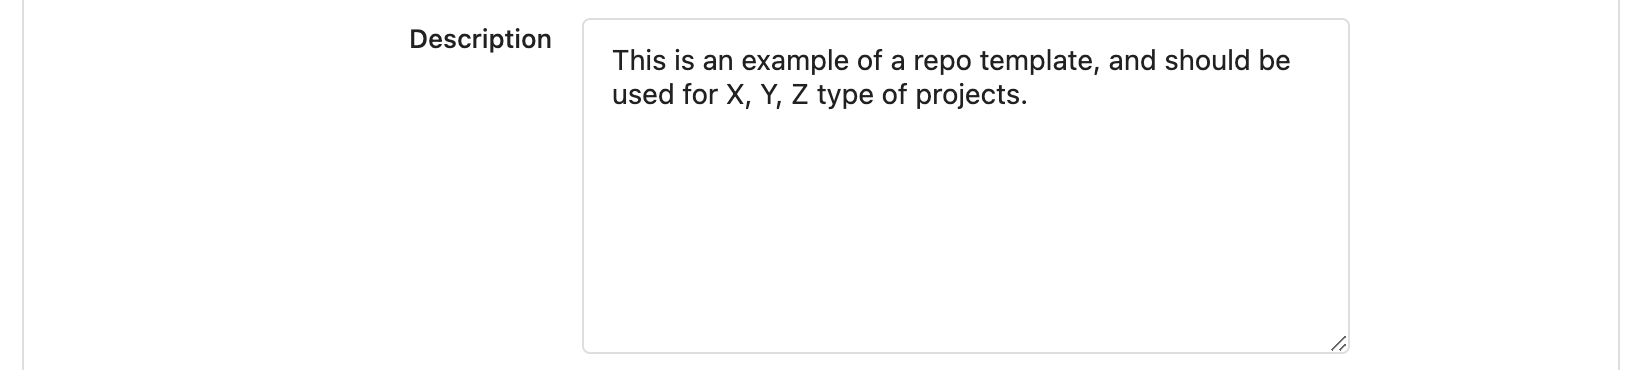
4. Enter a description (optional)
The contents of this description will appear both in the README file of your repository template.
If you have more than one template, you can use this section to add more details on when this template should be used.
5. Template
Unless you're basing this template off of another, leave the Template field blank.

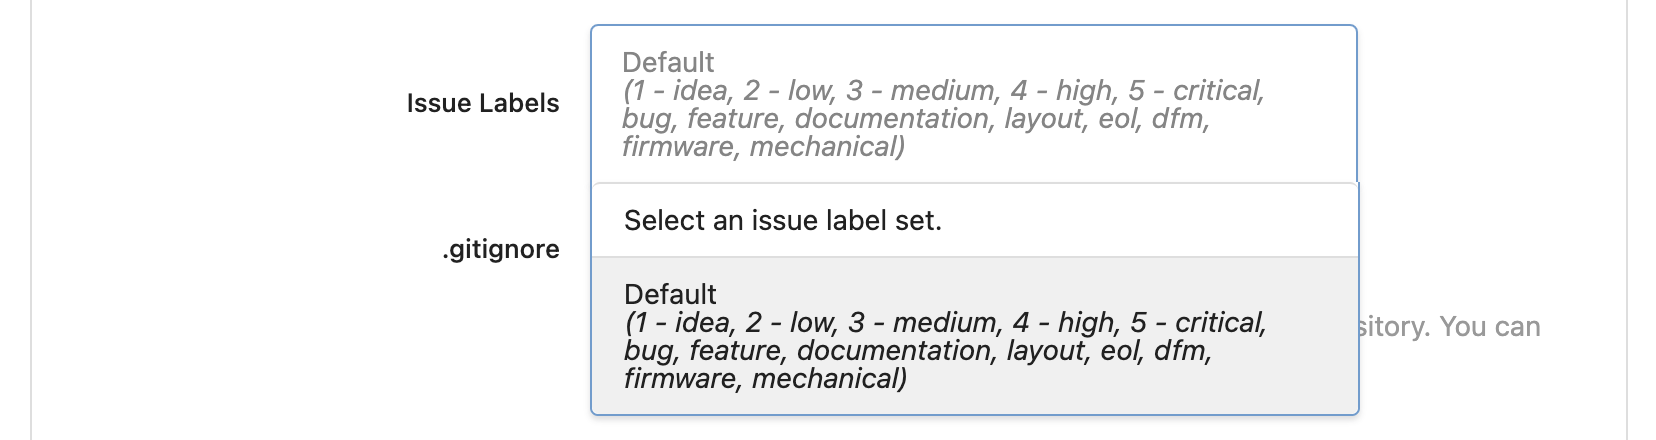
5. Issue Labels
Here you can select an initial set of labels you can later apply to issues you create. You can select the default group, which is a pre-created set of hardware labels. These can be further configured in organization settings.
6. Gitignore
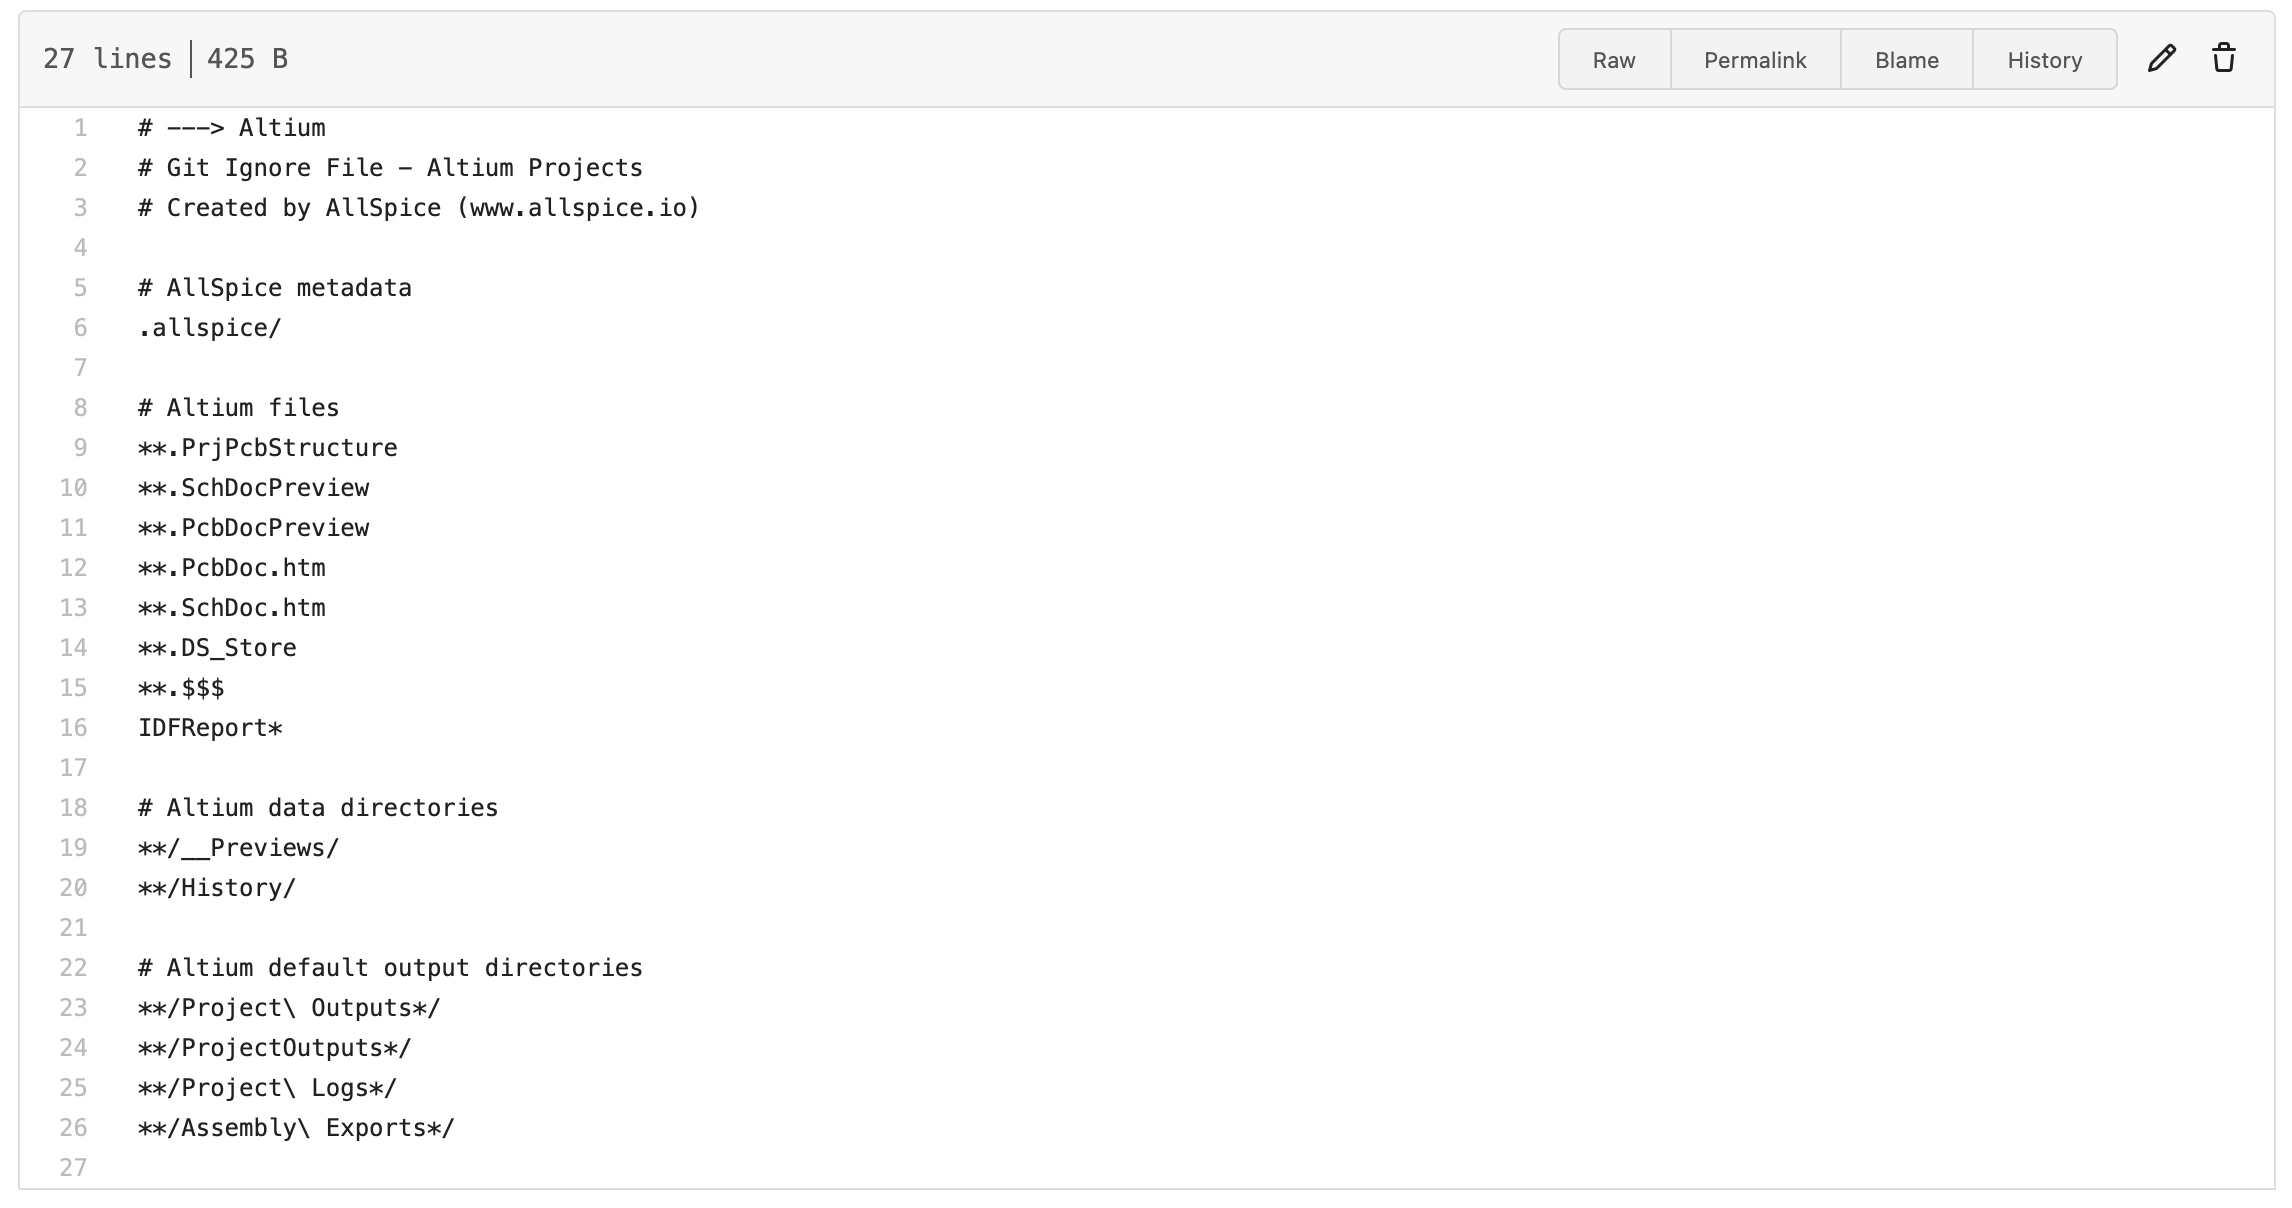
A .gitignore file will tell git what files and folders it can ignore in a directory. If you are using Altium, type and select Altium from the list to use AllSpice's pre-populated .gitignore. This .gitignore prevents file types that don't need to be revision-controlled, like previews, temporaries, or assembly exports, from bloating your repository. You can view and edit this later after you have created the repository.
If you will be adding C-code or other firmware to this repository, you can add those as well.

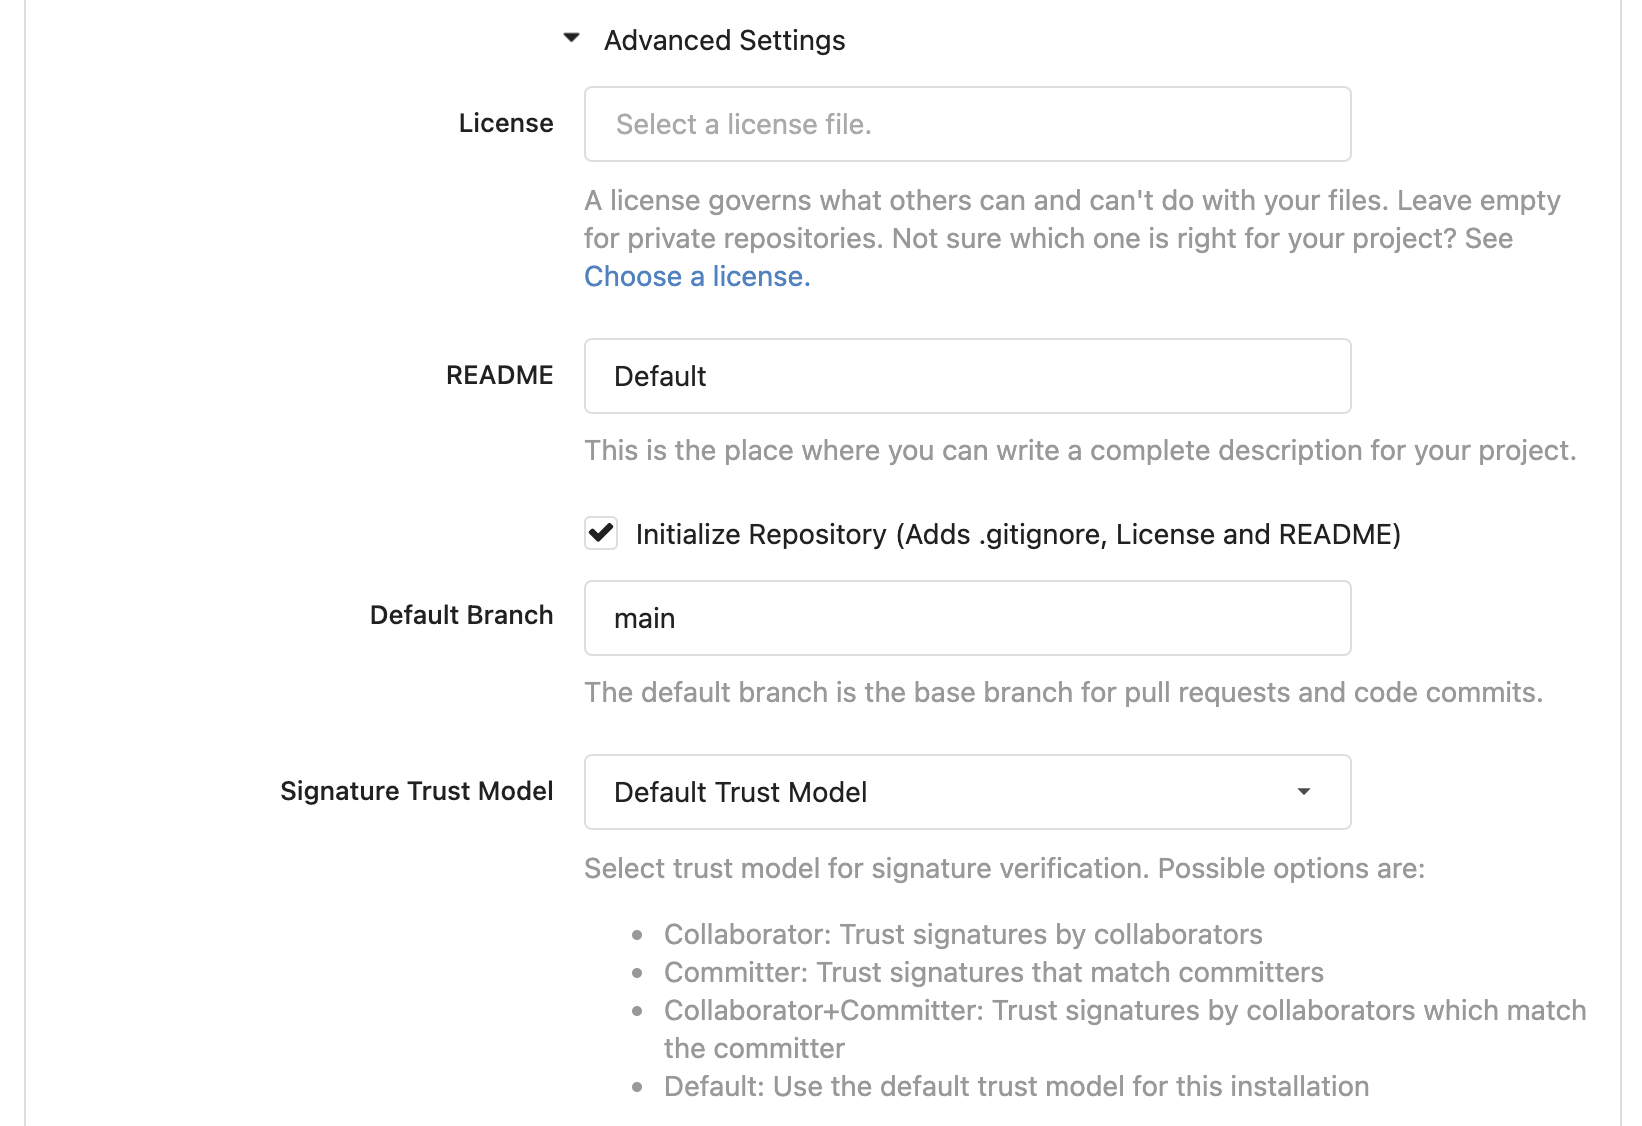
7-10. Advanced Settings: License, README, Default Branch, and Signature Trust Model
Unless you are an advanced user, the following setting can be left at default. You can find more information on these settings in the description.
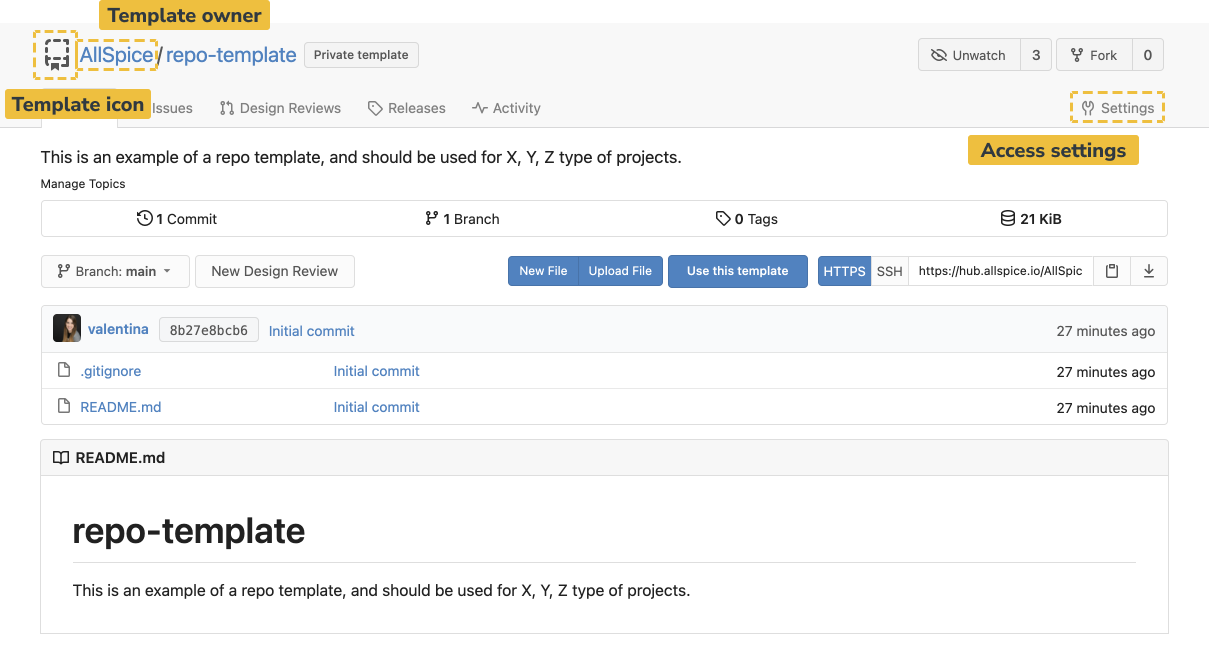
11. Make repository a template
Check the last entry to make this repo a template to create new repositories from.

12. Create
After reviewing all your new repository configurations, click Create Repository at the end. This will take you to your new repo template file page, where you can see an overview. From there, you can access the settings to make any changes.