The Design page opens when you select a project. It shows your schematics and boards in a large viewer. Use it to find a sheet, trace a net across sheets, and check a part's parameters, without going back to your ECAD tool.
Note: The Design page is part of the new Allspice. You can switch back to Allspice Classic at any time. See Switch between the new Allspice and Classic below.
What is on the Design page
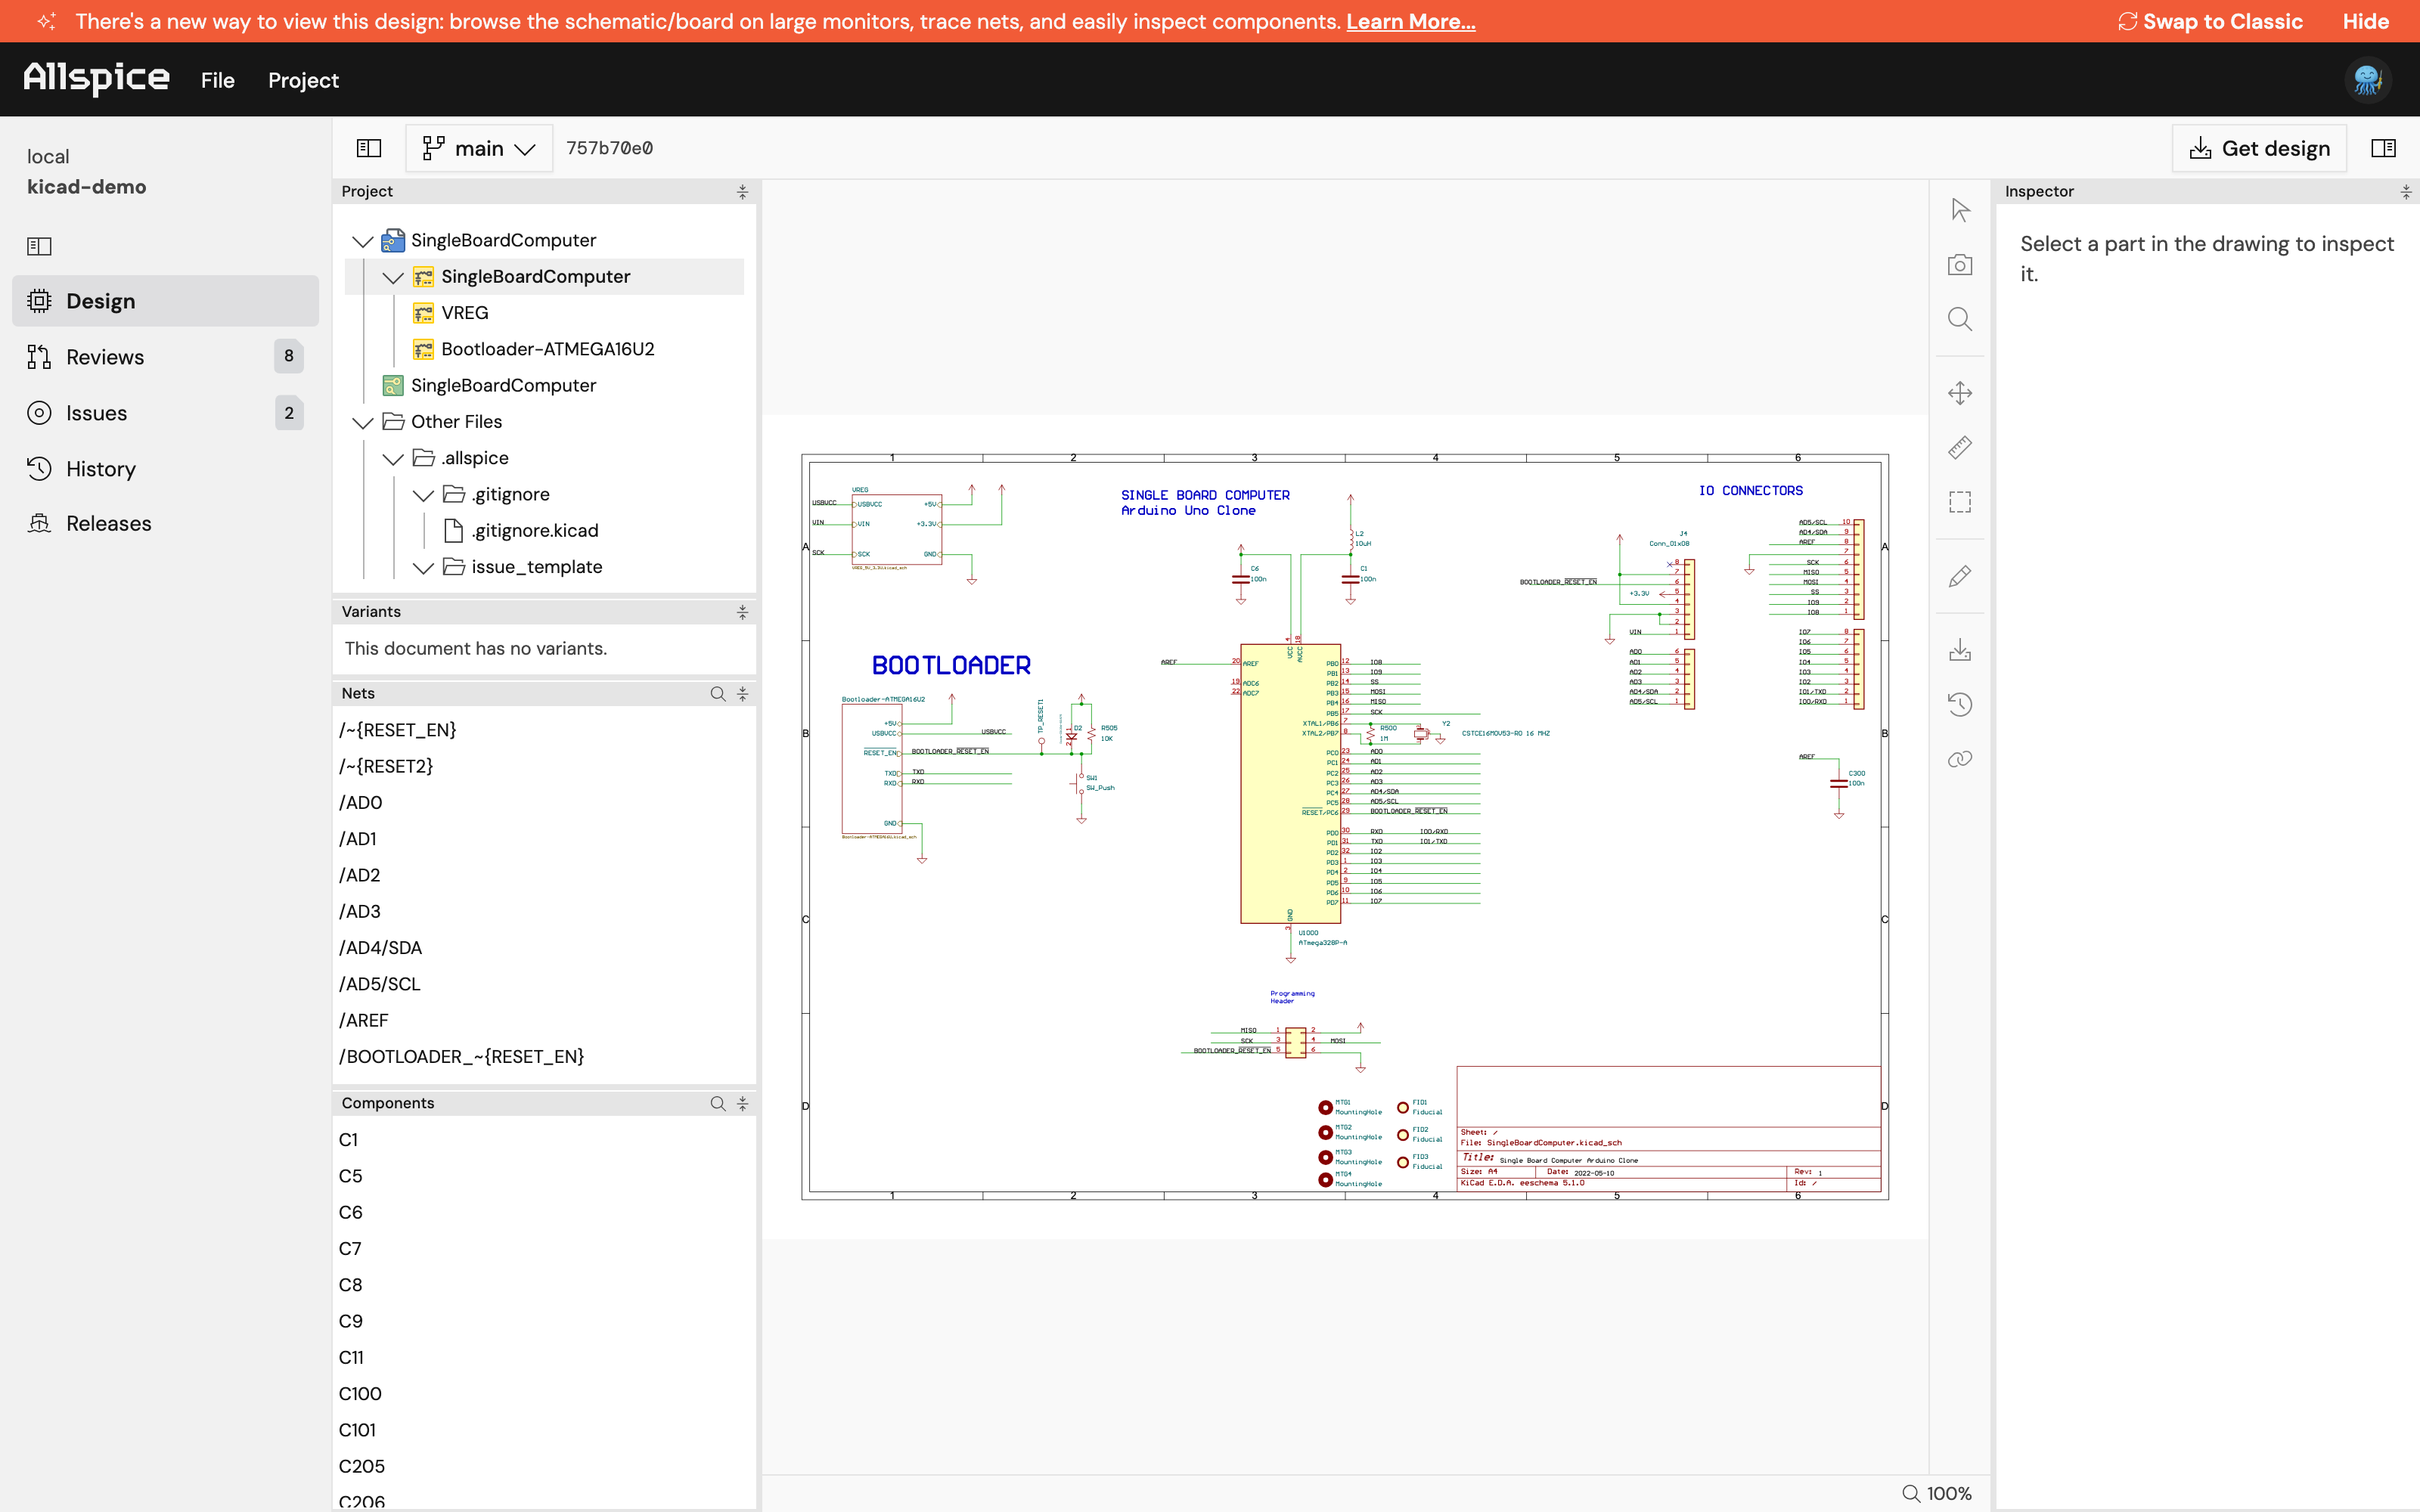
The Design page has five parts, from left to right:
- The project sidebar shows the project name and links to the project's Design, Reviews, Issues, History, and Releases.
- The top bar shows the branch you are looking at, the commit, and the Get design button.
- The navigation panel has four sections: Project, Variants, Nets, and Components.
- The viewer shows the selected schematic sheet or board.
- The Inspector shows details about the part or net you select.
The Project menu in the menu bar holds the actions for the project.
Walkthrough: inspect a design
1. Open a project
- On the Home page, select a project.
The project opens on the Design page. Allspice opens the first schematic of the project.
2. Check the branch
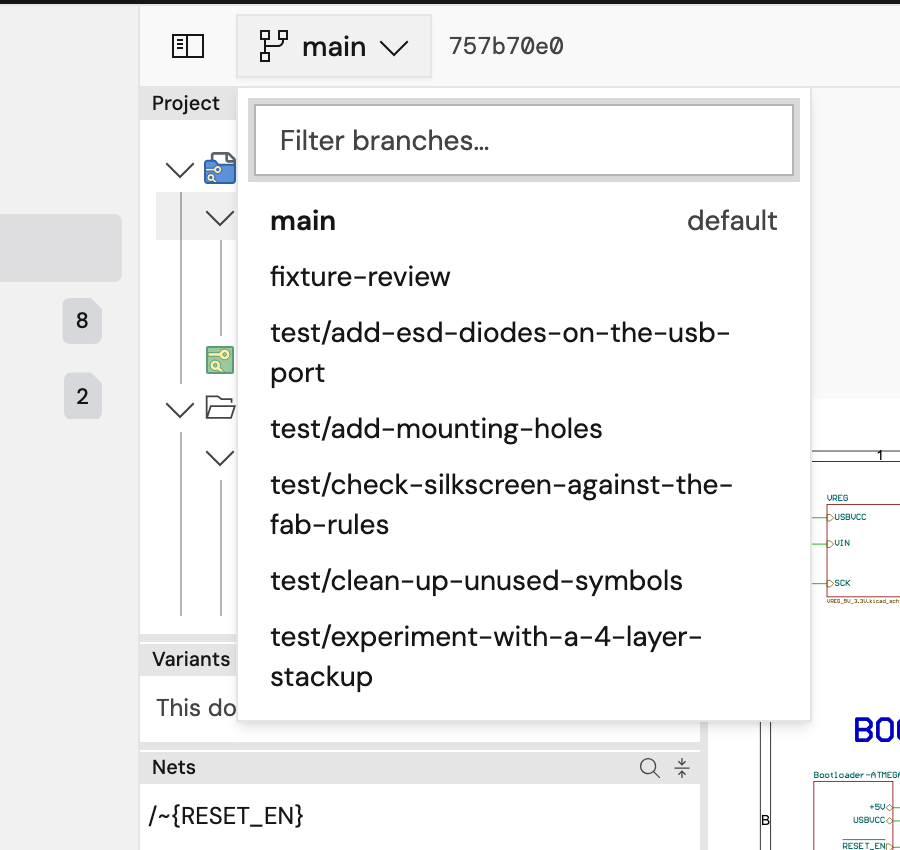
The branch selector in the top bar shows which branch you are looking at. The commit next to it shows the exact version.
- Select the branch name, for example main.
- Type in Filter branches... to find a branch.
- Select a branch.
The page shows the design on that branch. The default branch is marked default.
3. Open a sheet or a board
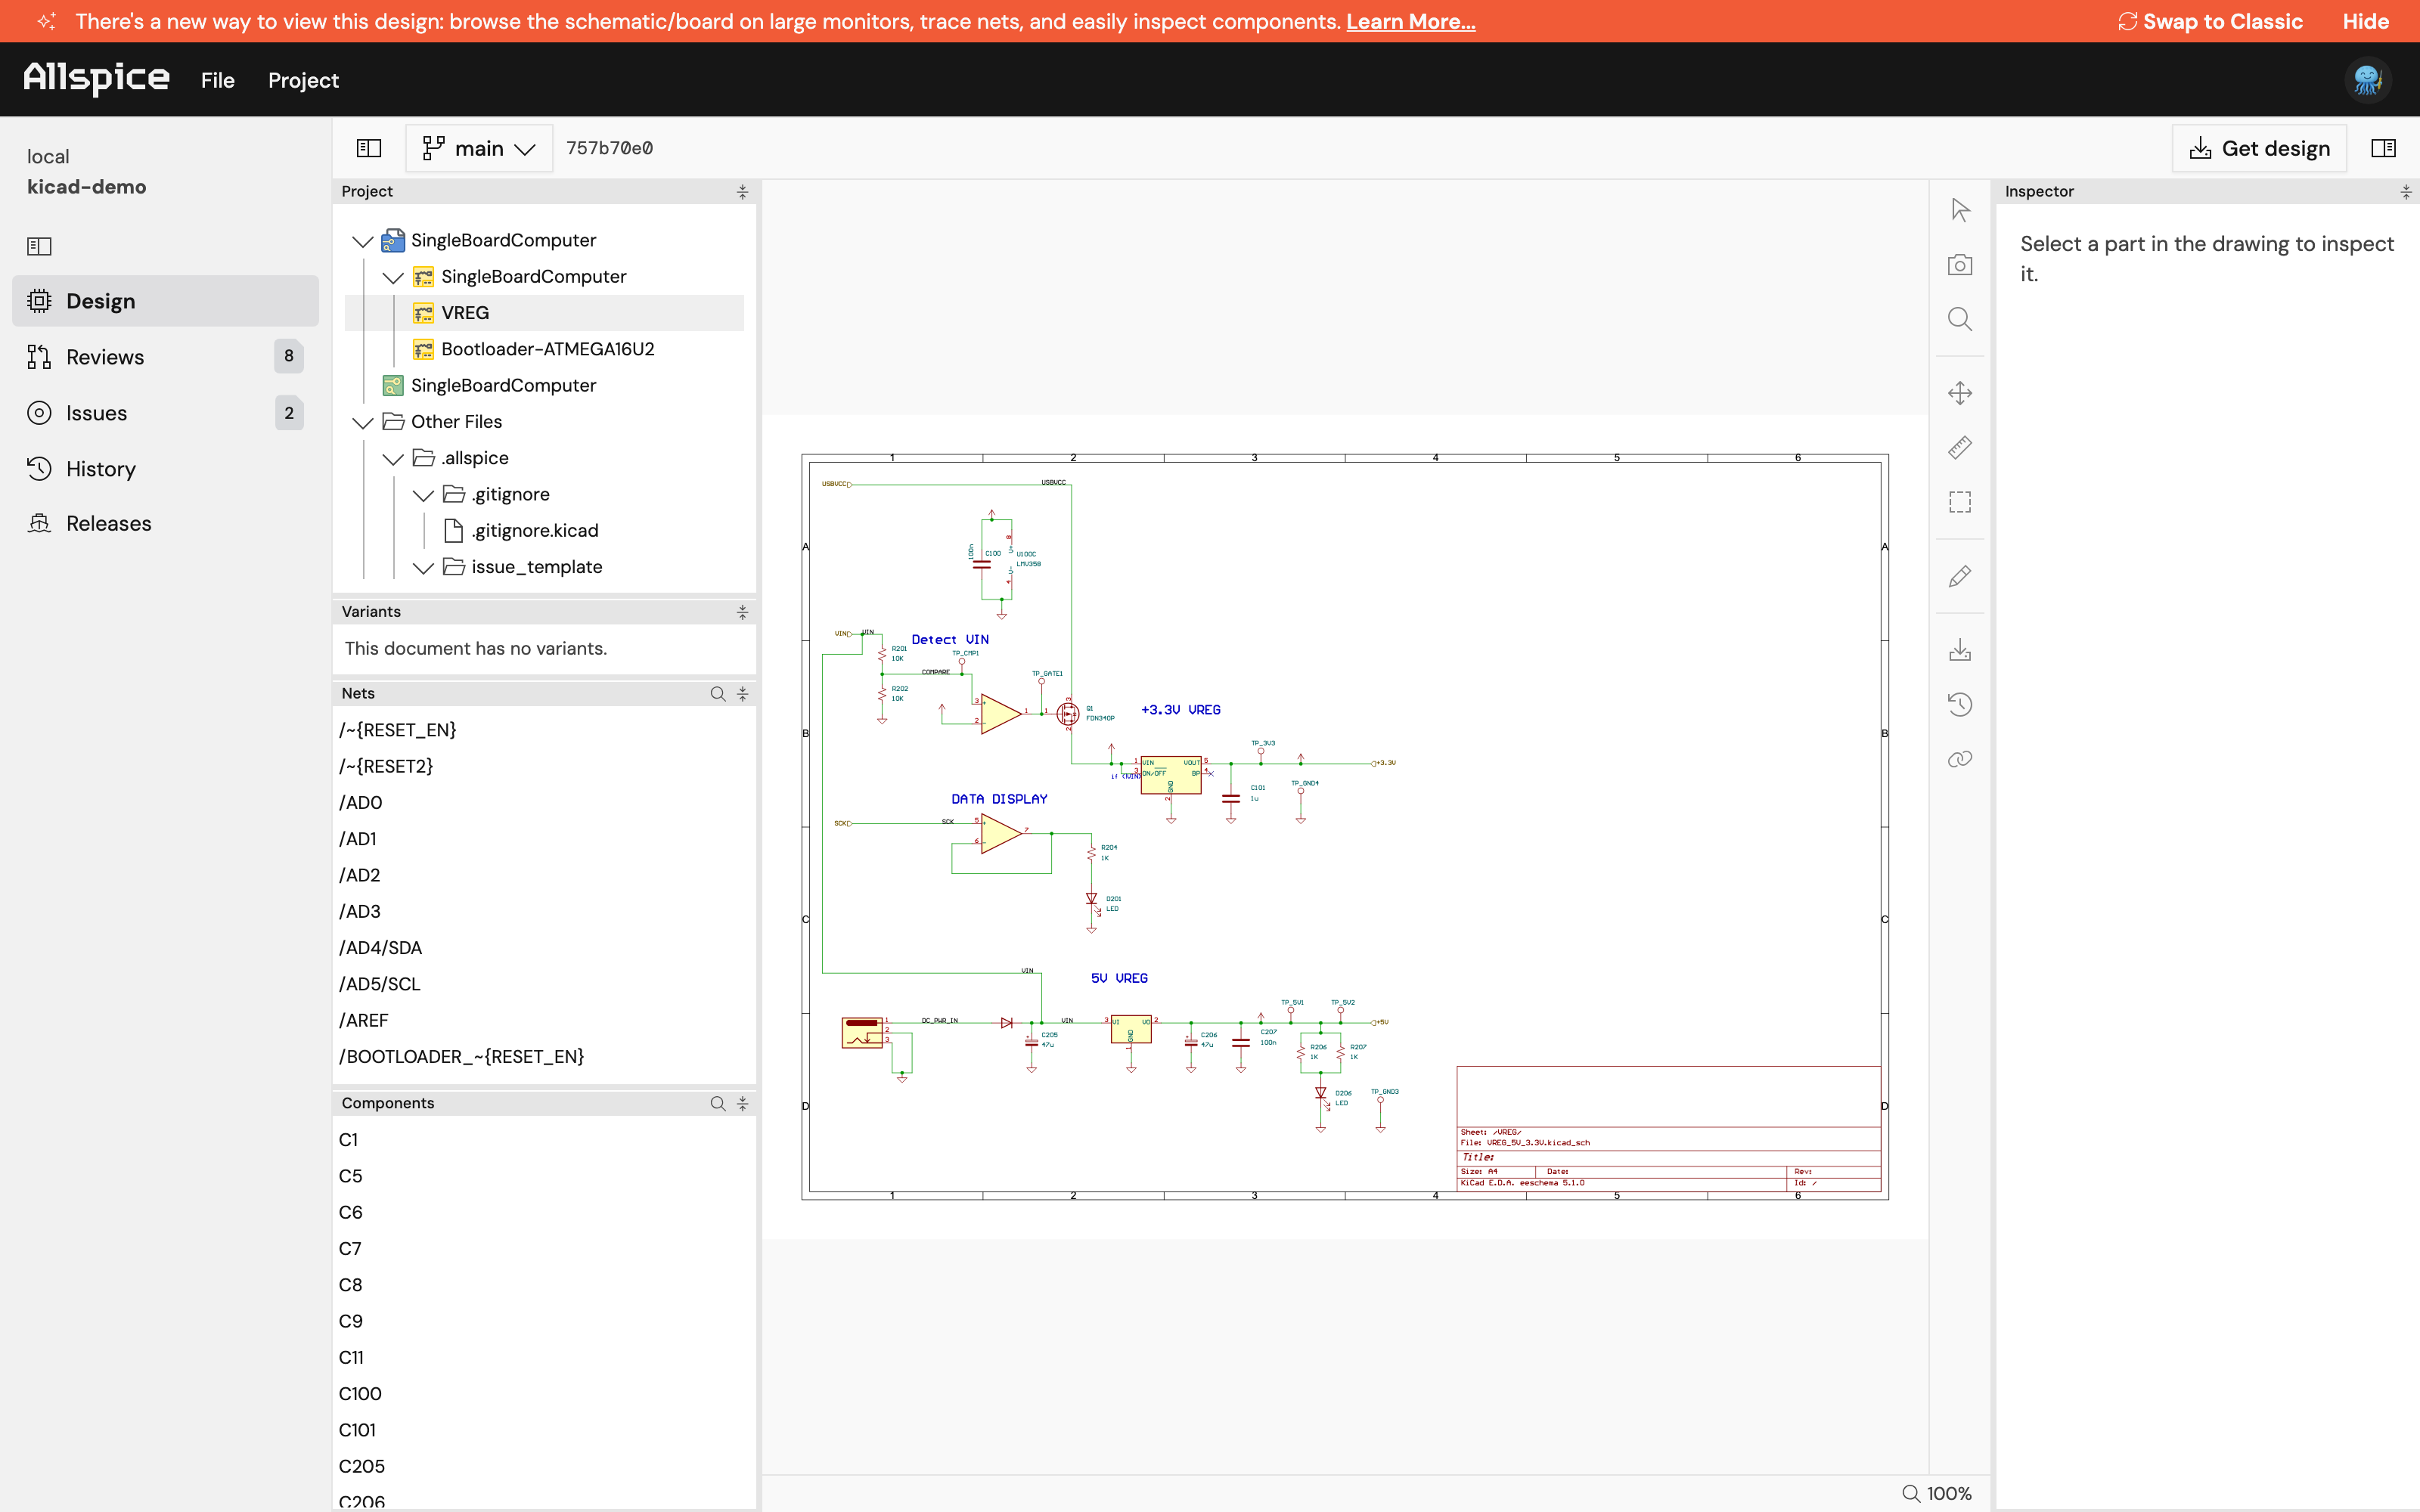
The Project section of the navigation panel shows the design tree. The tree lists each ECAD project, its schematic sheets, and its board. Files that are not ECAD documents are under Other Files.
- Select a sheet or a board in the tree.
The viewer shows it.
4. Move around the drawing
- Pan: drag the drawing.
- Zoom in: double-click the drawing.
- Zoom out: hold Option and double-click on a Mac. Hold Ctrl and double-click on Windows or Linux.
- Zoom with the scroll wheel: hold Shift and scroll on a Mac. Hold Ctrl and scroll on Windows or Linux.
The zoom level shows in the bottom-right corner of the viewer.
5. Find and trace a net
- In the Nets section, select the search icon.
- Type part of the net name, for example
5V. - Select the net in the list.
The Inspector shows the net: its pins, wires, and connections. The Where used list shows each sheet that uses the net, and how many pins it has on that sheet.
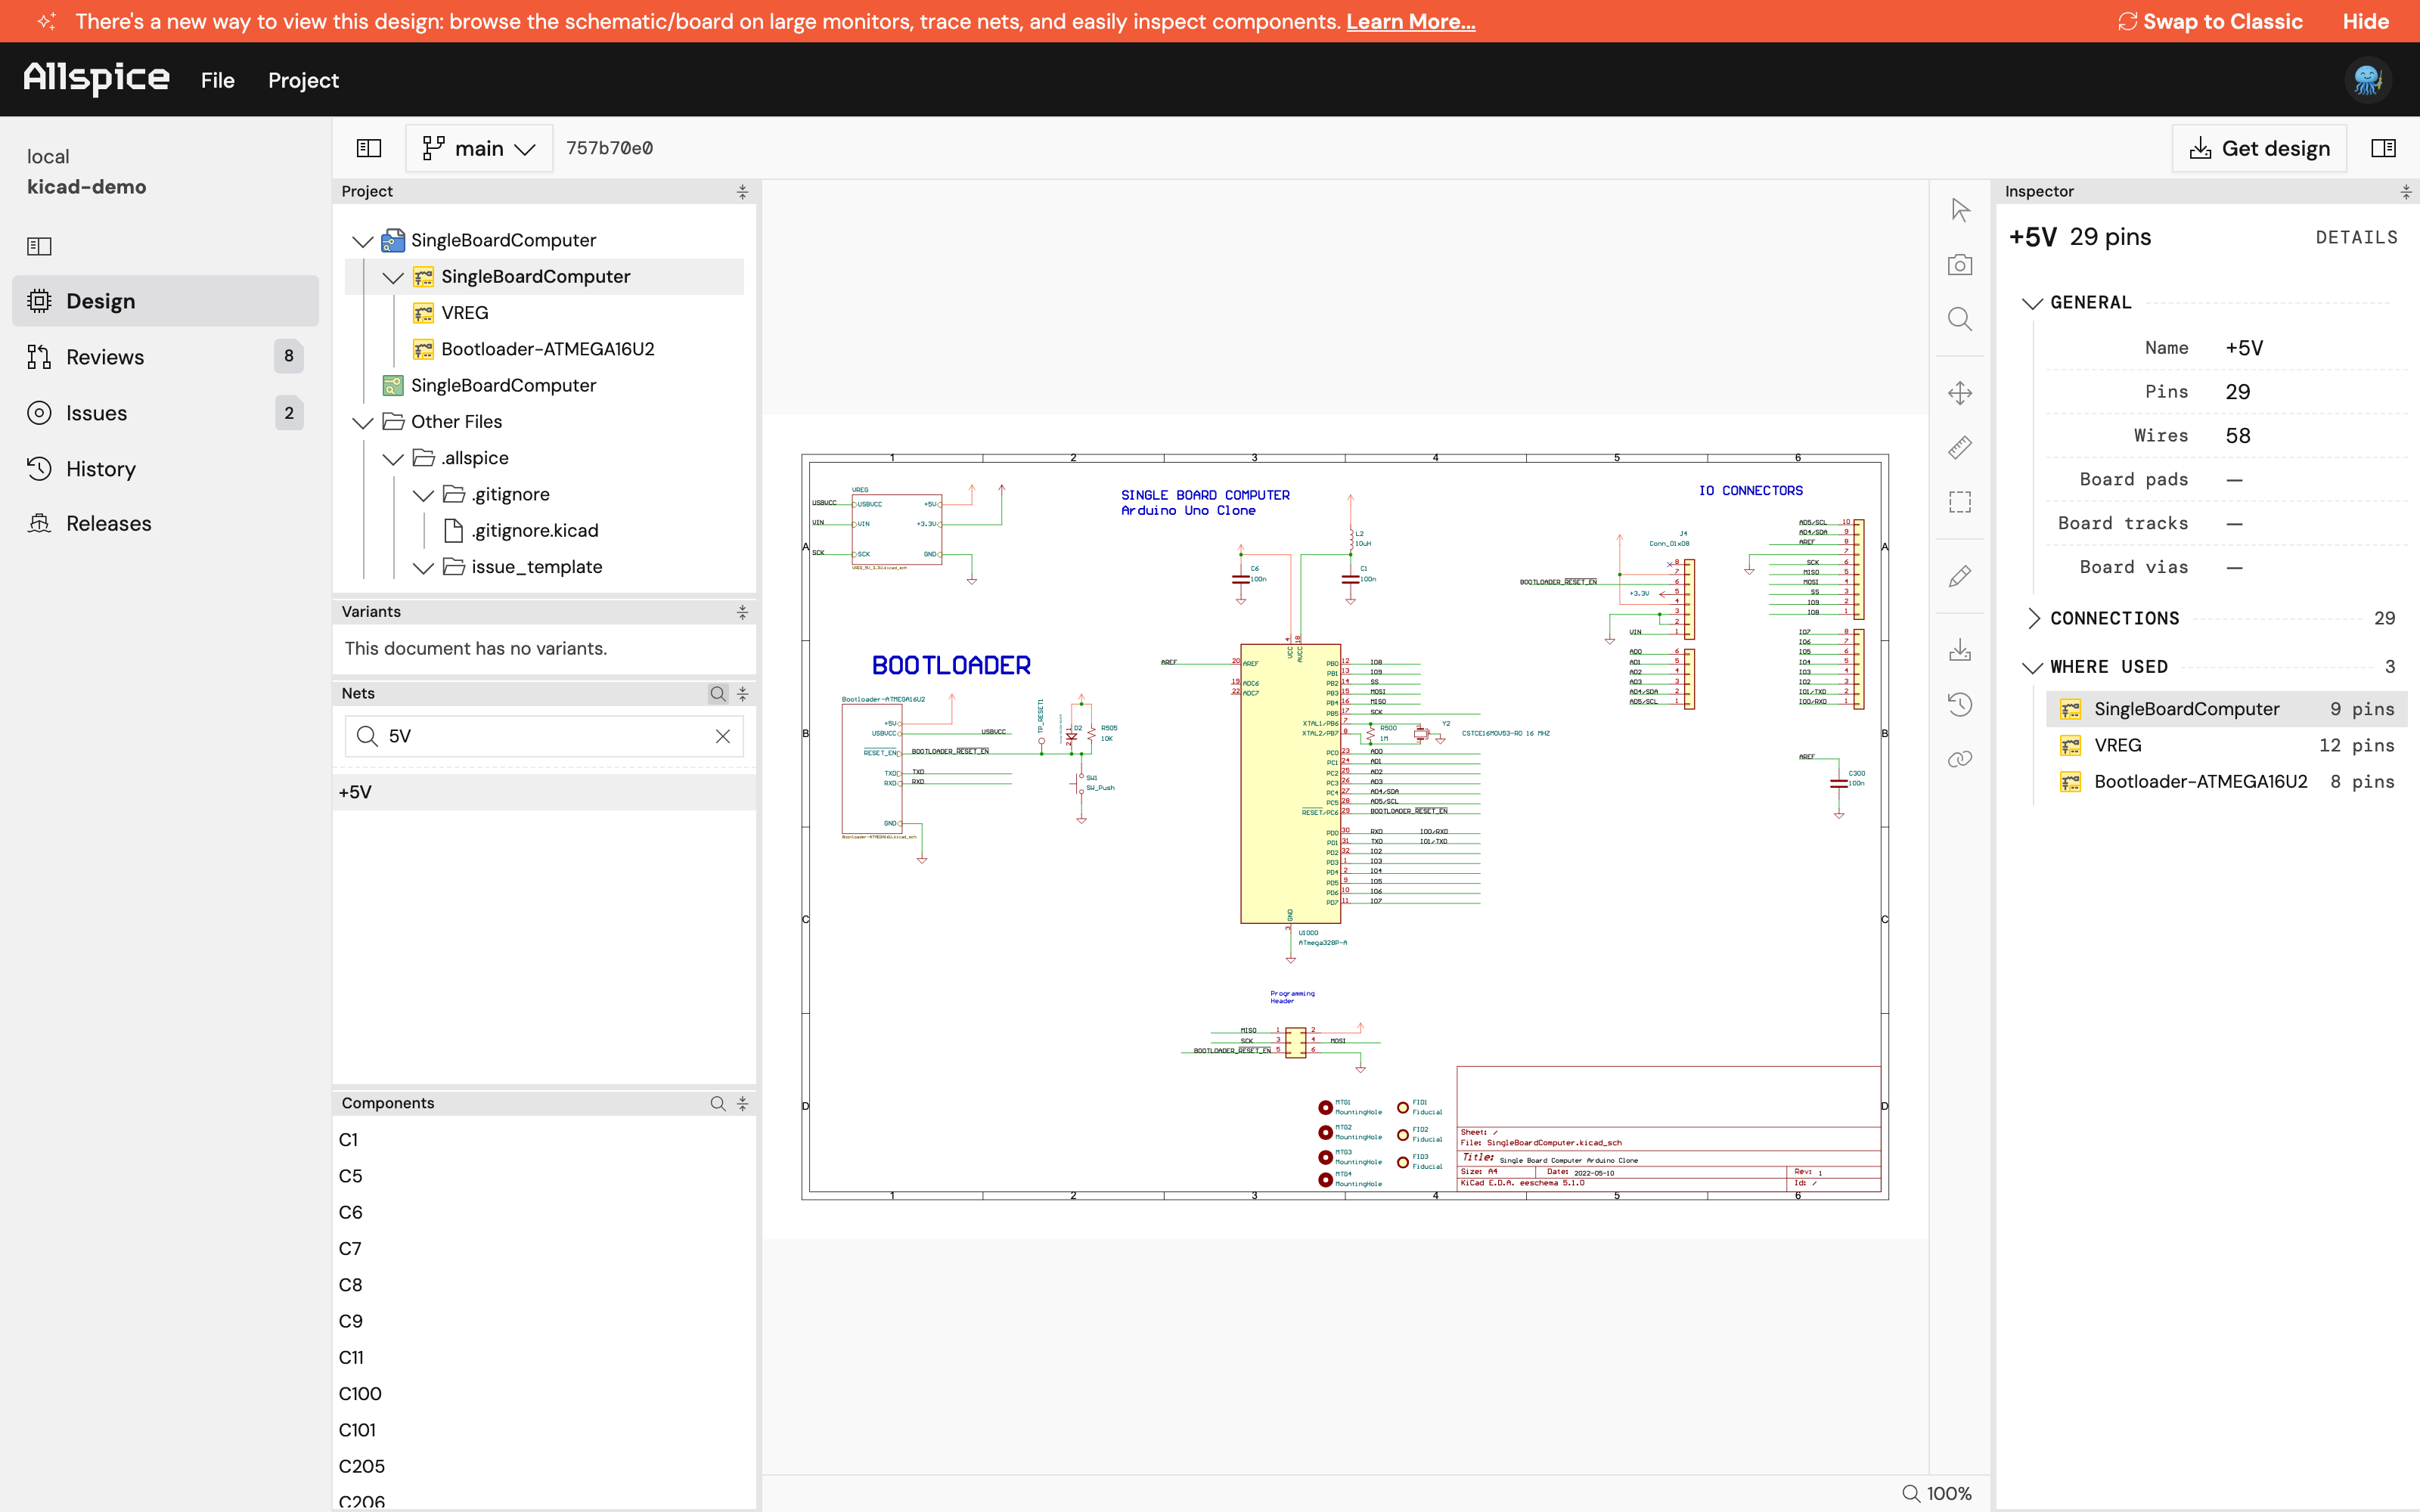
To follow the net to another sheet:
- Select a sheet in the Where used list.
The viewer opens that sheet, and the net stays selected.
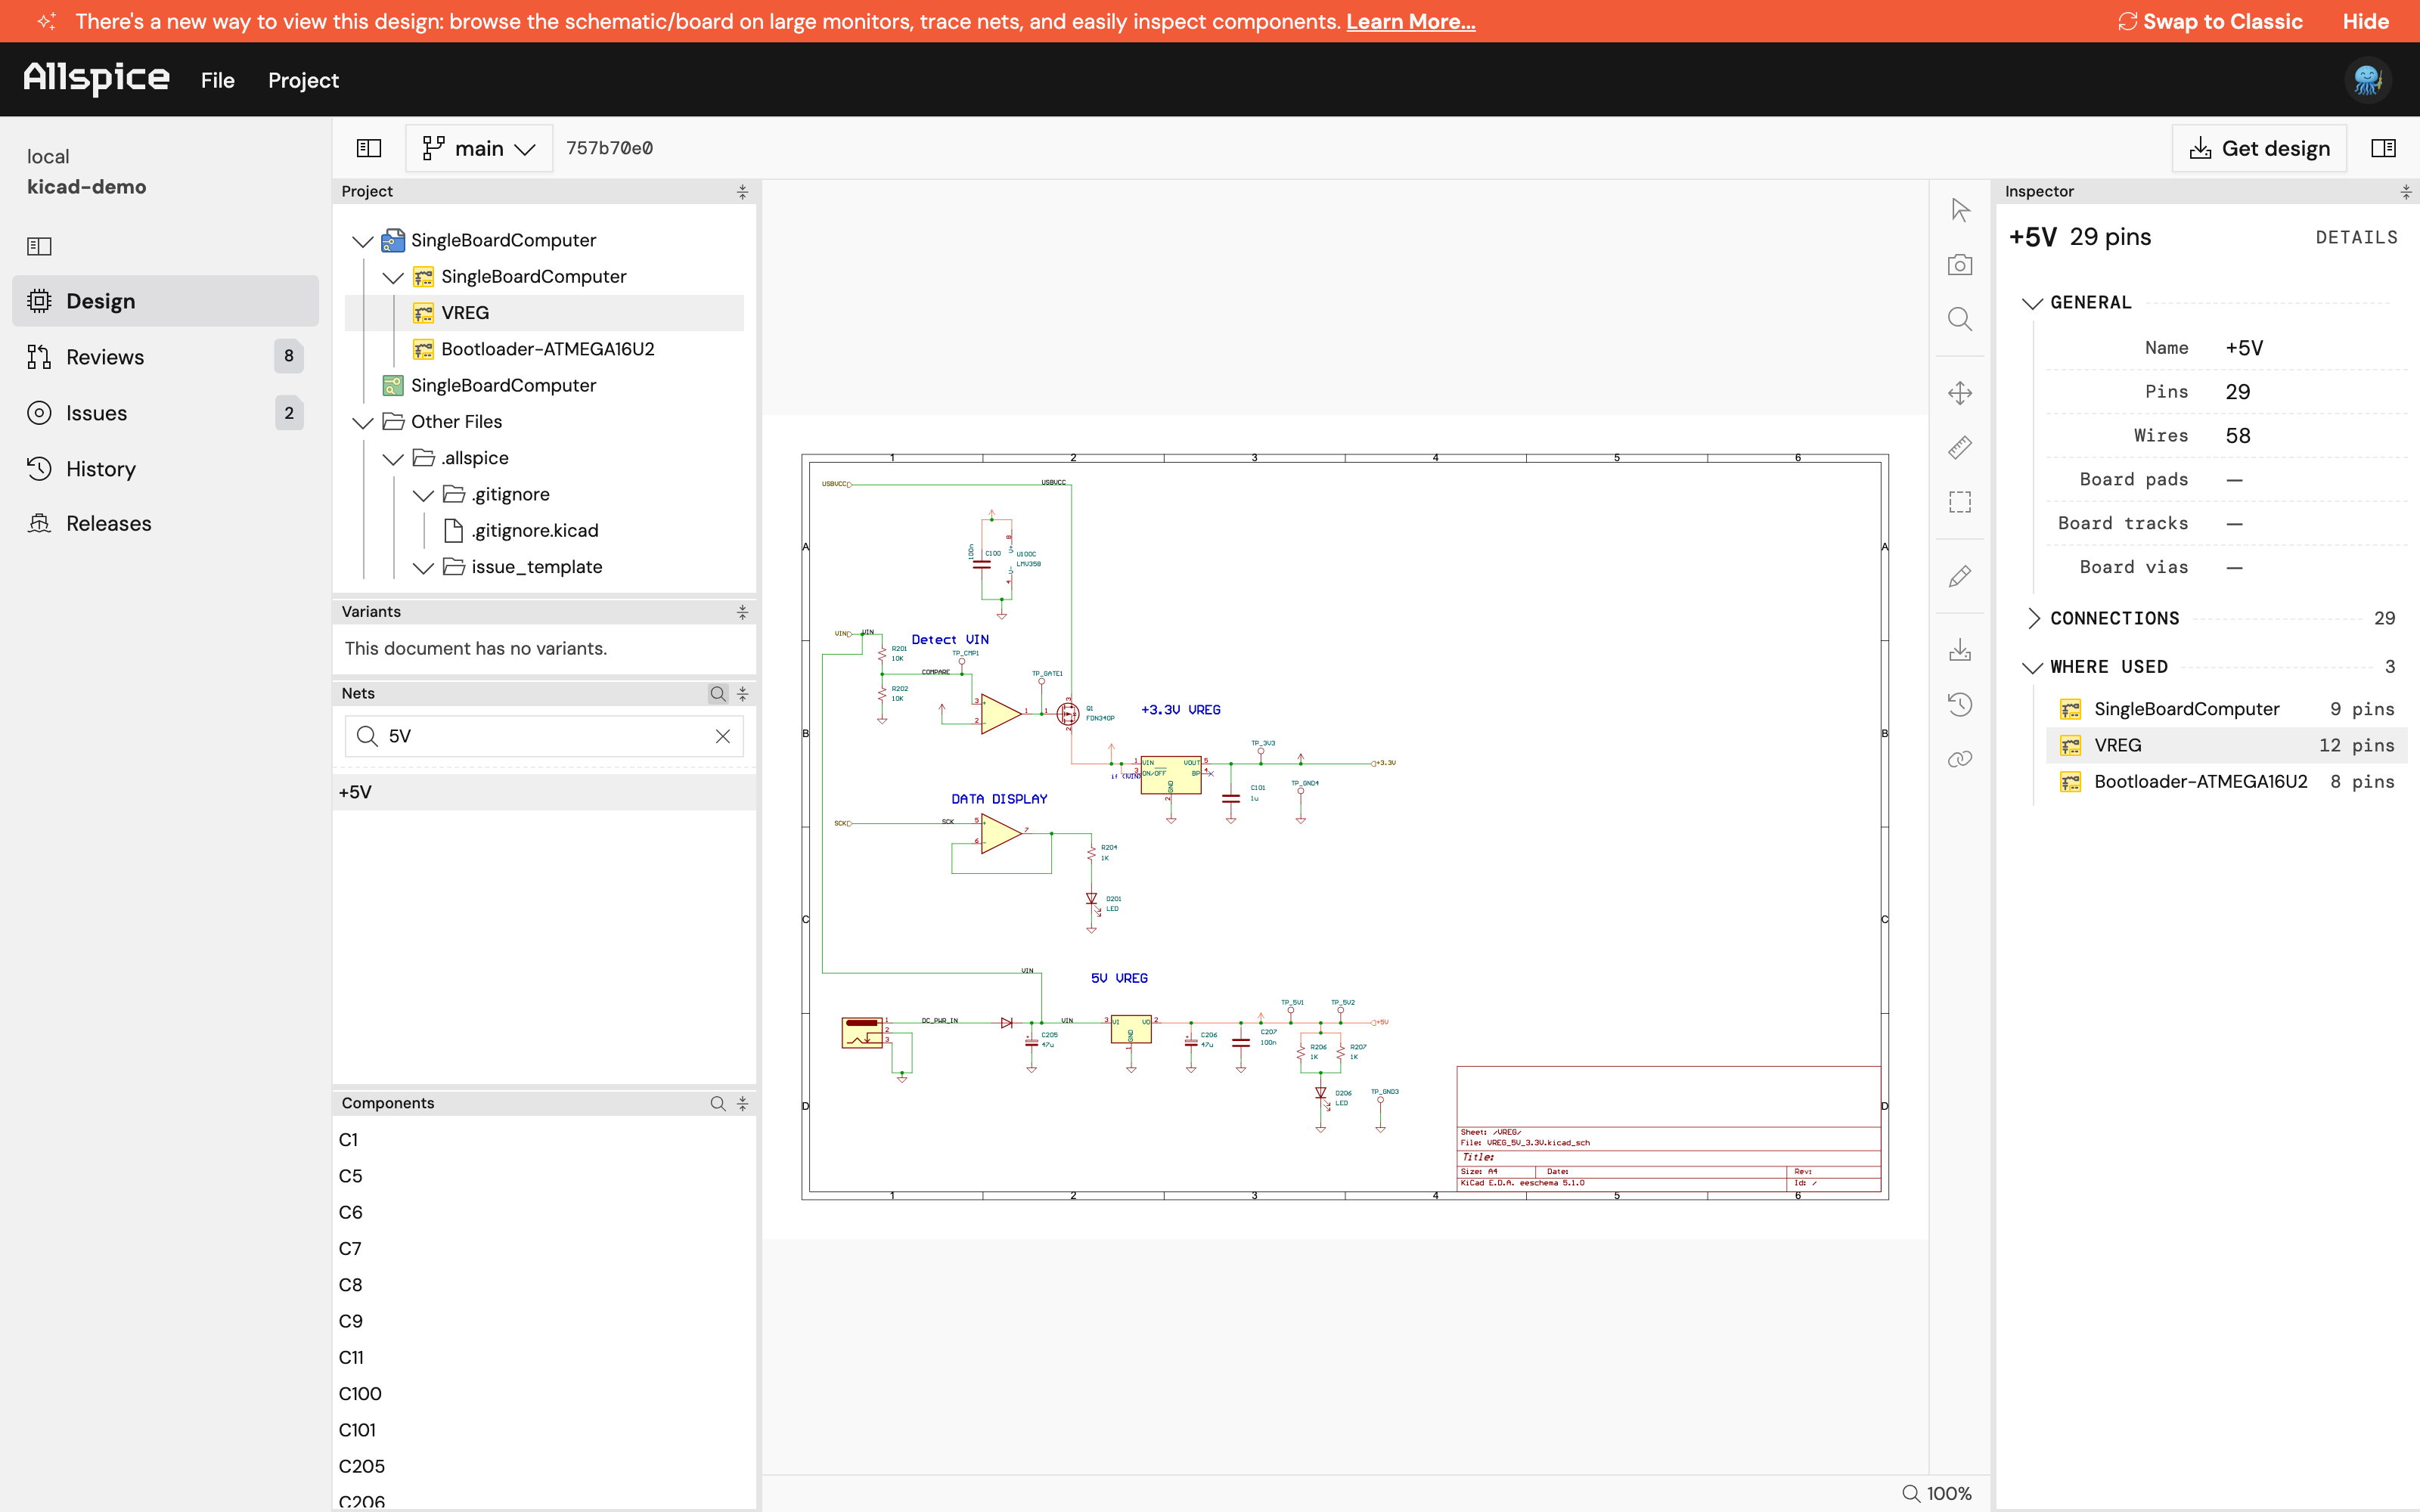
You can also select a wire or pin in the drawing to select its net.
6. Find a component and check its parameters
- In the Components section, select the search icon.
- Type the reference designator, for example
U1. - Select the component in the list.
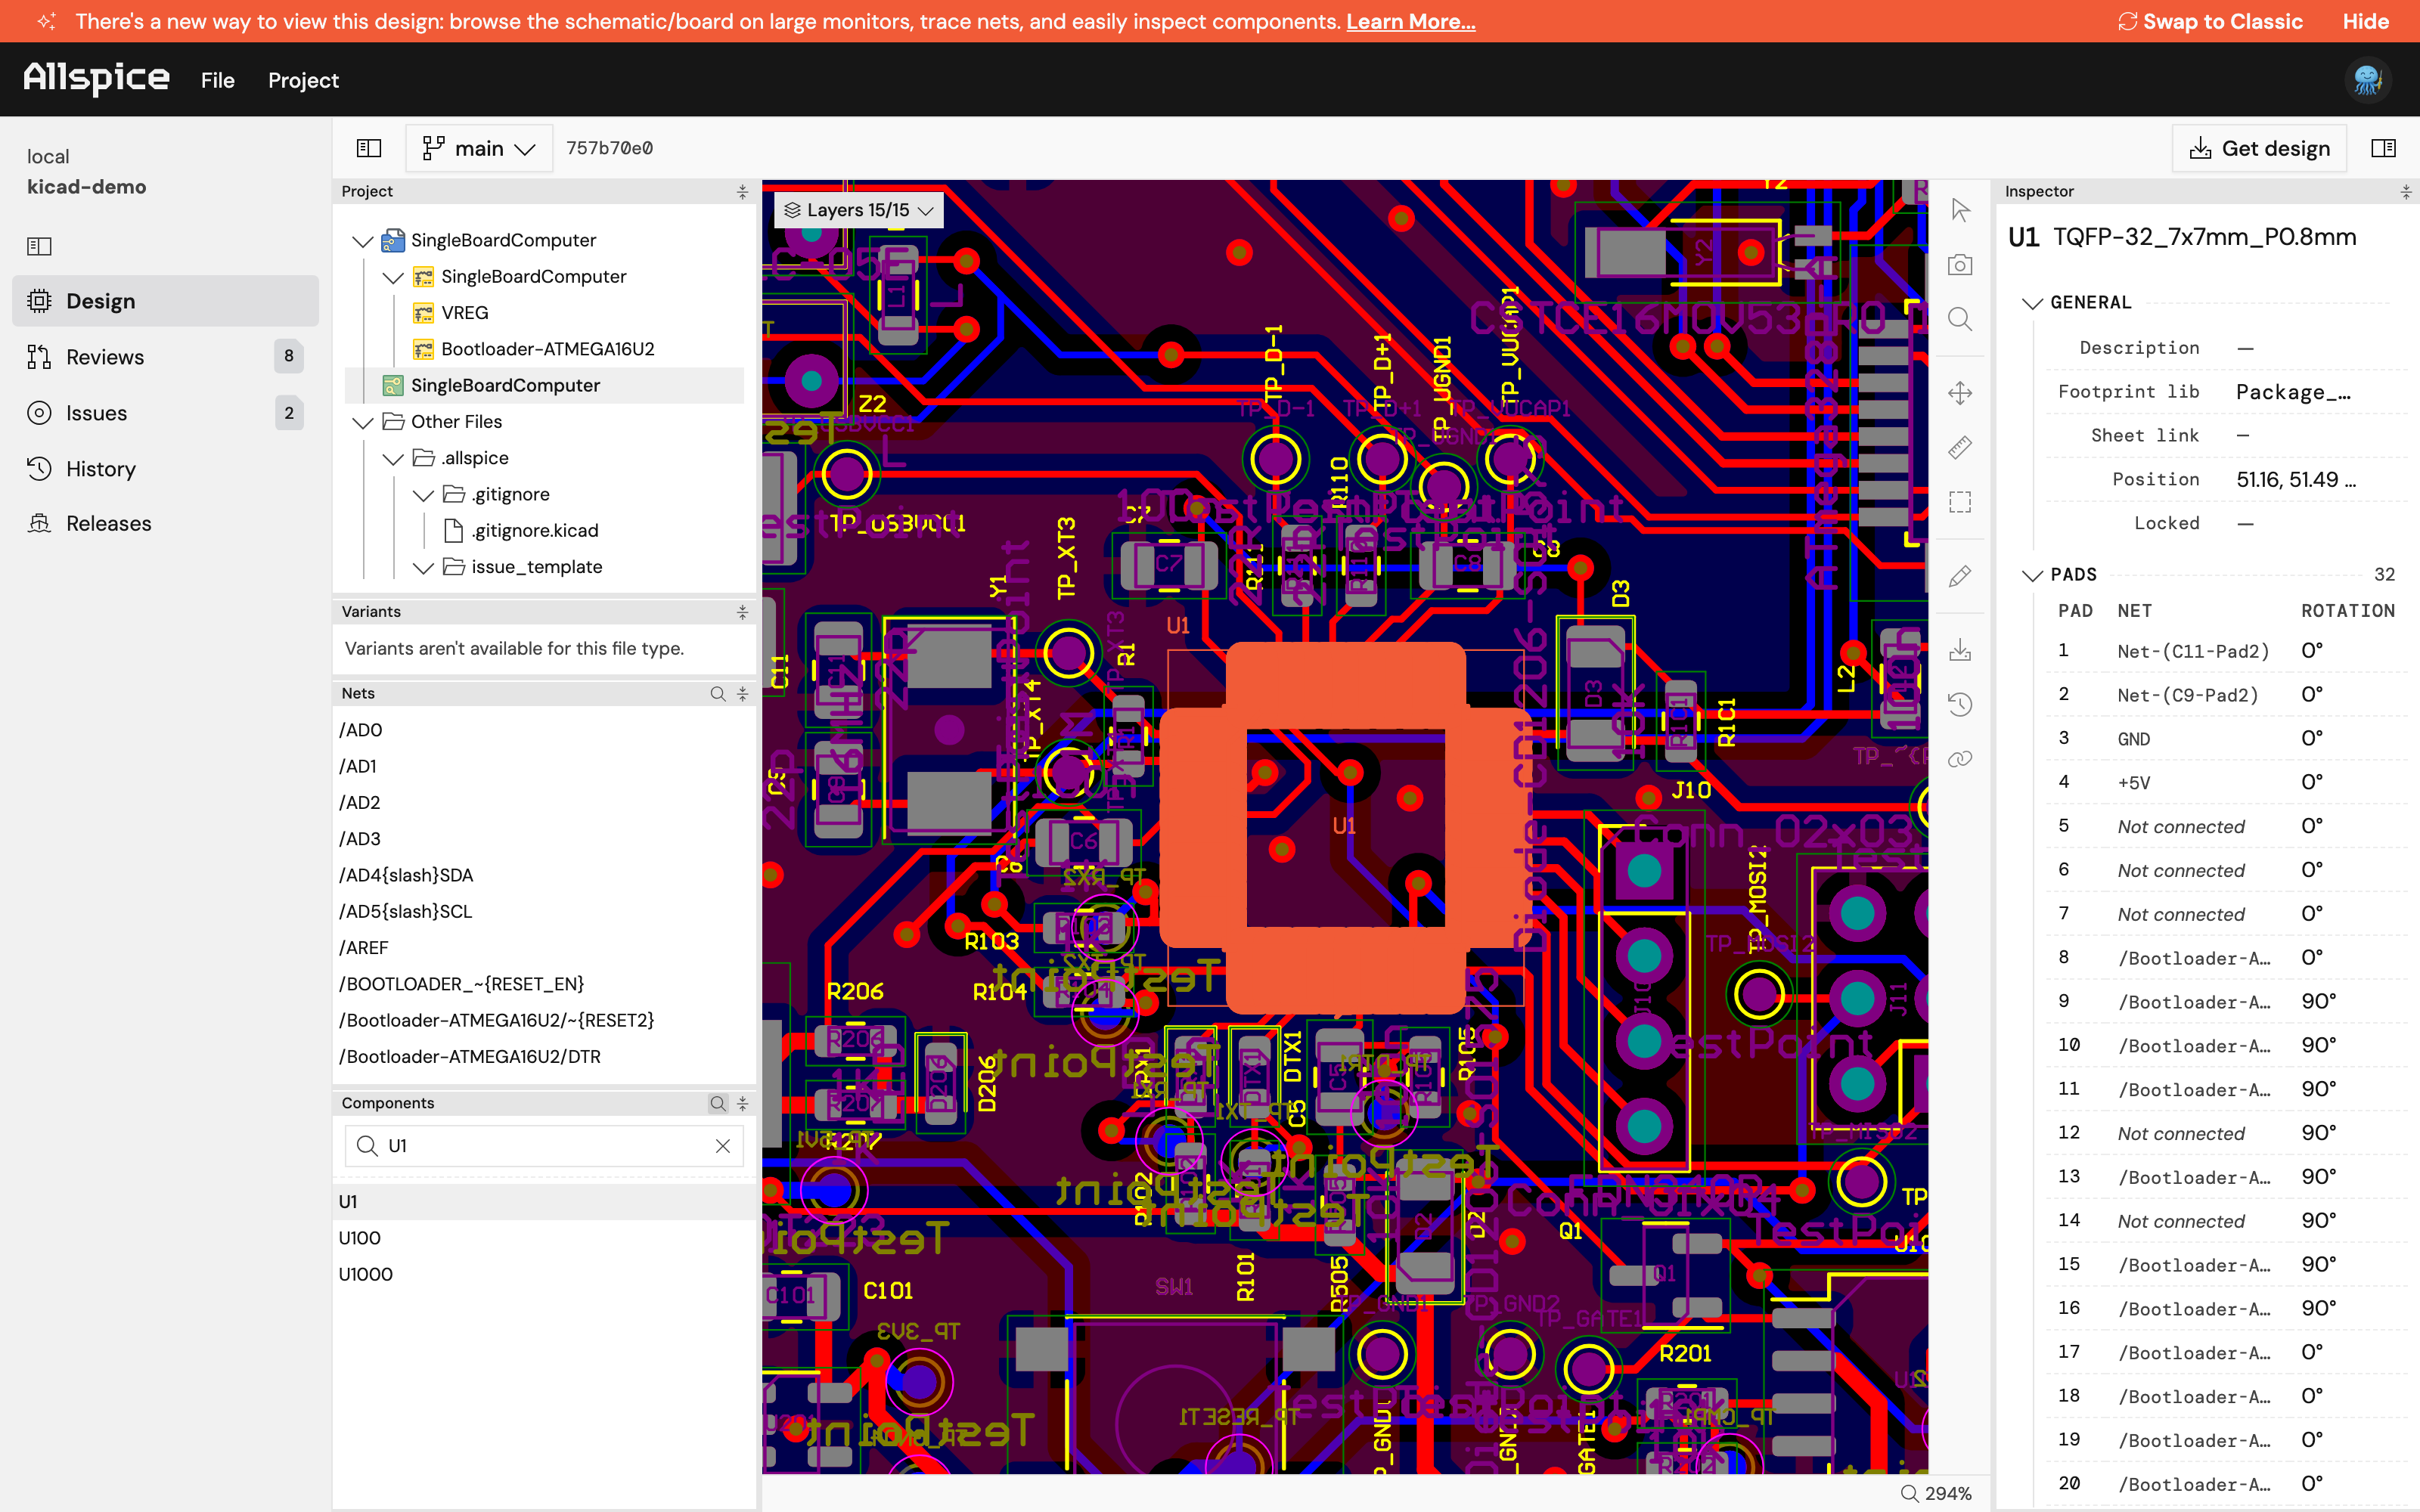
The viewer opens the sheet that has the component and zooms to it. The Inspector shows the component's details:
- General: the name, description, position, rotation, and whether the part is in the BOM.
- Attributes: the part's parameters.
- Pins: each pin with its name, net, and electrical type.
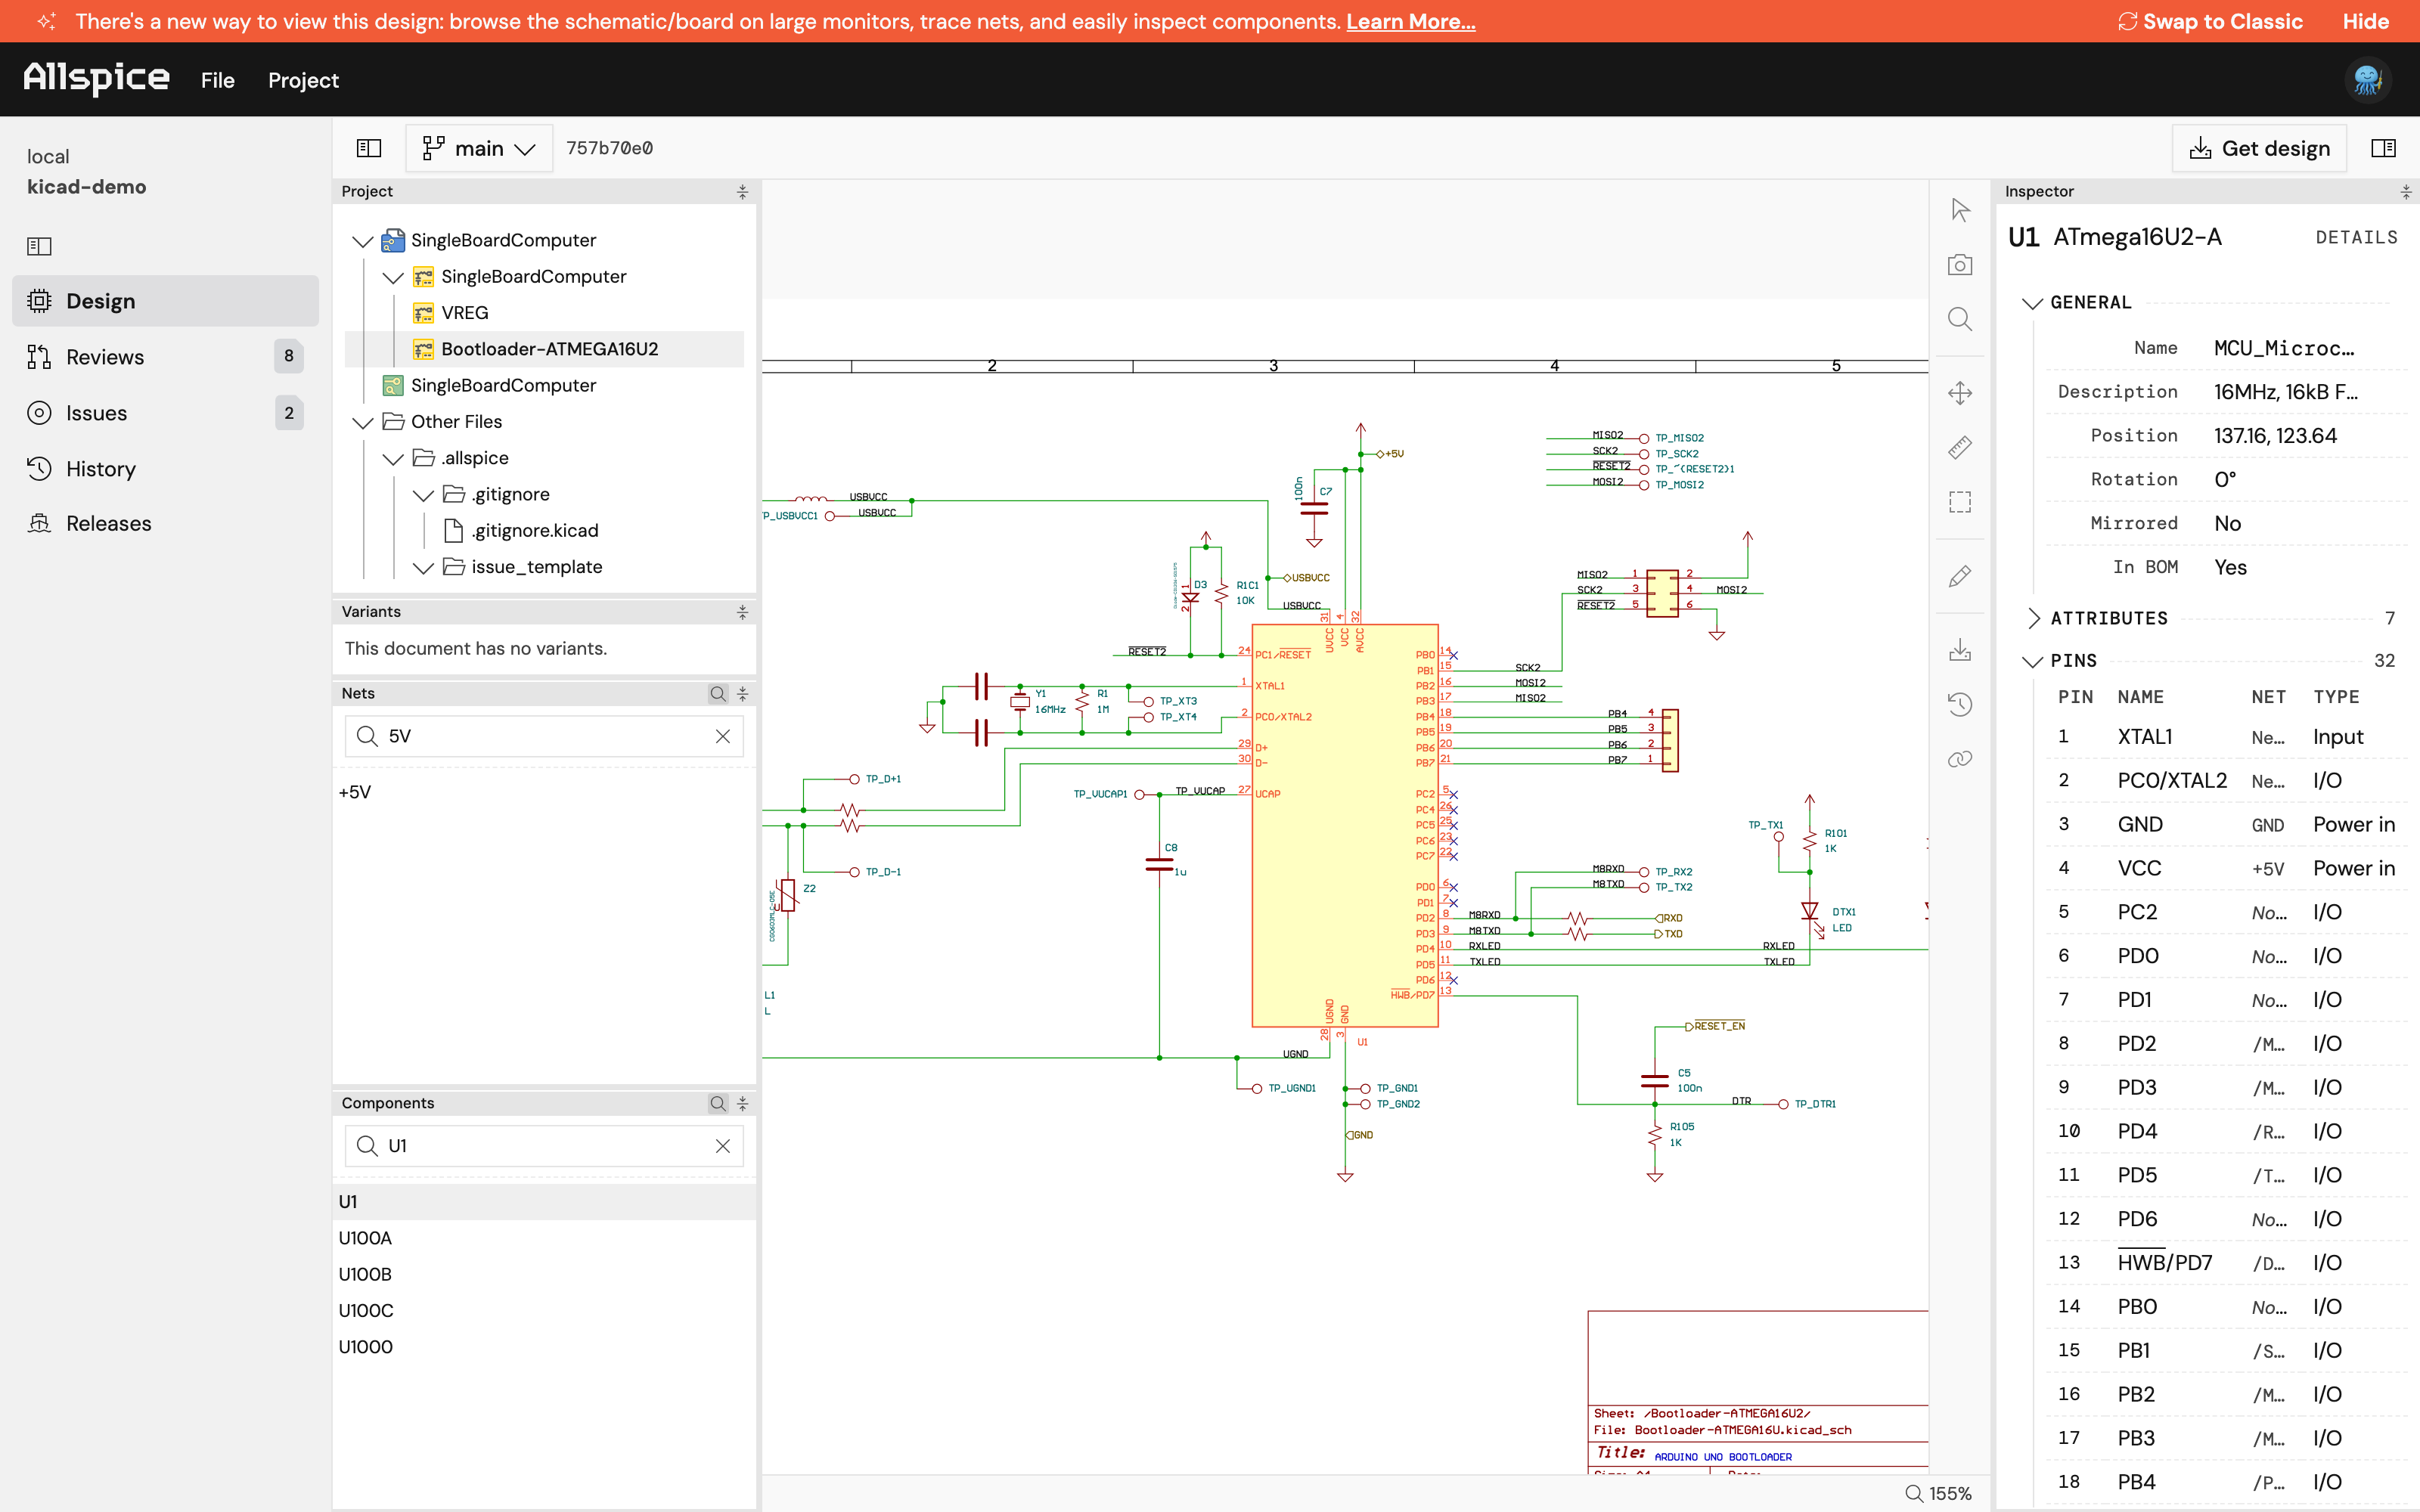
You can also select a part in the drawing to show it in the Inspector.
If the schematic has variants, the Variants section lists them. Select a variant to see that variant's parts in the Inspector and the nets list. Parts that the variant does not fit show as Not fitted.
7. Inspect the board
- In the design tree, select the board.
The viewer shows the PCB.
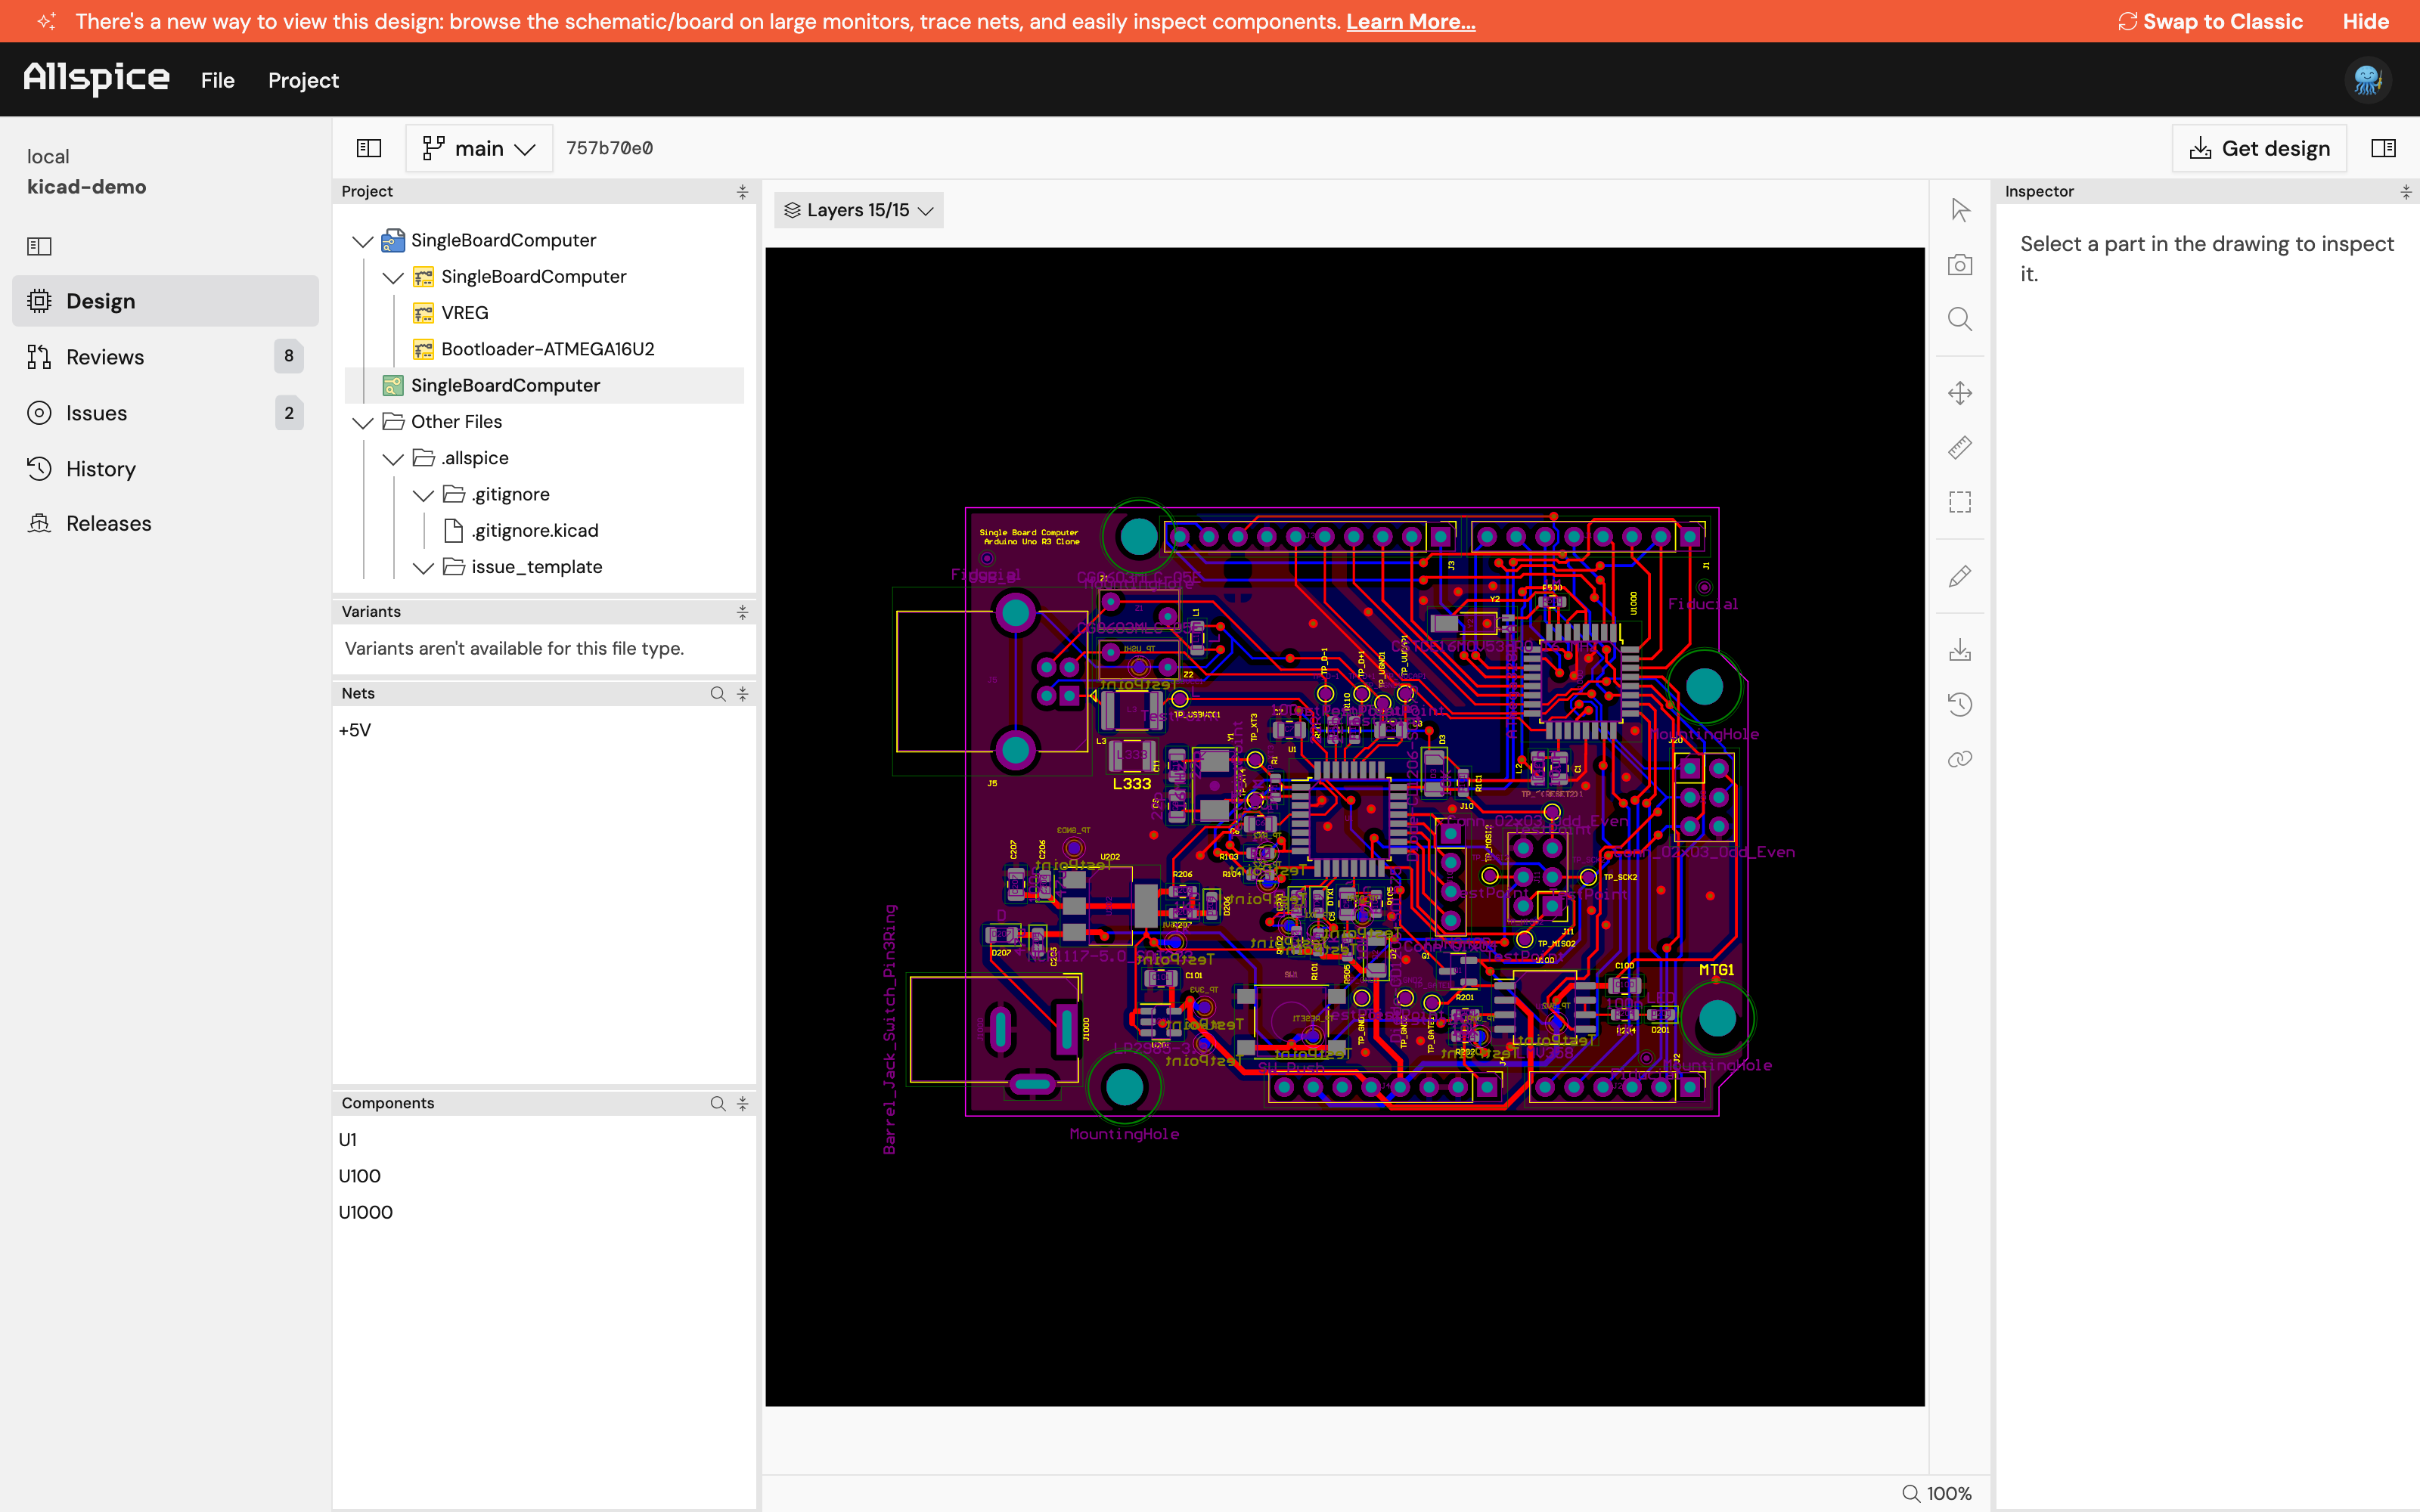
To show or hide layers:
- Select Layers at the top-left of the viewer. The button shows how many layers are visible, for example 15/15.
- Select a layer to show or hide it. Type in Type to filter... to find a layer.
- Select Hide all to hide every layer at once. When layers are hidden, the button changes to Show all.
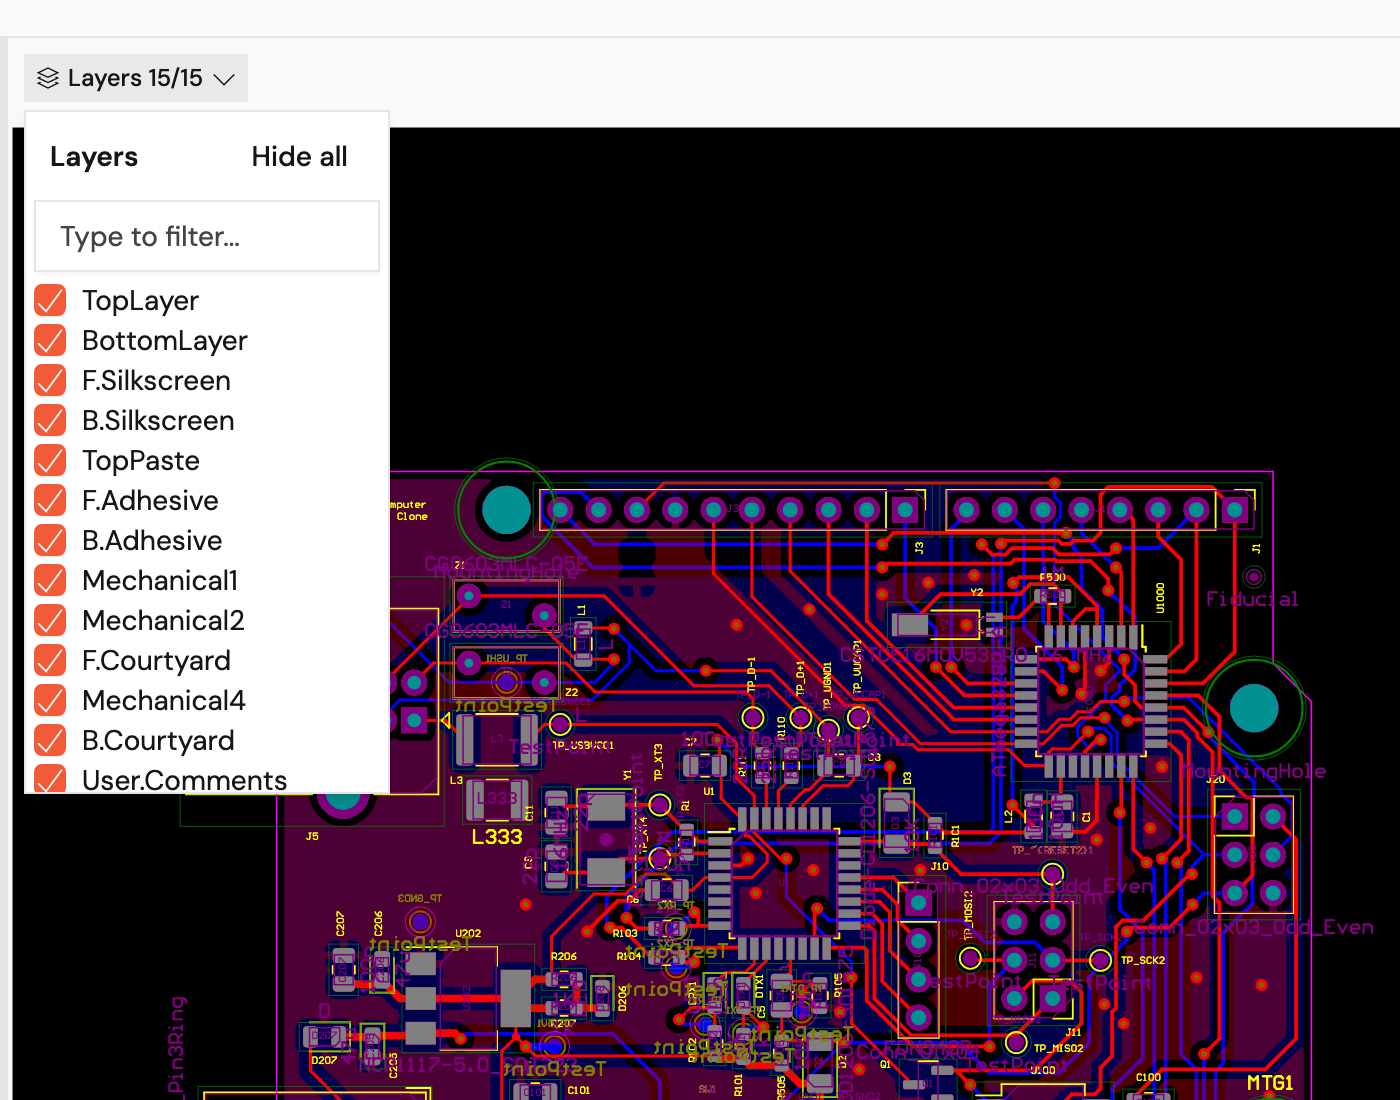
To find a component on the board, search for it in the Components section, as in step 6. The viewer zooms to the part, and the Inspector shows its pads and their nets.
8. Make more room for the drawing
You can collapse each panel to give the drawing more space:
- Select the panel icon at the left of the top bar to collapse the navigation panel.
- Select the panel icon at the right of the top bar to collapse the Inspector.
- Select the panel icon under the project name to collapse the project sidebar.
Select the same icon again to expand the panel. You can also drag the edge of a panel to resize it.
Use the Project menu
The Project menu in the menu bar has the actions for the project you are looking at.

| Menu item | What it does |
|---|---|
| New Design Review | Starts a design review from the branch you are looking at. |
| Upload... | Uploads files to the branch you are looking at. |
| Download | Downloads the project as a ZIP or TAR.GZ file. |
| Clone... | Shows the clone URL. |
| Branches | Switches to another branch, creates a branch, or shows all branches. |
| Tags | Creates a tag or shows all tags. |
| Fork to another organization | Makes a copy of the project in another organization. |
| Use this template | Starts a new project from this one. It is available only when the project is a template. |
Some of these actions open a page in Allspice Classic.
Go to reviews, issues, and history
The project sidebar on the left links to other parts of the project. The numbers show how many reviews and issues are open.
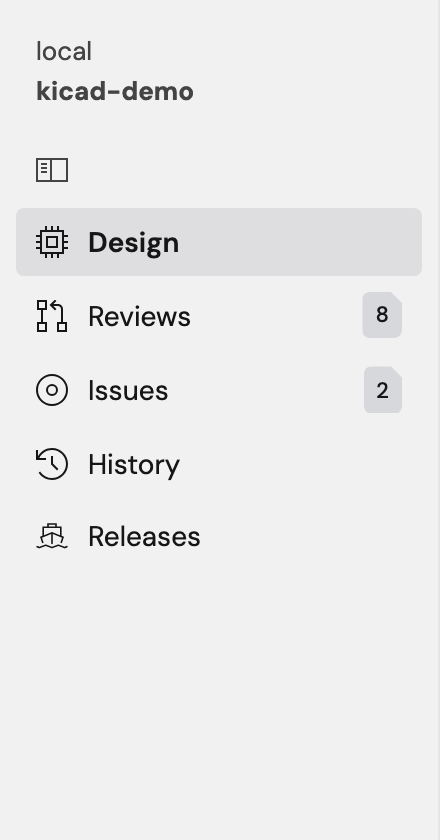
Reviews, Issues, History, and Releases open in Allspice Classic for now.
What is not available yet
The Design page is in beta. These items are not ready yet:
- Toolbar tools: the tools on the right side of the viewer, such as Measure and Annotate, show "not available yet" when you point to them.
- Some designs: designs in subdesigns (Git submodules) and designs stored in Git LFS may not show yet.
If a design does not show, switch to Allspice Classic to keep working. Then tell us at support@allspice.io.
Switch between the new Allspice and Classic
You can change to Allspice Classic at any time, and back again. Your choice applies only to you. When you switch, Allspice keeps you on the same project.
To switch to Classic from the banner: select Swap to Classic in the orange banner at the top of the page.

To switch to Classic from your profile menu:
- Select your profile picture in the top-right corner.
- Select Switch to Allspice Classic.
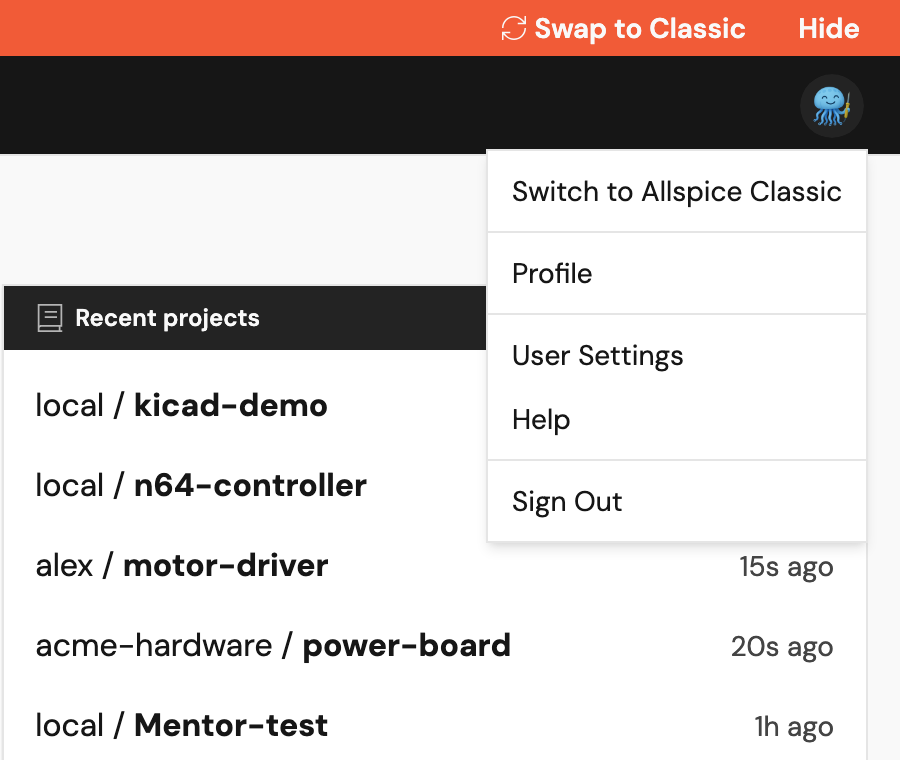
To switch back to the new Allspice from Classic:
- Select your profile picture in the top-right corner.
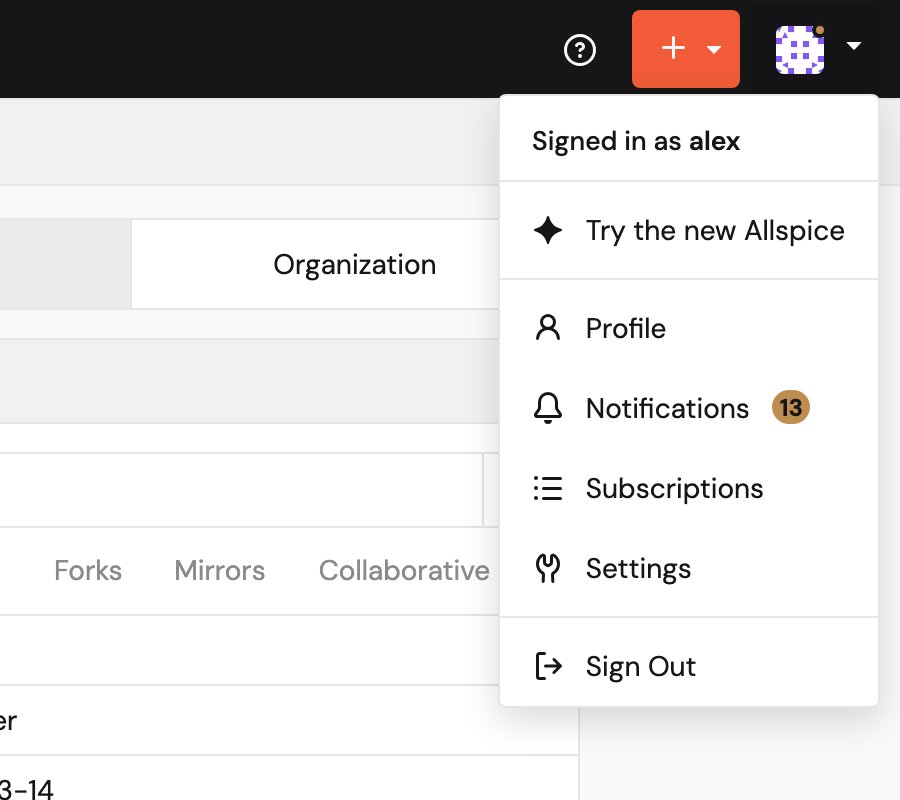
- Select Try the new Allspice.